
This guide will explain what is marketing ROI and how to measure marketing ROI for your business.
This guide will walk through everything you need to know to get started on effectively tracking and measuring Marketing ROI (return on investment) for your business. By the end of this guide, you should be able to do the following:
Marketing ROI (Return On Investment) is a measure of how much your advertising cost is returning in sales and revenue. This metric is super important because you want to make sure that the money spent on advertising is actually leading to sales, otherwise your company would be spending more than its brining in.
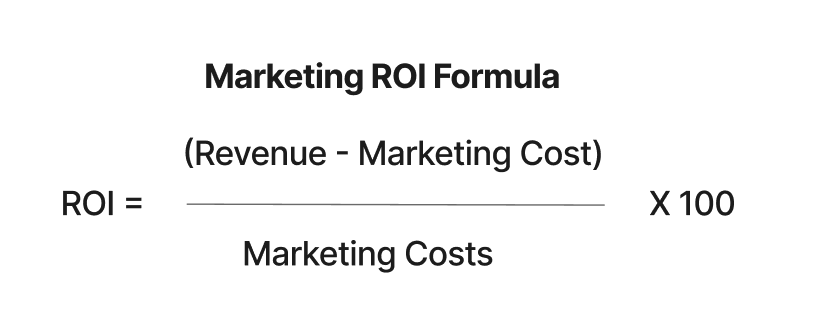
To calculate this you will need to first subtract revenue minus total marketing costs and then divide the subtracted number by total marketing cost. To express this number as a percentage you would then multiple by 100. Below is the formula for this.
Marketing ROI Formula
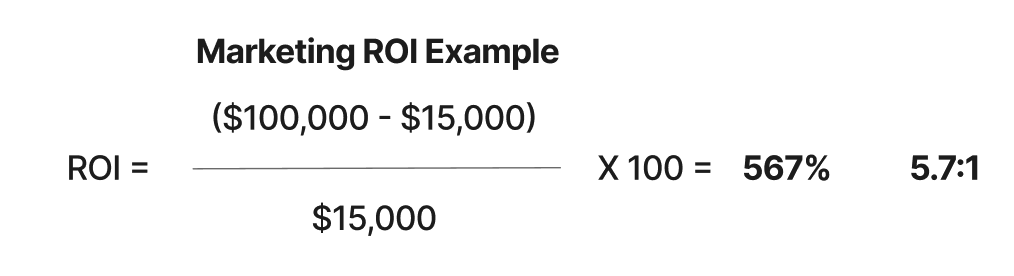
Let's provide a practical example in a real-world situation. Let's say you achieved $100,000 in revenue from 5 sales. Your marketing cost included a $5,000 LinkedIn ad and $10,000 in Google paid search ad which brings your total marketing costs to $15,000. The breakdown to calculate the marketing ROI for this is below.
ROI = [($100,000 - $15,000)/$15,000] * 100 = 567%
You can also display this as a ratio which would be 5.7:1 rounded slightly up.
Doing a quick search online you will find other articles that businesses should try to achieve a marketing ROI of at least 500% or 5:1. Below is a breakdown of you ROI potential
Expectional ROI (1000% or 10:1) - Achieving this is considered way above industry standard and your marketing is locked in.
Good ROI (500% or 5:1) - Having a marketing ROI of at least 500% is considered healthy. Obtaining an ROI of at least 5:1 is recommended and should be achievable for most businesses.
Acceptable ROI (200% or 2:1) - This is the minimum amount of marketing ROI that is acceptable. I know what you might be thinking, isn't 200% ROI considered great? When thinking in terms of investment it is but when you are looking at this as marketing ROI it's not that great. This is because marketing ROI excludes the cost of other business expenses such as cost of goods sold (COGS) and operational expenses. Your marketing ROI needs to be way above this in order to provide a safe margin for your business.
So based on our previous example, one could say our marketing ROI is great. It's above 500% which is considered what is recommended. However, calculating marketing ROI this way gives us only part of the story.
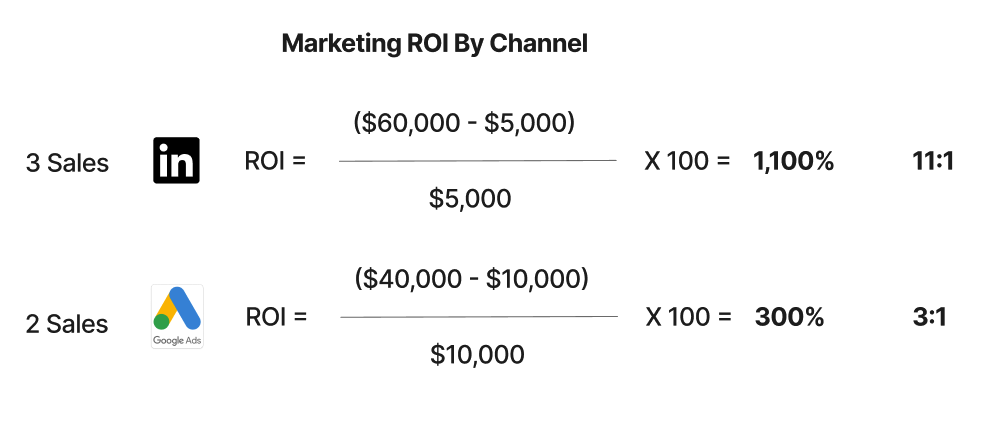
In our previous example, we took the total marketing cost from both LinkedIn Ads and Google Paid Search and added them both to come up with our total marketing costs. This is what most agencies do, however this does not give us the full picture on our marketing performance and does not help us determine next steps to take to improve ROI. Let's see what are marketing ROI comes to when we calculate LinkedIn Ads and Google Paid Search separately. Let's make a few assumptions as well. Let's assume that each sales is $20,000 in generated revenue. In our example we got 5 sales total, let's assume that 3 of those sales came from LinkedIn Ads which comes to $60,000 in revenue generated from LinkedIn. 2 of those sales came from Google Paid Search which comes to $40,000 in revenue generated from this channel. Our marketing costs of $15,000 remain the same. So we spent a total of $5,000 for LinkedIn Ads and a total of $10,000 for Google Paid Search. Now let's run the numbers.
LinkedIn Ads ROI = [($60,000 - $5,000)/$5,000] * 100 = 1,100% or 11:1
Google Paid Search ROI = [($40,000 - $10,000)/$10,000] * 100 = 300% or 3:1
Based on our results this gives us a much clearer picture on what we should focus on next. Because my Google Paid Search ROI is less than the 5:1 recommended marketing ROI, I would focus my efforts in improving this channel. You could refine the keywords you are targeting for the Google Paid Search ad, you could looking into improving the landing page design the ad is redirecting towards, you could even run A/B testing to try out different ideas. Another approach could be to budget more of your money towards LinkedIn Ads as well. From this example, you can see the benefits of calculating marketing ROI by channel vs calculating marketing ROI overall.
Now I know what you may be thinking, how the heck can I track and measure this? You might have hangups about trying to achieve something like this especially when your sales are offline, you could even be a B2B business with long sales cycles with no visibility on if you ad spend is actually doing anything. You're in luck because I am going to show you step-by-step on how to do this no matter what CRM you or if you have no CRM at all.
The rest of this guide will walk you through how to setup your website and CRM so you can not only effectively track overall marketing ROI but you can also tack marketing ROI by channel. After going through this technical setup, you will be able to accurately measure which advertisements led to which offline sales. I know this may sound like hocus pocus, and you will be copying/pasting some code, but just follow along and you will be able to do this with ease. Here are the two ways you can tack marketing ROI by channel:
Utilize a tracking code provided by you CRM - Most Customer Relationship Management (CRM) software should provide you a tracking code that you should be able to copy and paste into the <head/> tag of your website. There also might be a plugin you could utilize as well. In this guide, we will be walking through on how to do this with Webflow and HubSpot CRM. Please keep in mind that this guide can also be applied to other Content Management Systems (CMS) like WordPress, Shopify, Squarespace. Also keep in mind that a lot of CRMs do provide a tracking code to do this as well, this is not something exclusively provided by Hubspot.
Implement a 1st Party Cookie on your website - This way is a little more technical, but this guide will hold your hand during this process. Essential what we are going to do is when a user clicks on a link data on where the user came from will be stored in a 1st party cookie. A cookie is a small file that is stored locally on your computer so that a website you visit remebers you. What we will be doing is storing the data where a user came from in a cookie, enter that data through a hidden form field, and then enter that information manually in the CRM.
Both methods will require the use of UTM Parameters, which are tags added to a URL to track the effectiveness of online marketing campaigns across traffic sources and publishing media. By appending UTM parameters to your URLs, you can gain insights into which campaigns are driving the most traffic and conversions, allowing for more informed marketing decisions.
Here is an example of a URL without a UTM Parameter
https://metricpathedge.com
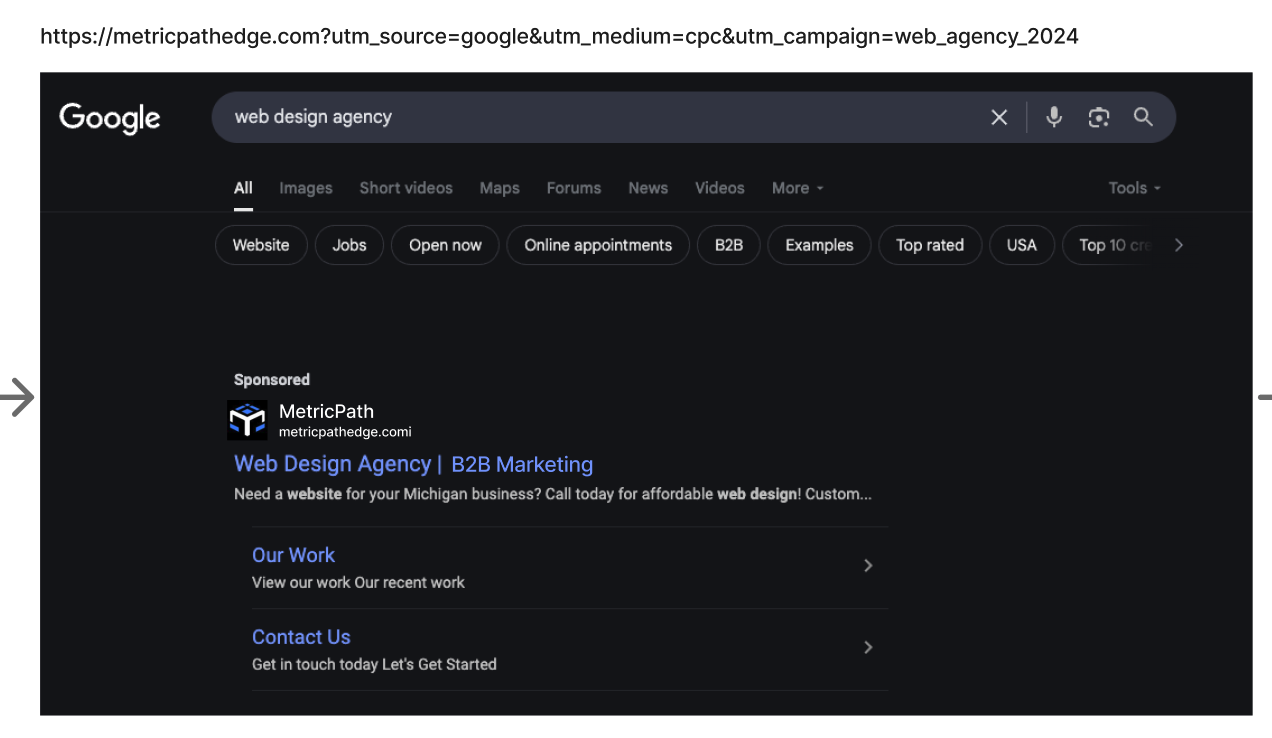
Here is an example of a URL with UTM Parameters
https://metricpathedge.com?utm_source=google&utm_medium=cpc&utm_campaign=web_agency_2024
Lets breakdown what each one means
utm_source is a parameter used to identify the source of your traffic, such as a search engine (e.g., Google), a newsletter, or another referring website. This helps in determining where your visitors are coming from, allowing you to analyze the performance of different traffic sources.
utm_medium is used to identify the medium through which the traffic is coming, such as email, social media, or paid search. This parameter helps in understanding the channel that is driving the traffic to your website, allowing marketers to assess the effectiveness of different marketing mediums.
utm_campaign is a parameter used to identify a specific campaign or promotion being run. This allows marketers to track the performance of individual campaigns, helping to determine which strategies are most effective in driving traffic and conversions.
Below are two examples of separate UTM Links for two different ads.

You can also reference the visuals below to understand what we will be doing for both methods.
We will be tracking where ads are coming from to the website, when user submits a form, we will reference where they came from in the CRM to see if it led to sales.
For our LinkedIn Ad, utm_source=LinkedIn, utm_ medium=paid_ social, utm_ campaign=webinar_spring_ 2024. If a user submits a form on your website who originally clicked on the LinkedIn ad, the UTM information will be stored and can get sent to the CRM.
This section of the guide will walk you through on how you can utilize a tracking Code from a CRM. This guide goes over how to do this in Webflow & Hubspot CRM but can be also used for other content management systems and crms.
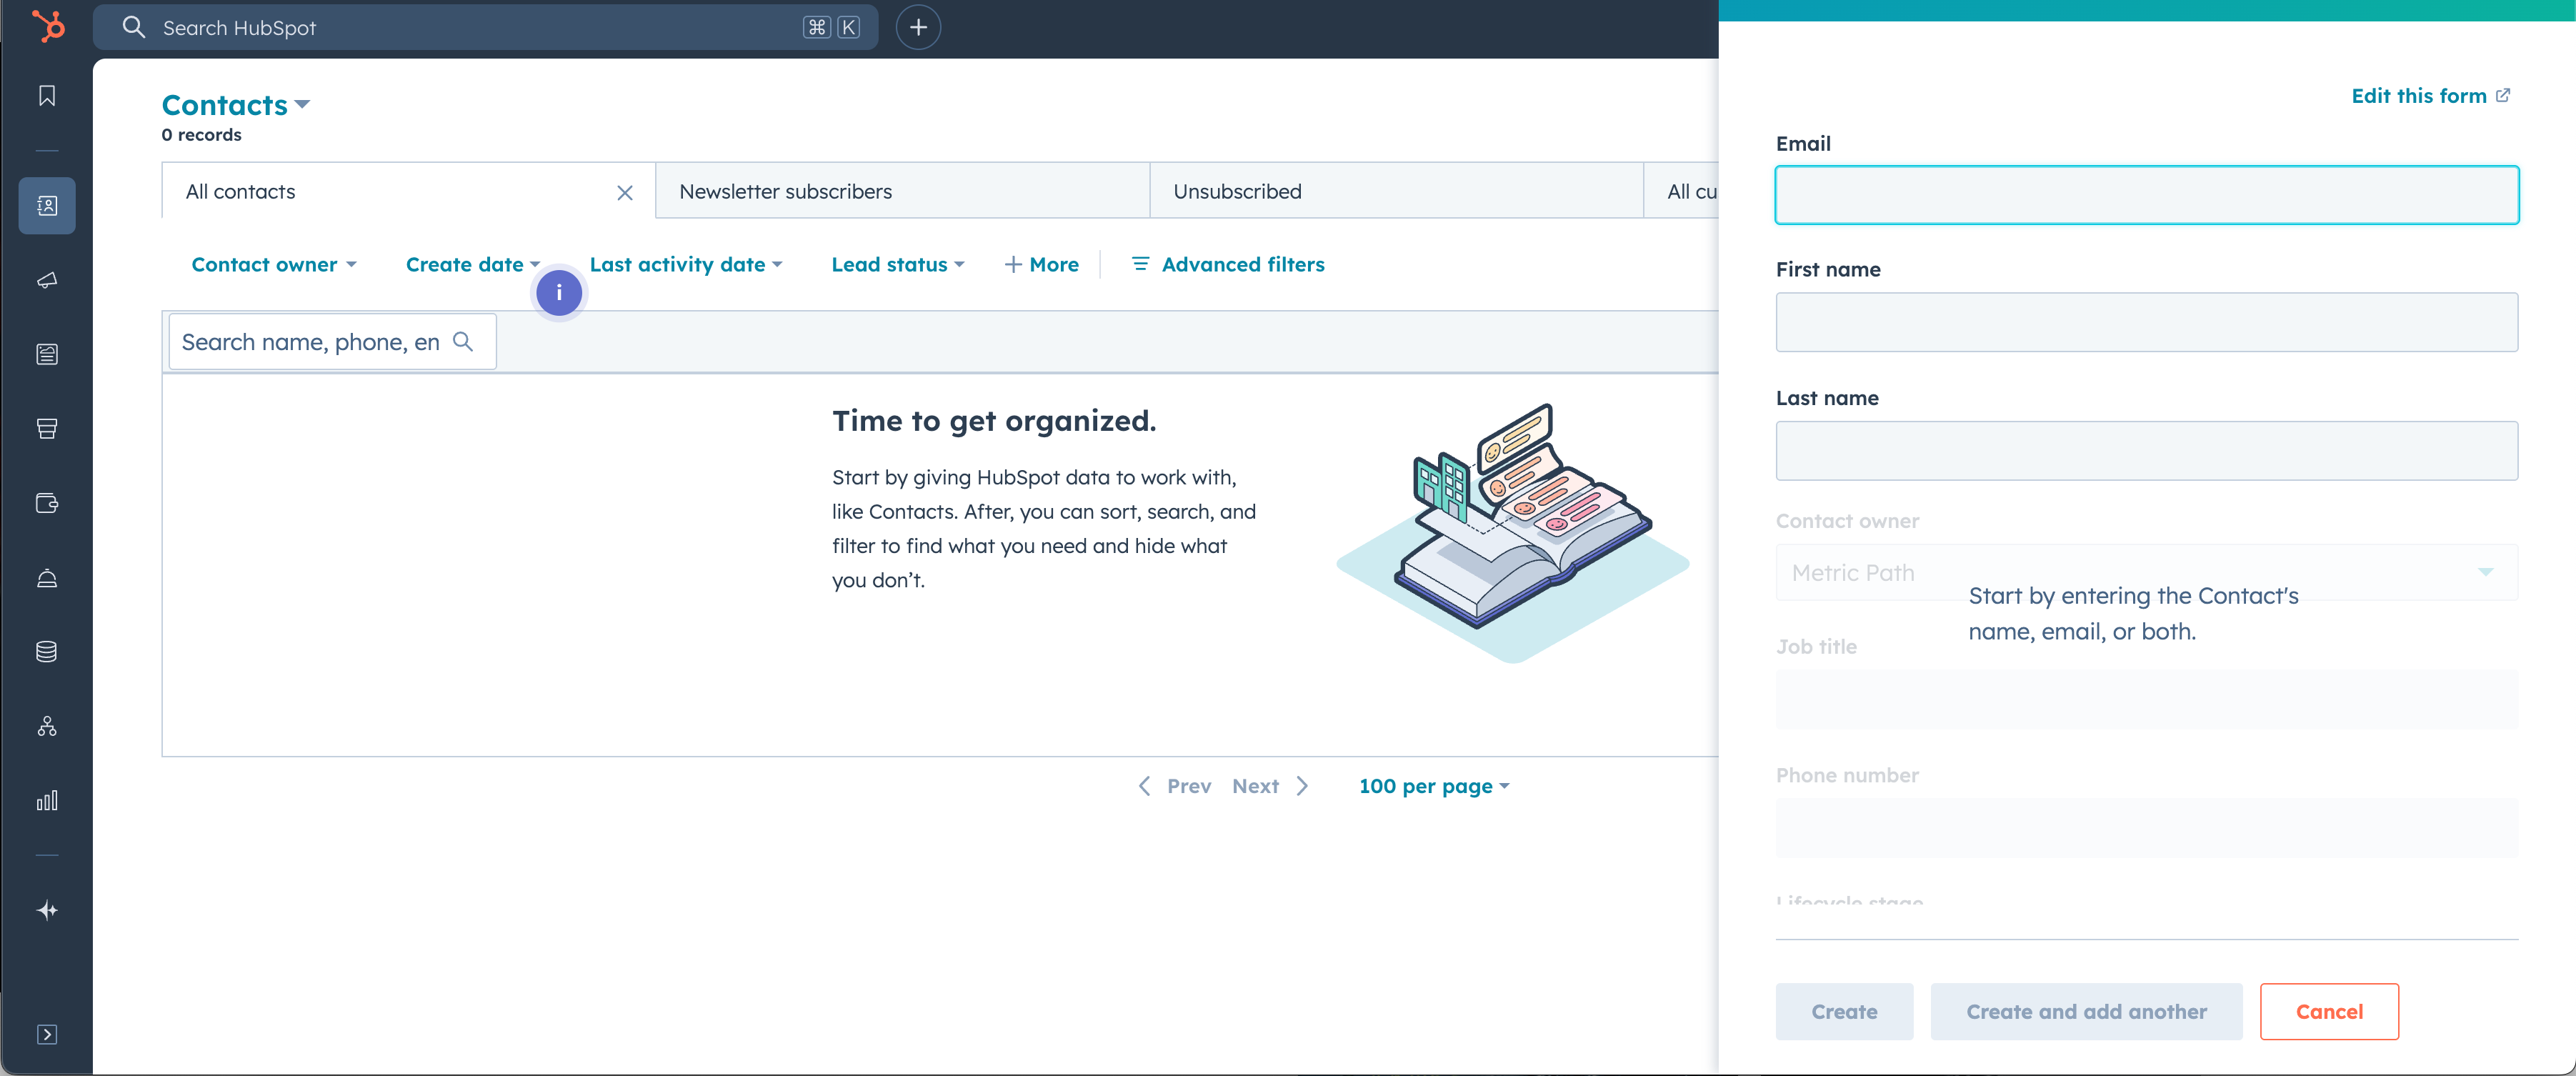
Create a Hubspot account or login into Hubspot CRM. Once this is done navigate to the contacts section in the dashboard. Create a new contact.

A flyout will appear, enter the minimum amount of contact details and then select Create
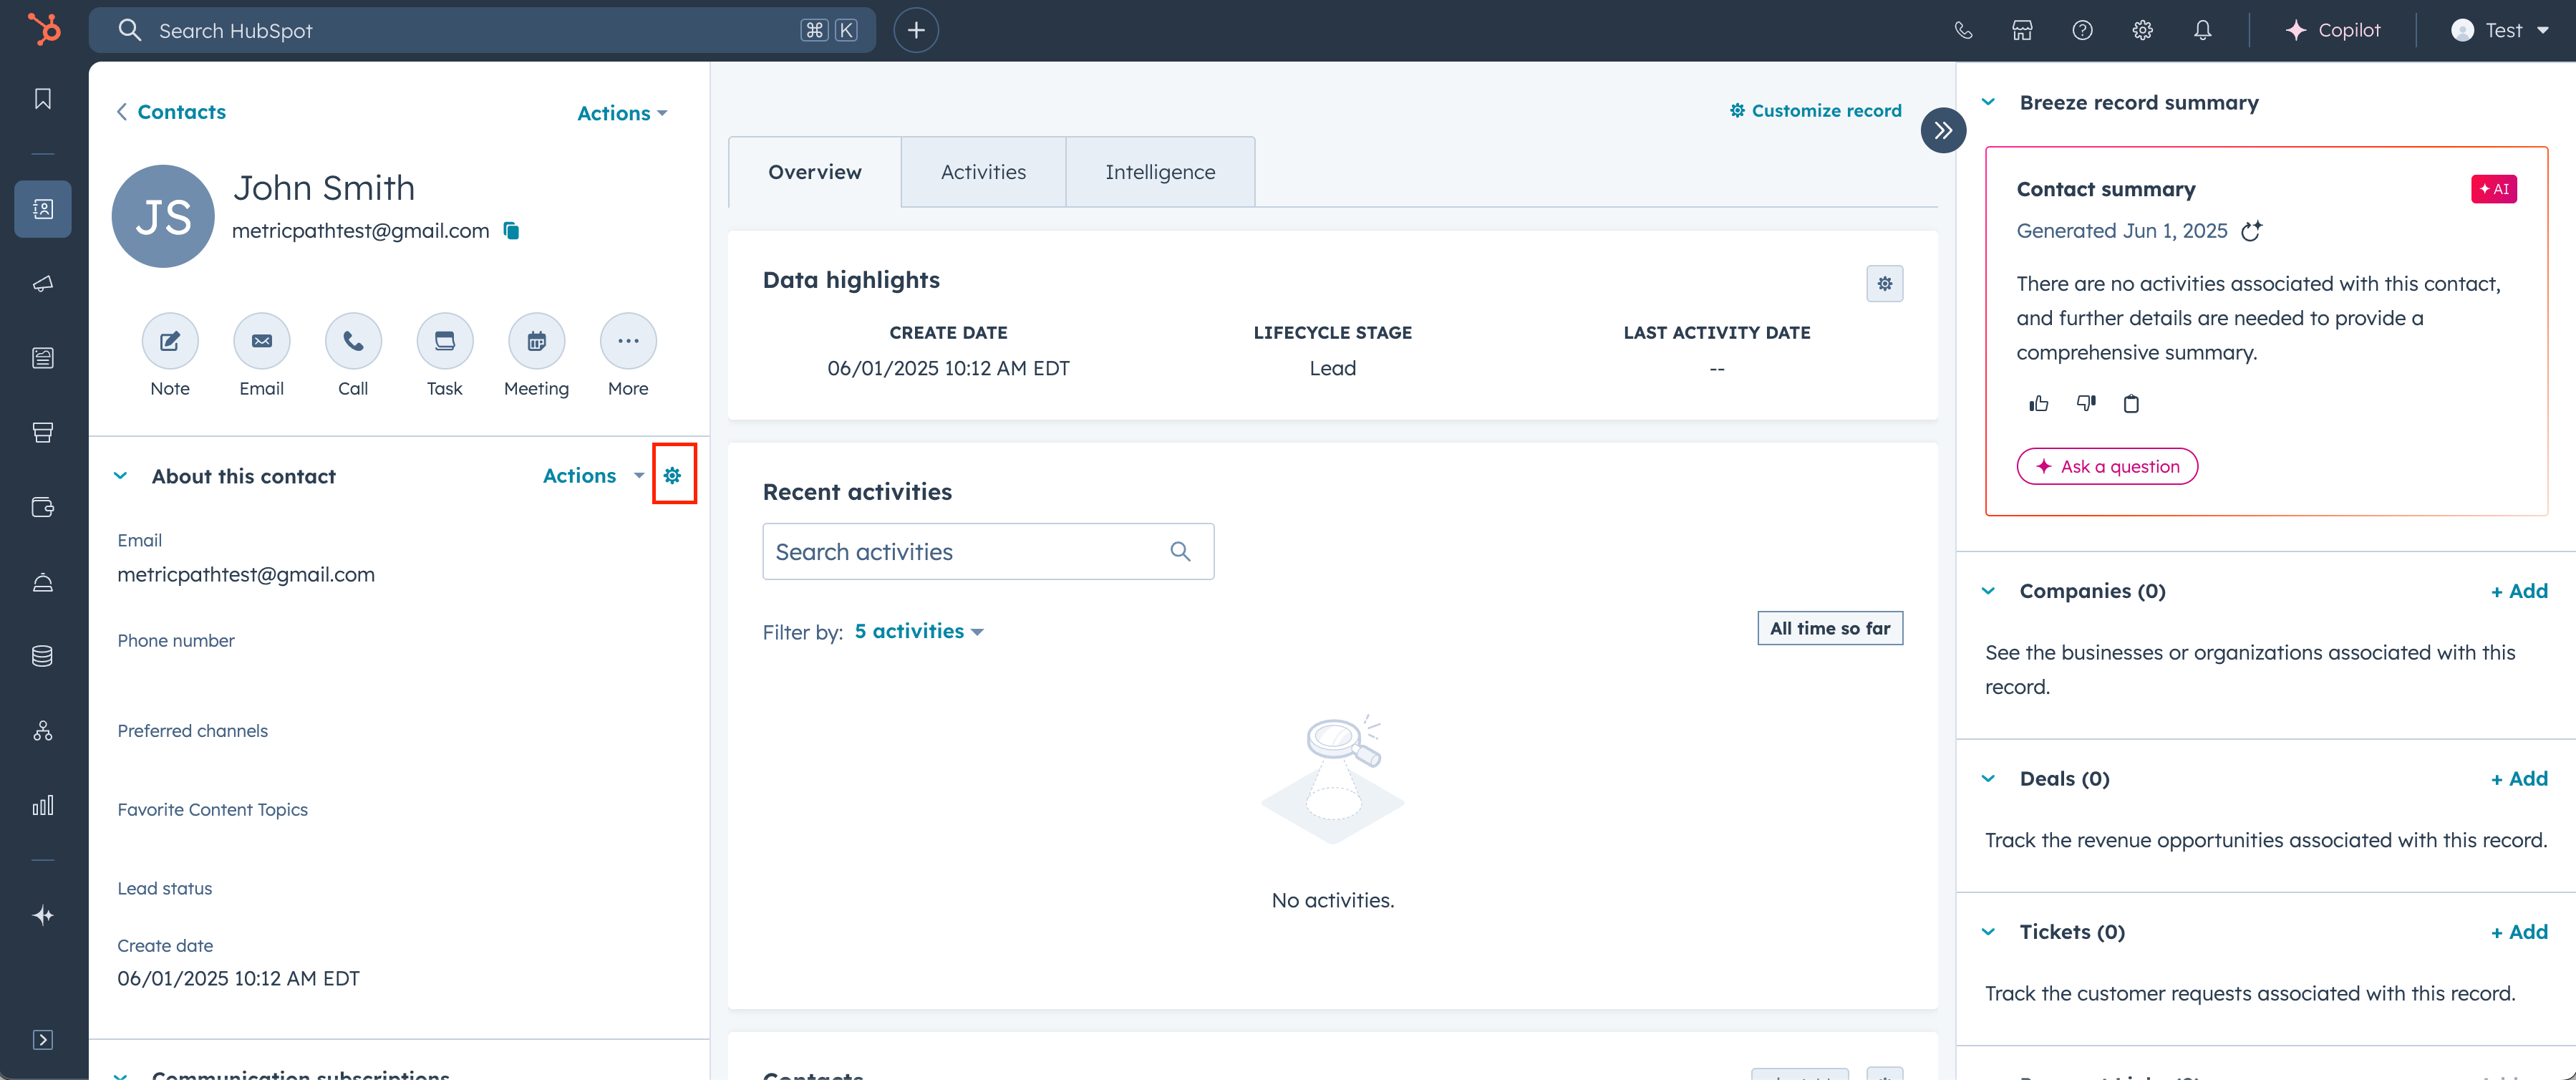
On the contact details screen, select the Gear Icon located in the contact card.
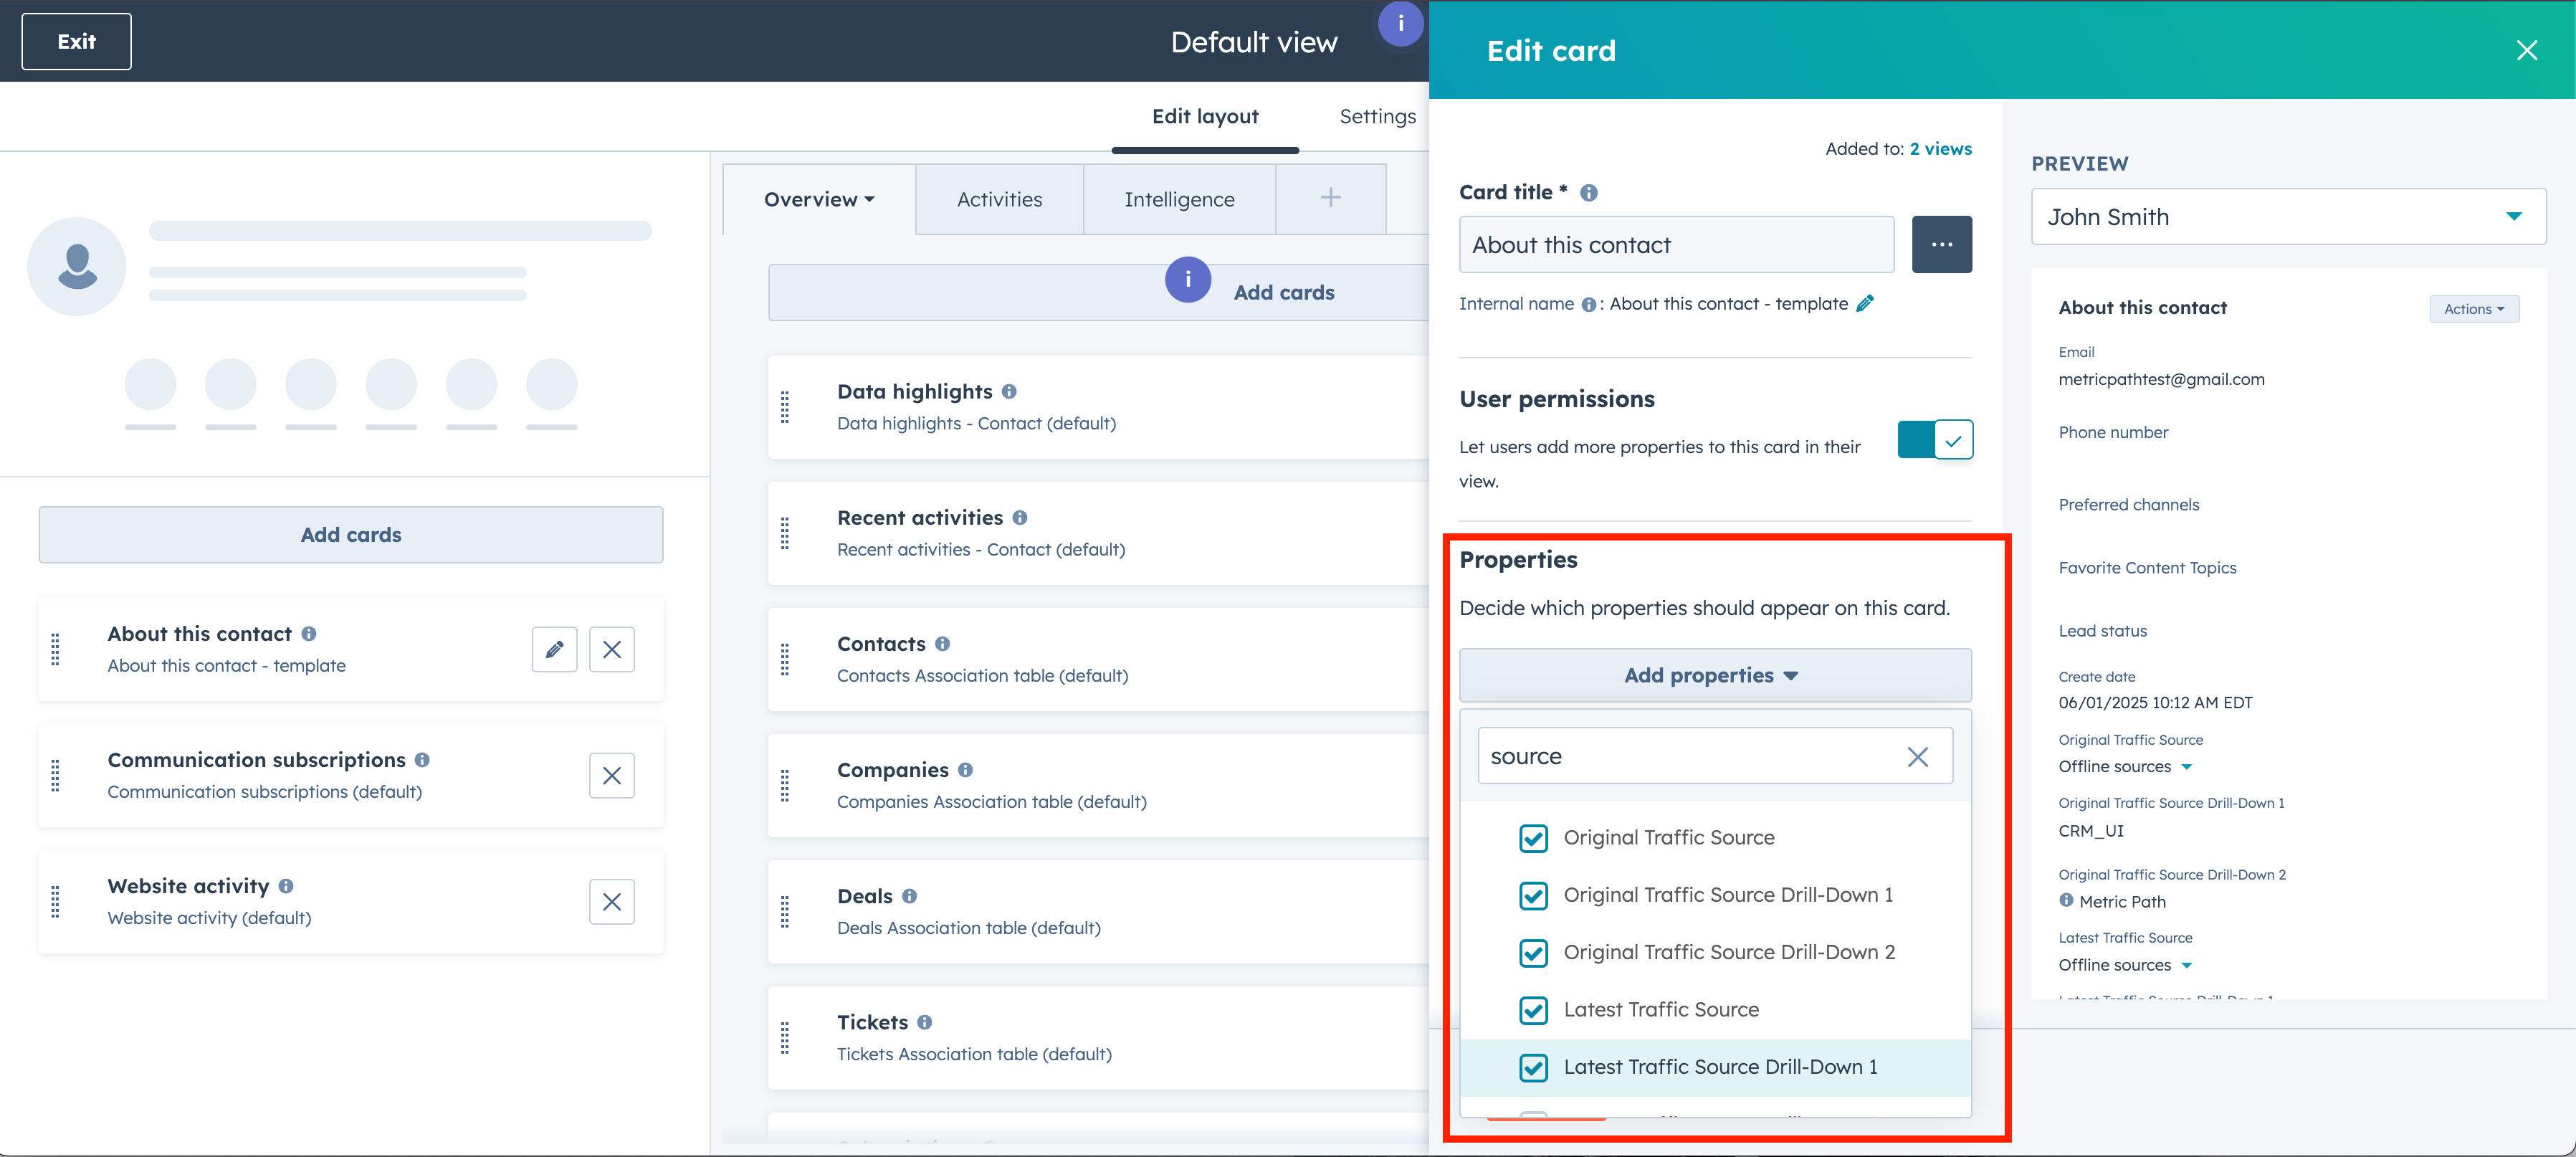
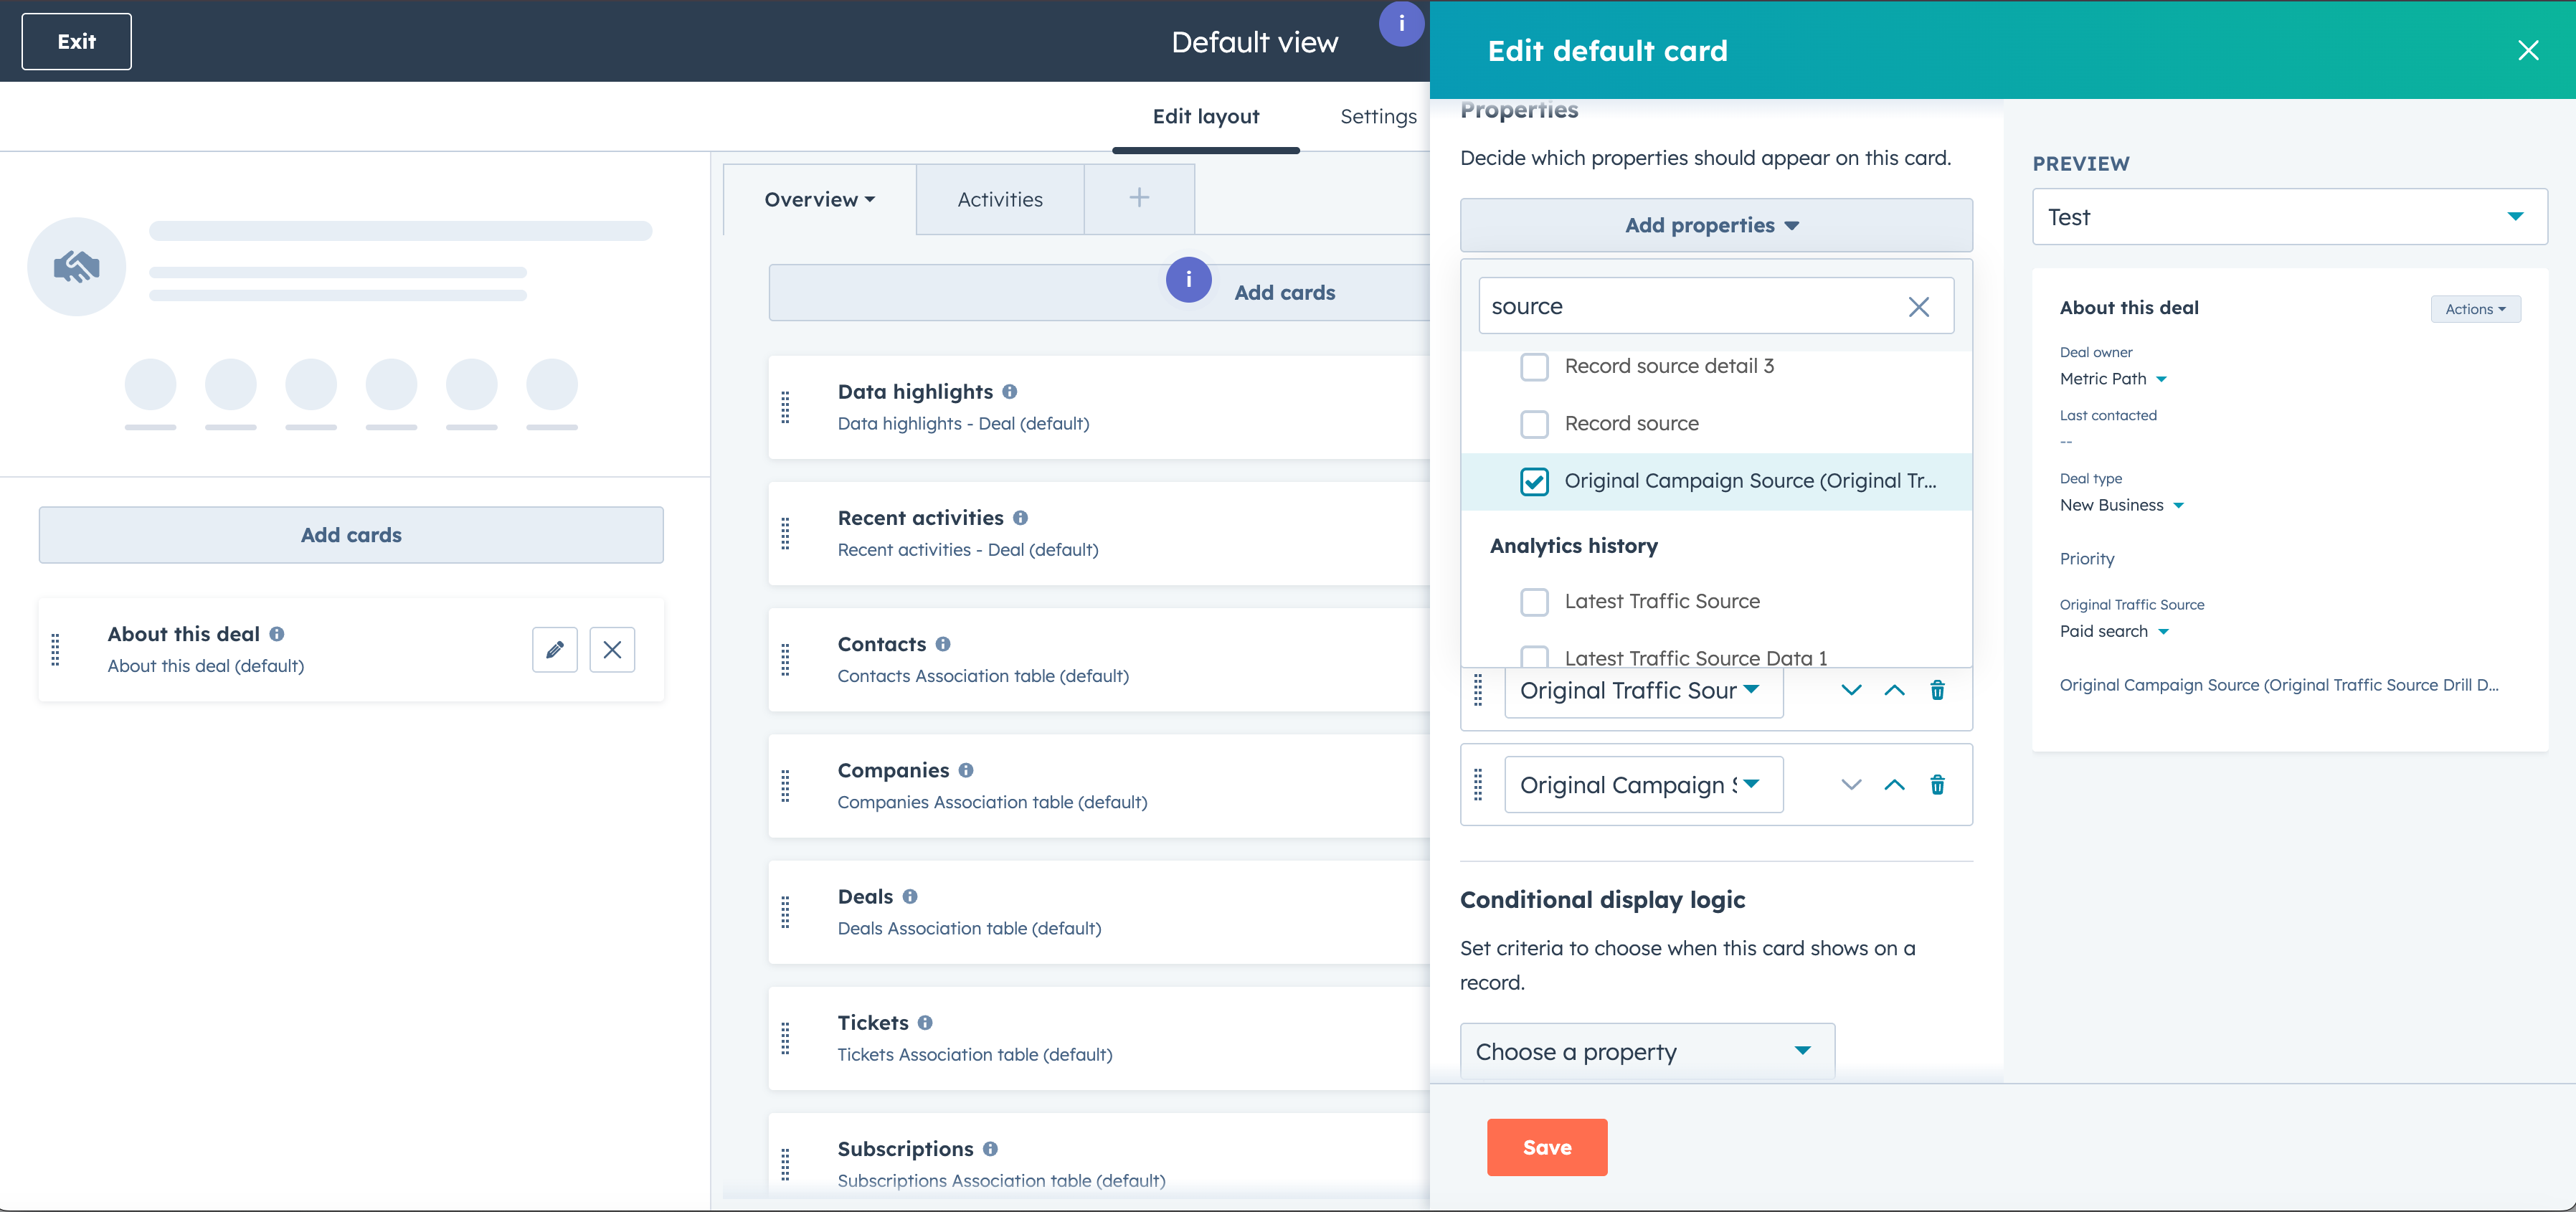
Towards the right of screen, search for source under add properties. Select the following properties and then save
-Original Traffic Source
-Original Traffic Source Drill-Down 1
-Original Traffic Source Drill-Down 2
-Latest Traffic Source
-Latest Traffic Source Drill-Down 1
-Latest Traffic Source Drill-Down 2
-Record Source
-Record Source Detail 1
-Record Source Detail 2
-Record Source Detail 3
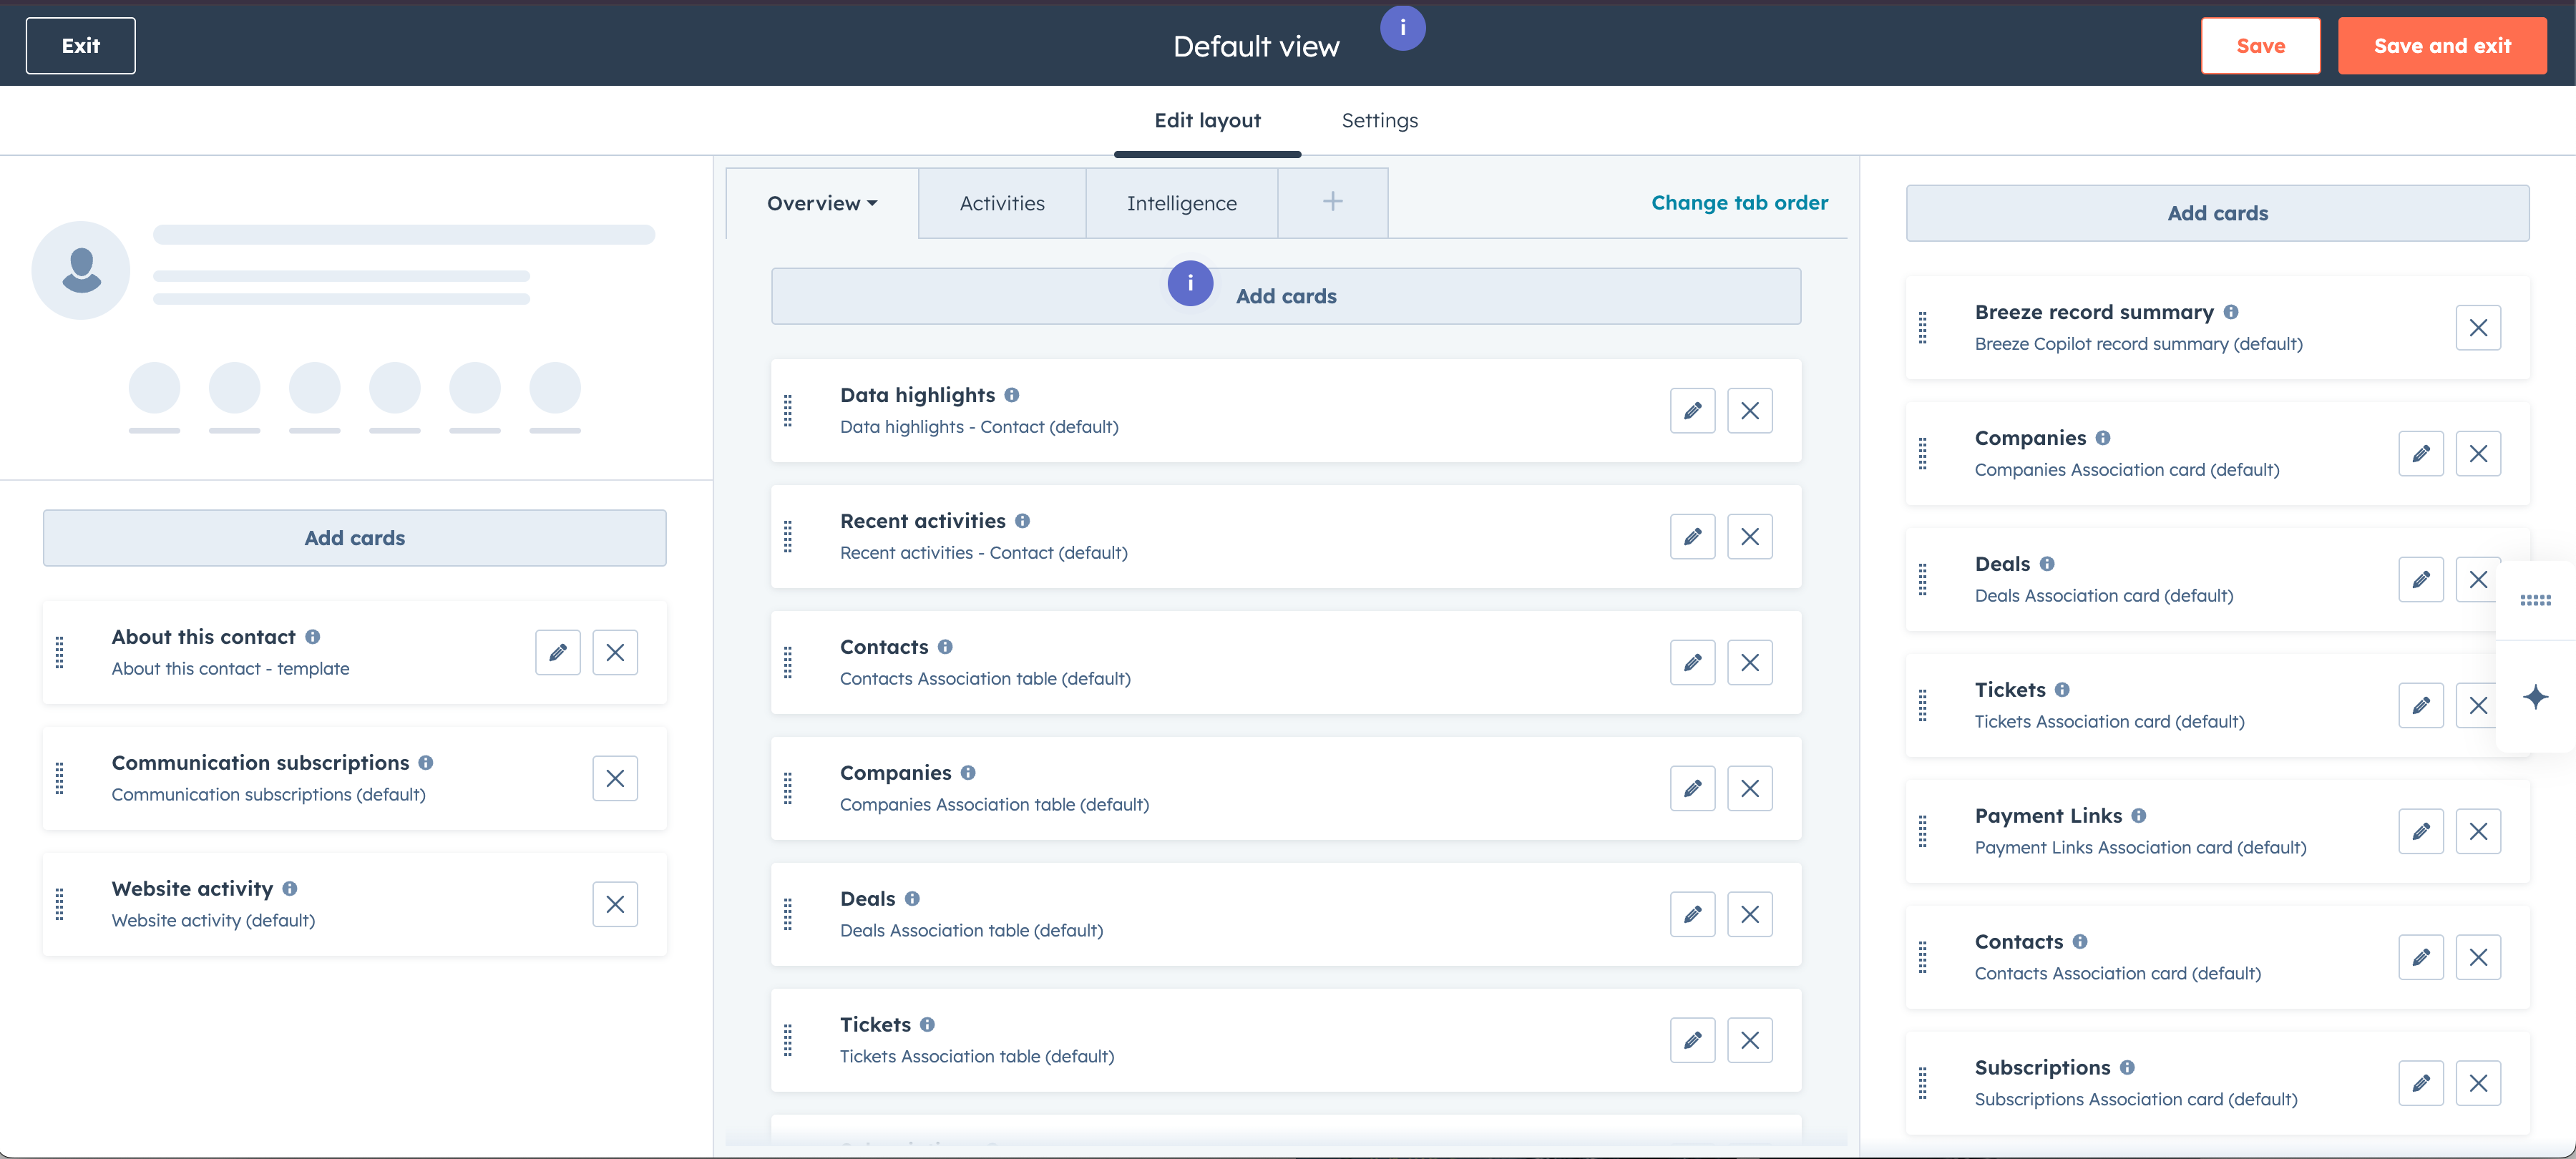
Select Save and exit
I am not going to go into super depth what this mean. Record source displays details on how the contact was created in the CRM. Original traffic source is information where the user came from originally when the submitted the form online. If a user submits another from later on from a different ad or campaign, this information will be added as the Latest traffic source. In the example below, we entered in the user manually into the CRM. If this user were to submit a form online, they would show different details.

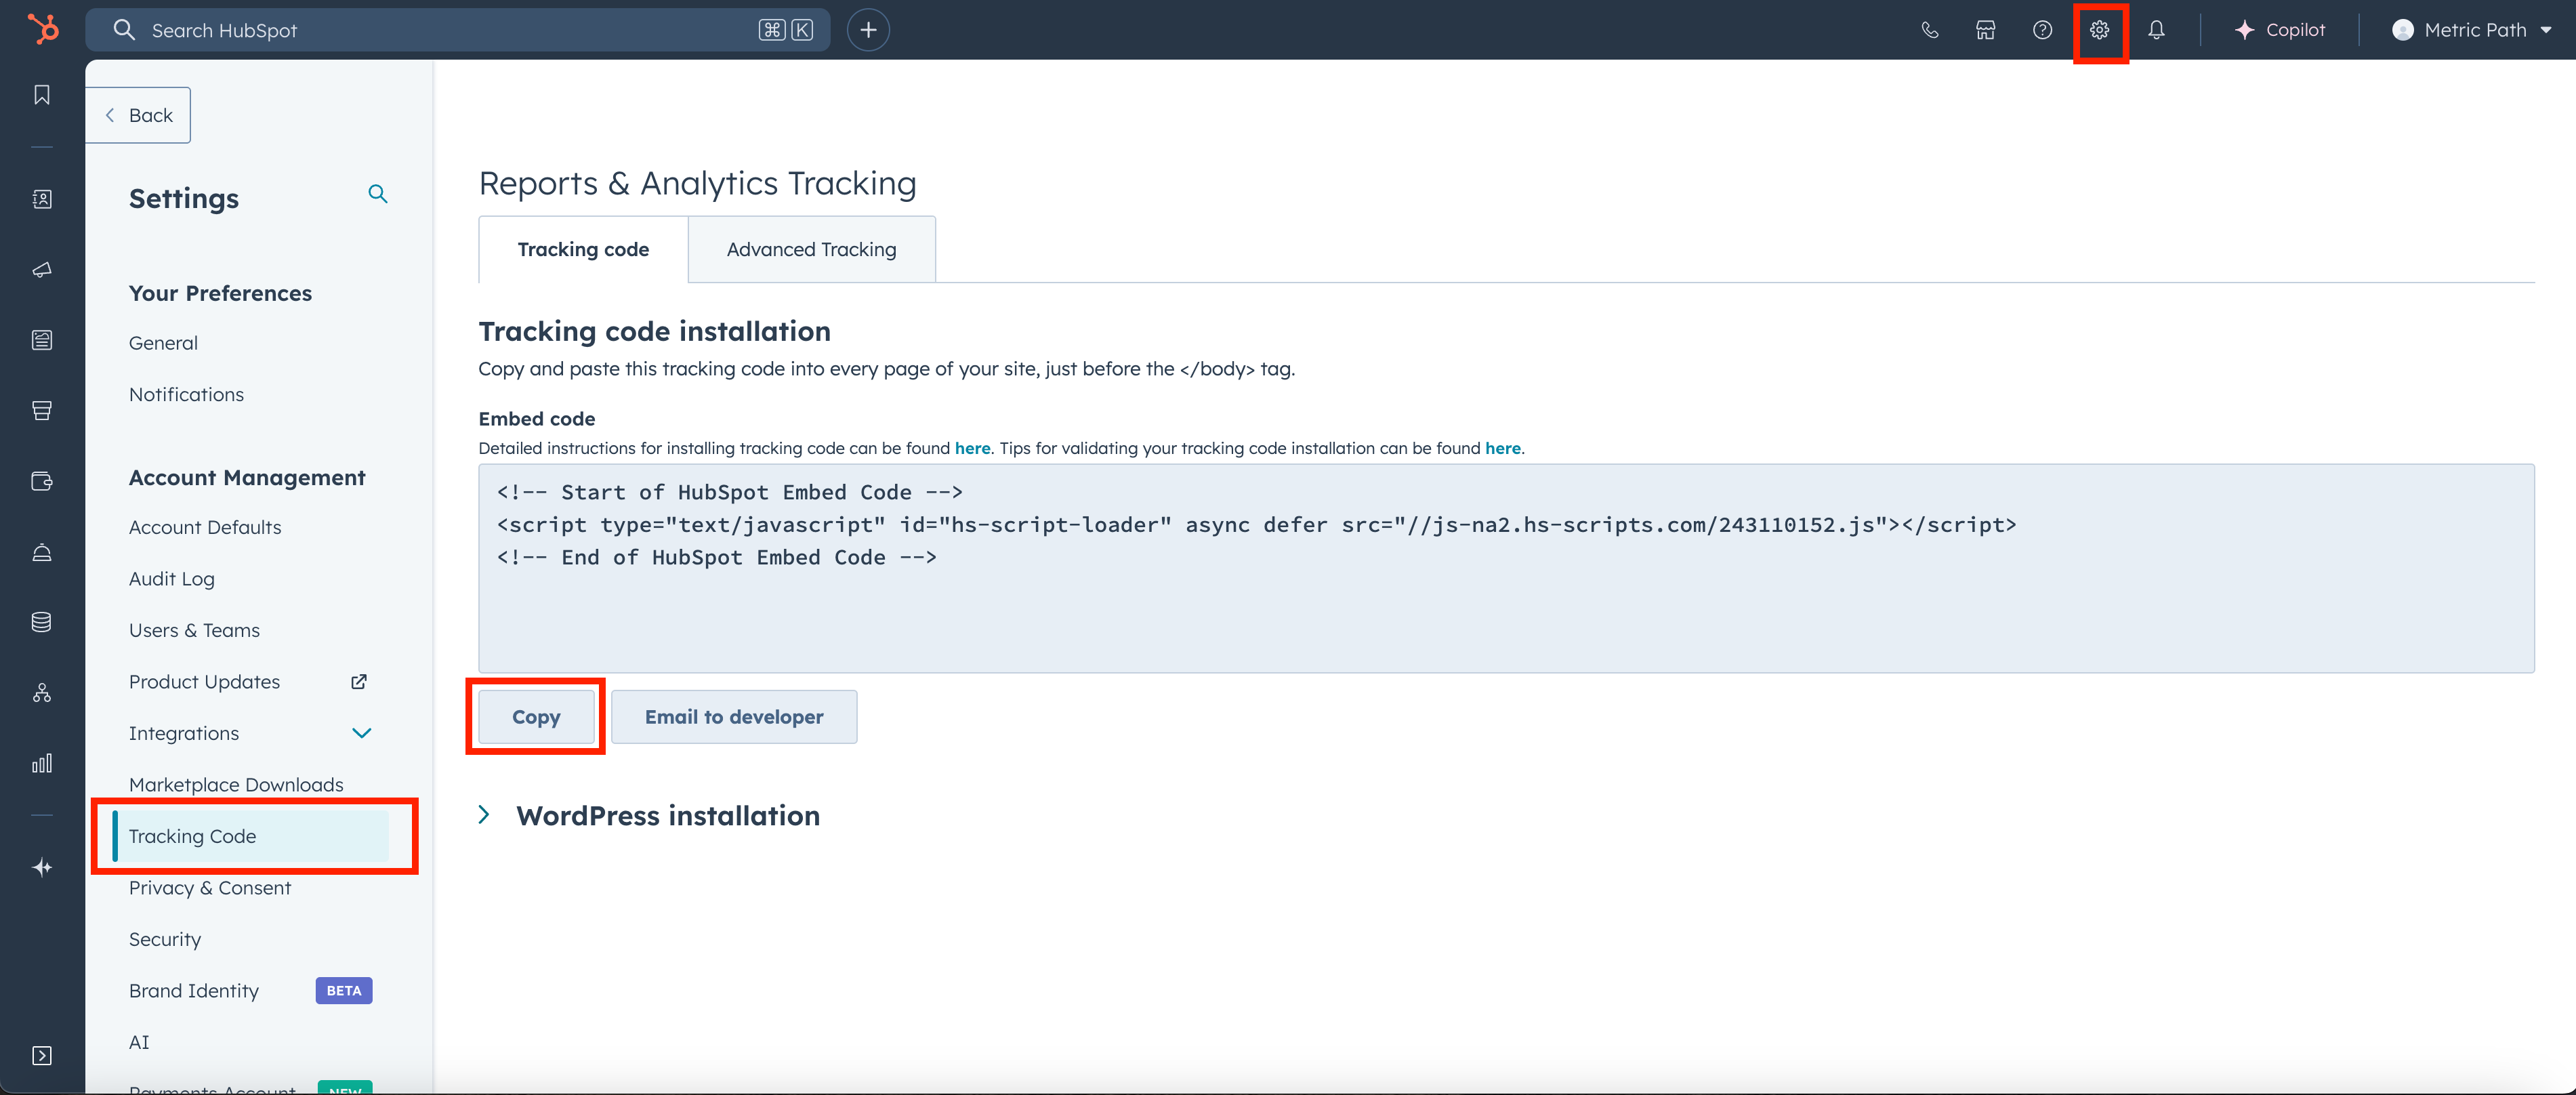
Select the gear icon, then on the left side menu select Tracking Code, and then copy tracking code.
Login into Webflow and create a webflow website or navigate to an existing one. Navigate into your existing webflow website by selecting the gear icon in the thumbnail.
In the site settings dashboard, select custom code to the left and then paste the hubspot tracking code into the section highlighted below. Publish your changes.
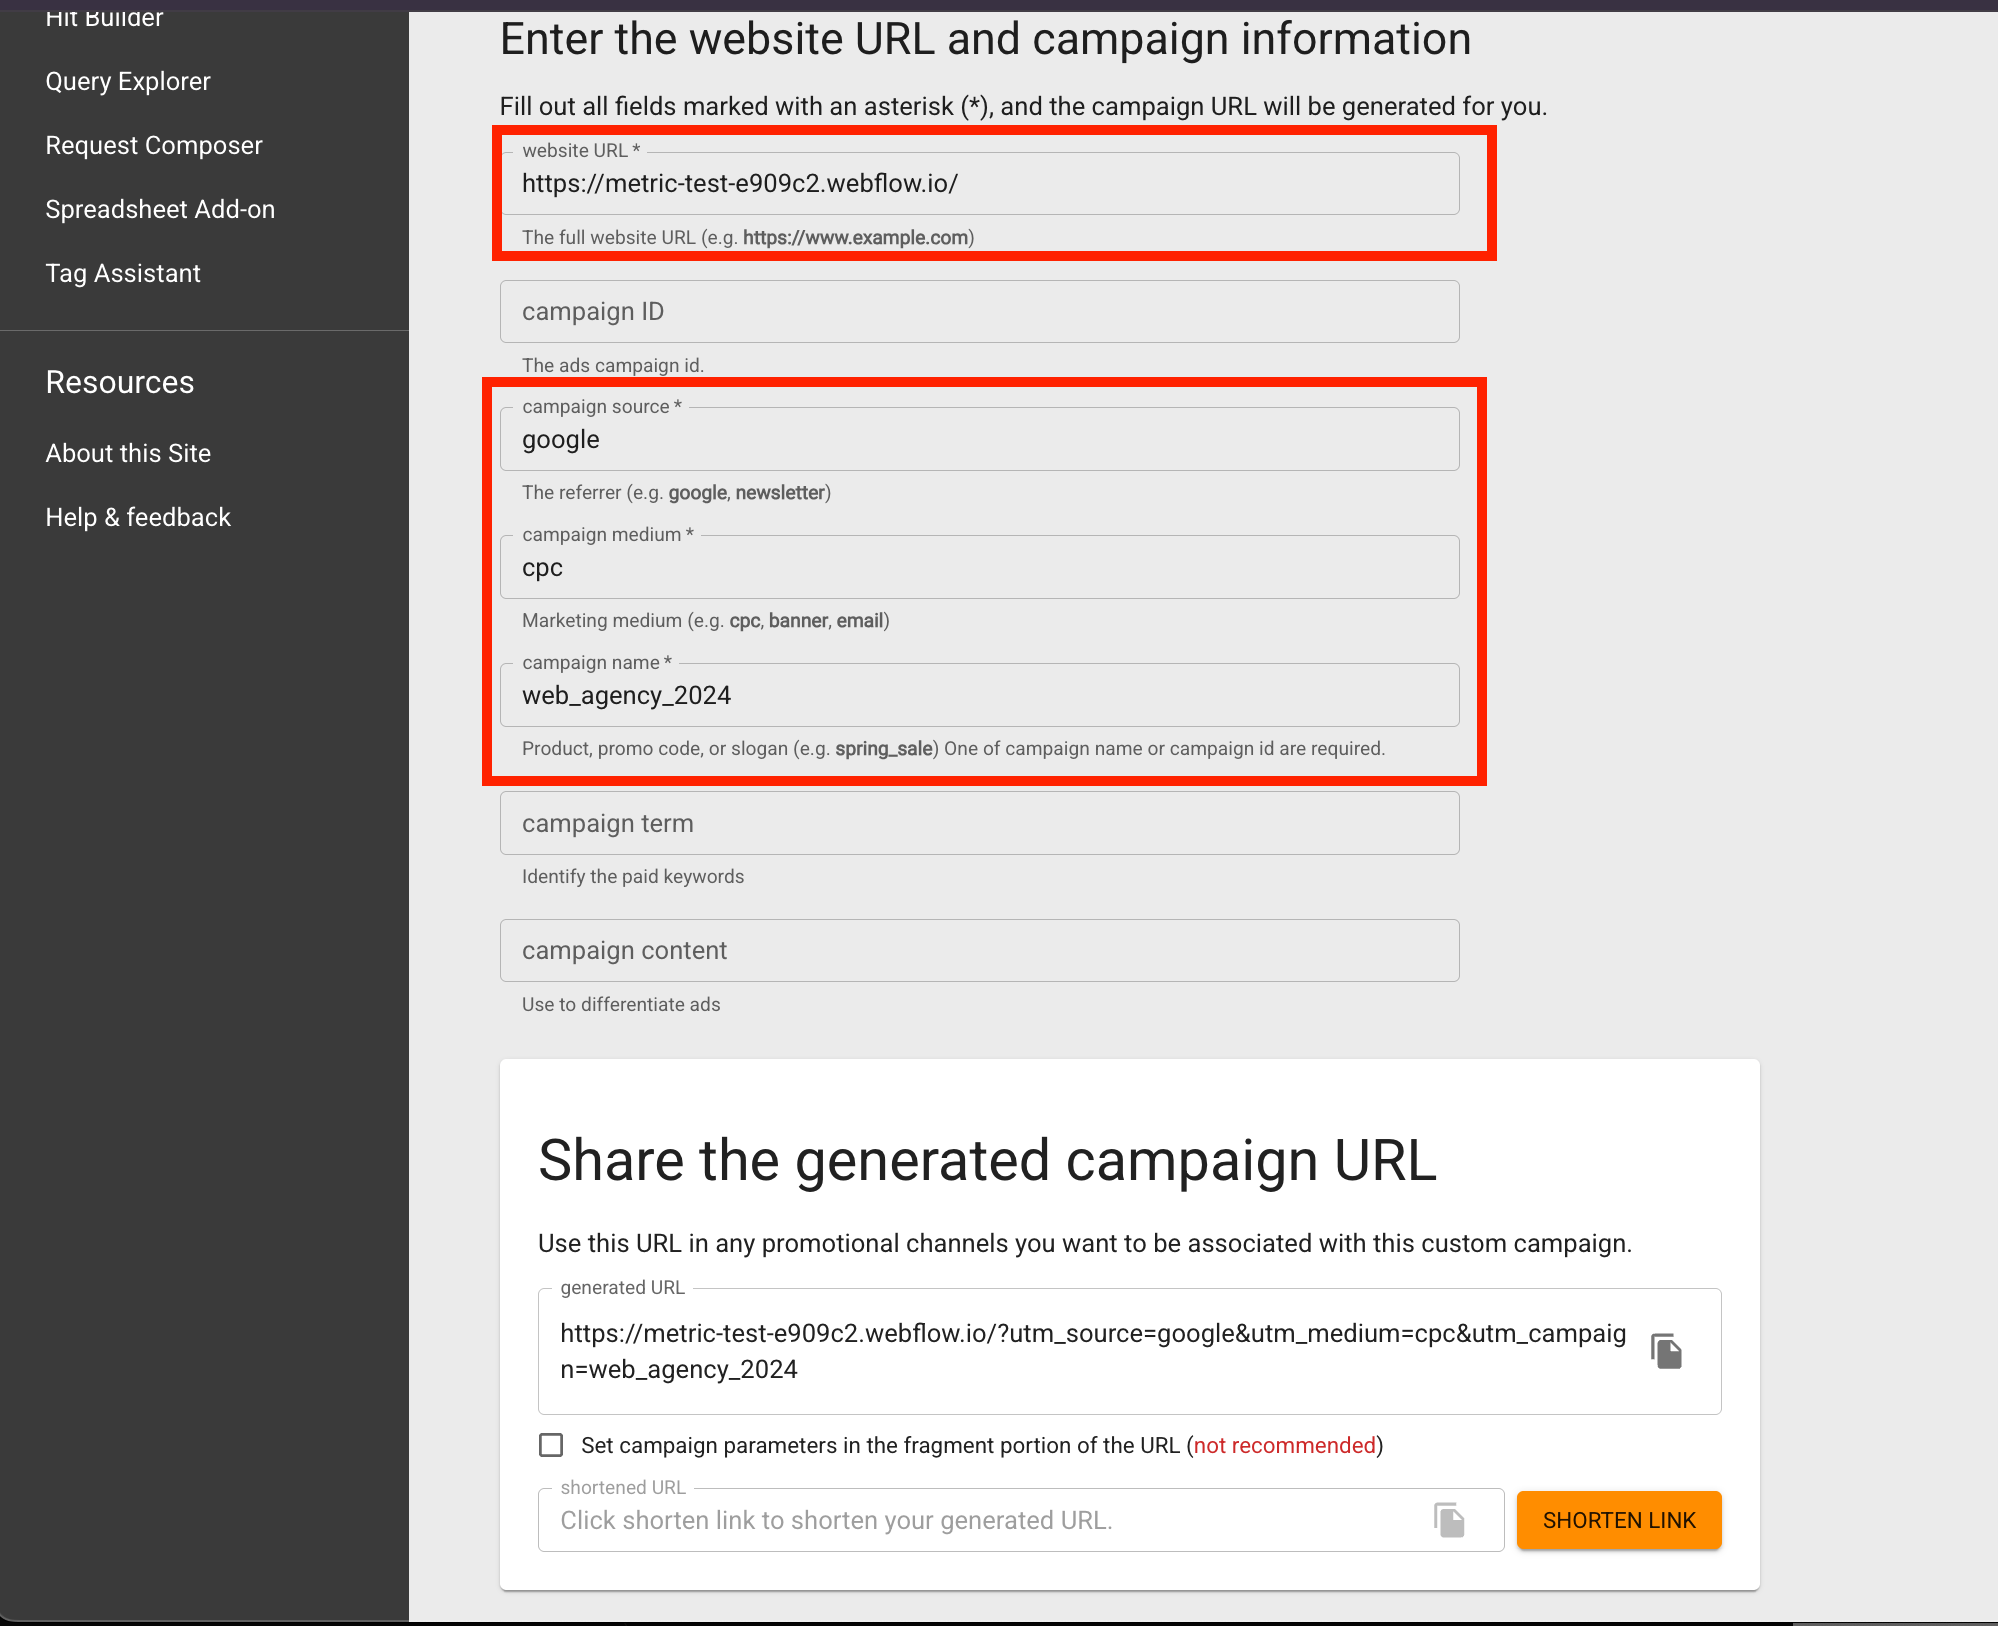
Go to https://ga-dev-tools.google/campaign-url-builder/ and enter the information below. Once done copy the link generated below.
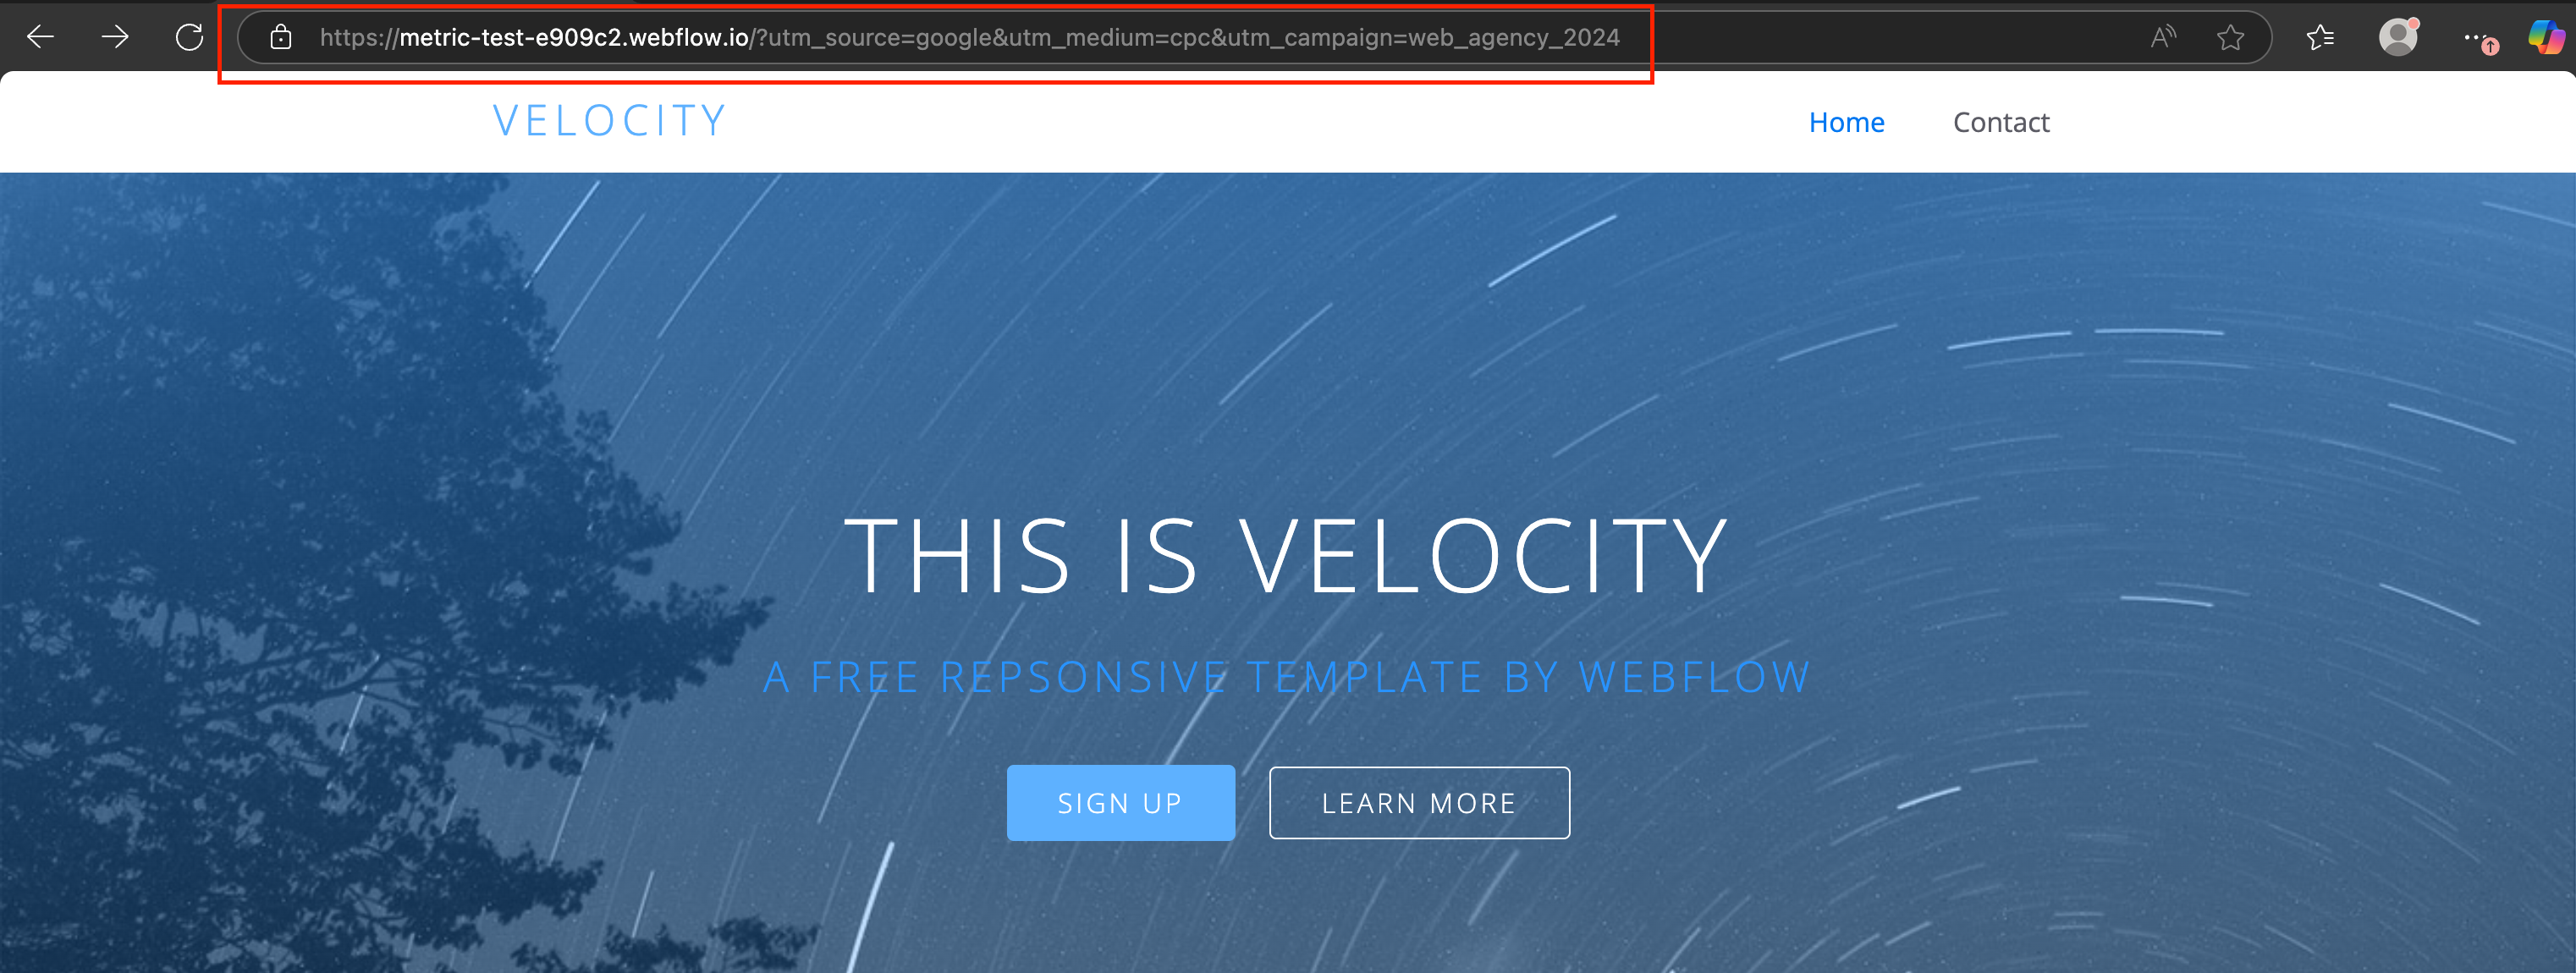
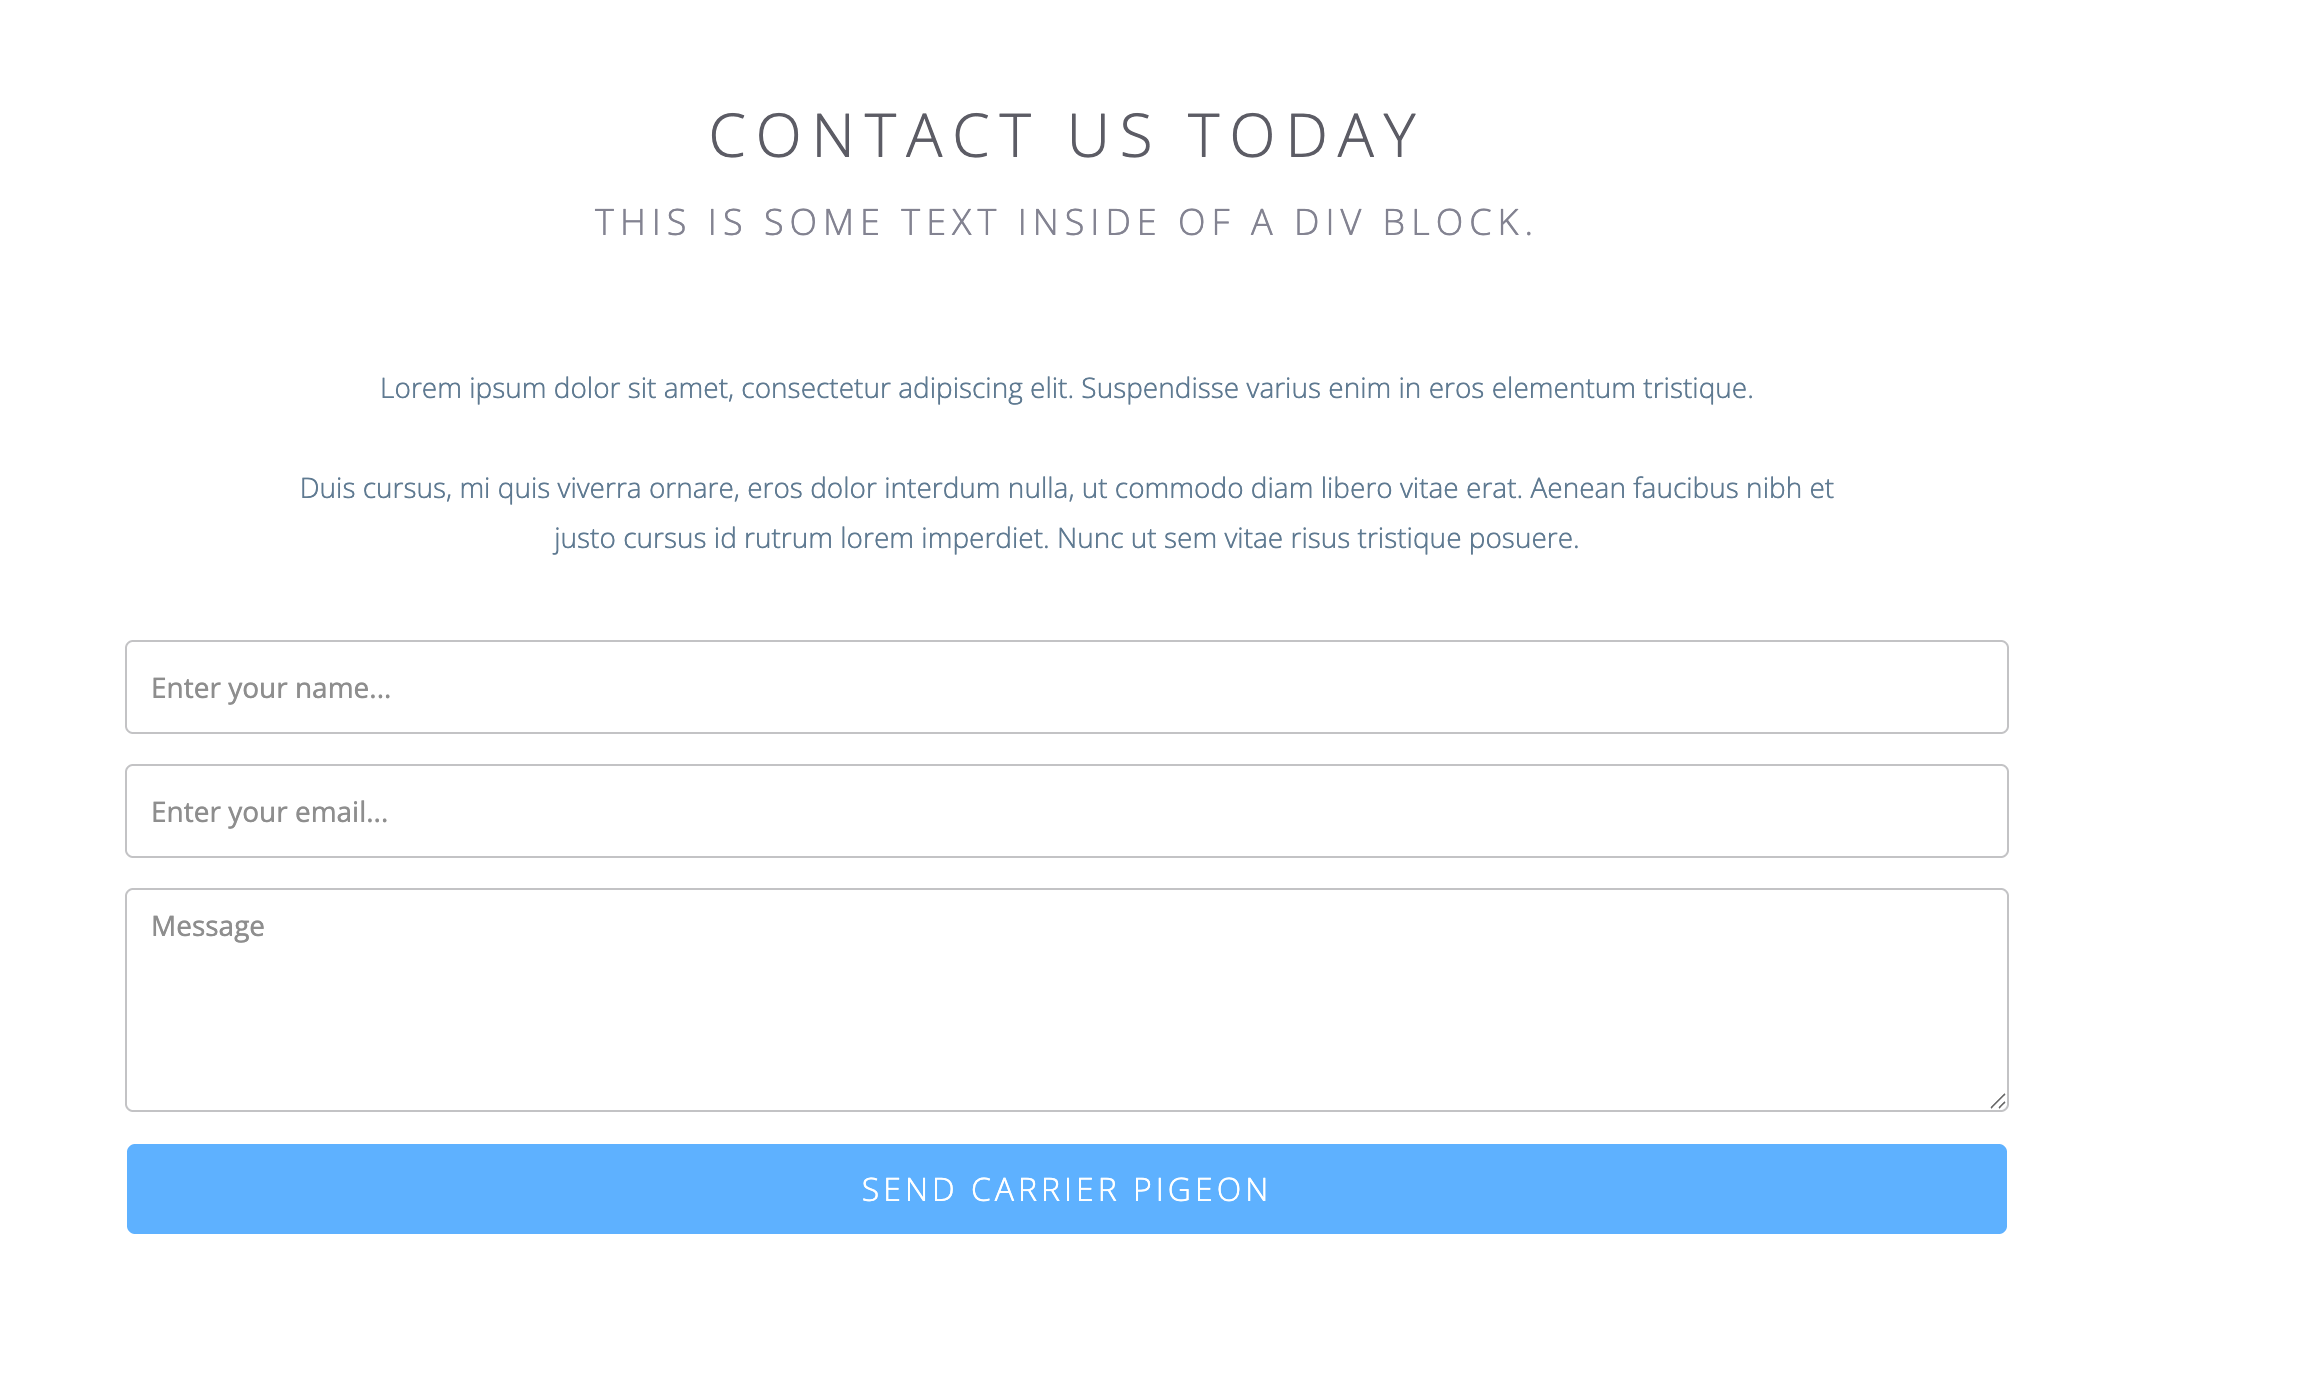
Open a new browser with cookies and cache cleared so we make sure info in the UTM parameter gets sent to the CRM. Existing cookies in your browser can cause wrong info to be sent. Clearing our cookies will ensure that we a simulating what is sent to the CRM for a first time visitor on your website. Enter the generated url in a new browser tab or window. Navigate to a form on your website and enter in test contact information.
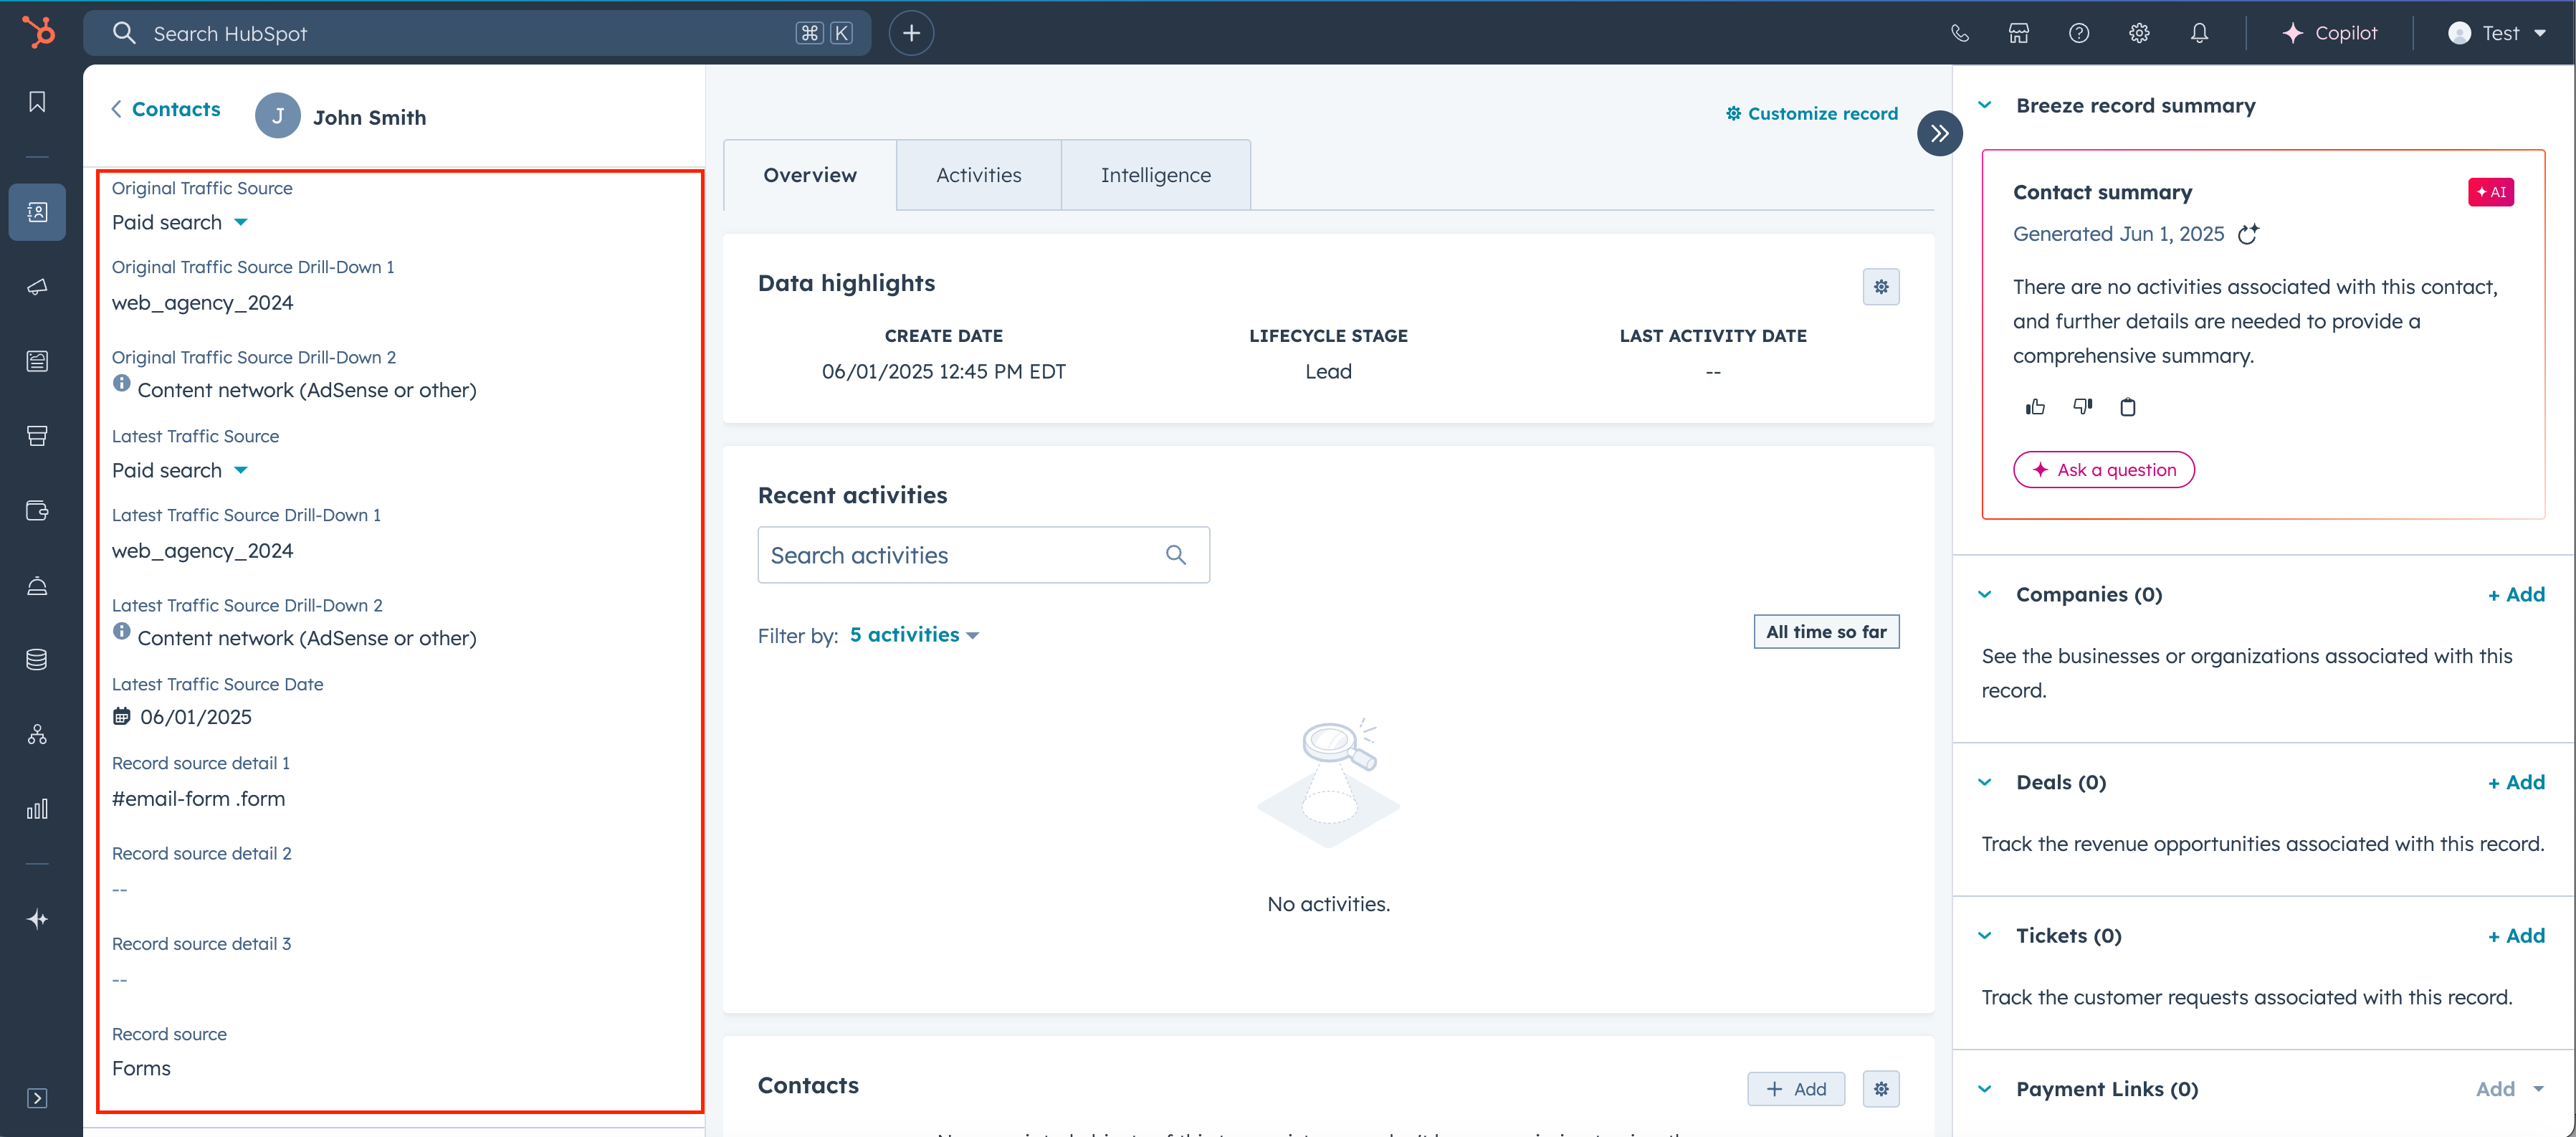
After you submit your form, navigate back into your Hubspot CRM dashboard and see if contact is added to CRM in contacts screen. Navigate to that specific contact and see if the source details are updated. You might have to wait a few minutes for all data to get populated.
In most situations, especially in B2B marketing and sales, contacts will sit in your CRM for while and talk to sales. When a contact want to become a customer, we need to create an associated deal. The deal will have all the revenue and transaction info from the contact. The deal must also have the same source fields as the contact property. We must ensure that the information from the source fields match the source fields in the deals property. We can do this through automation (which you will have to pay for) or we can do this manually. I will walk you through step-by-step on how to use Hubspot Workflows to do this automatically.
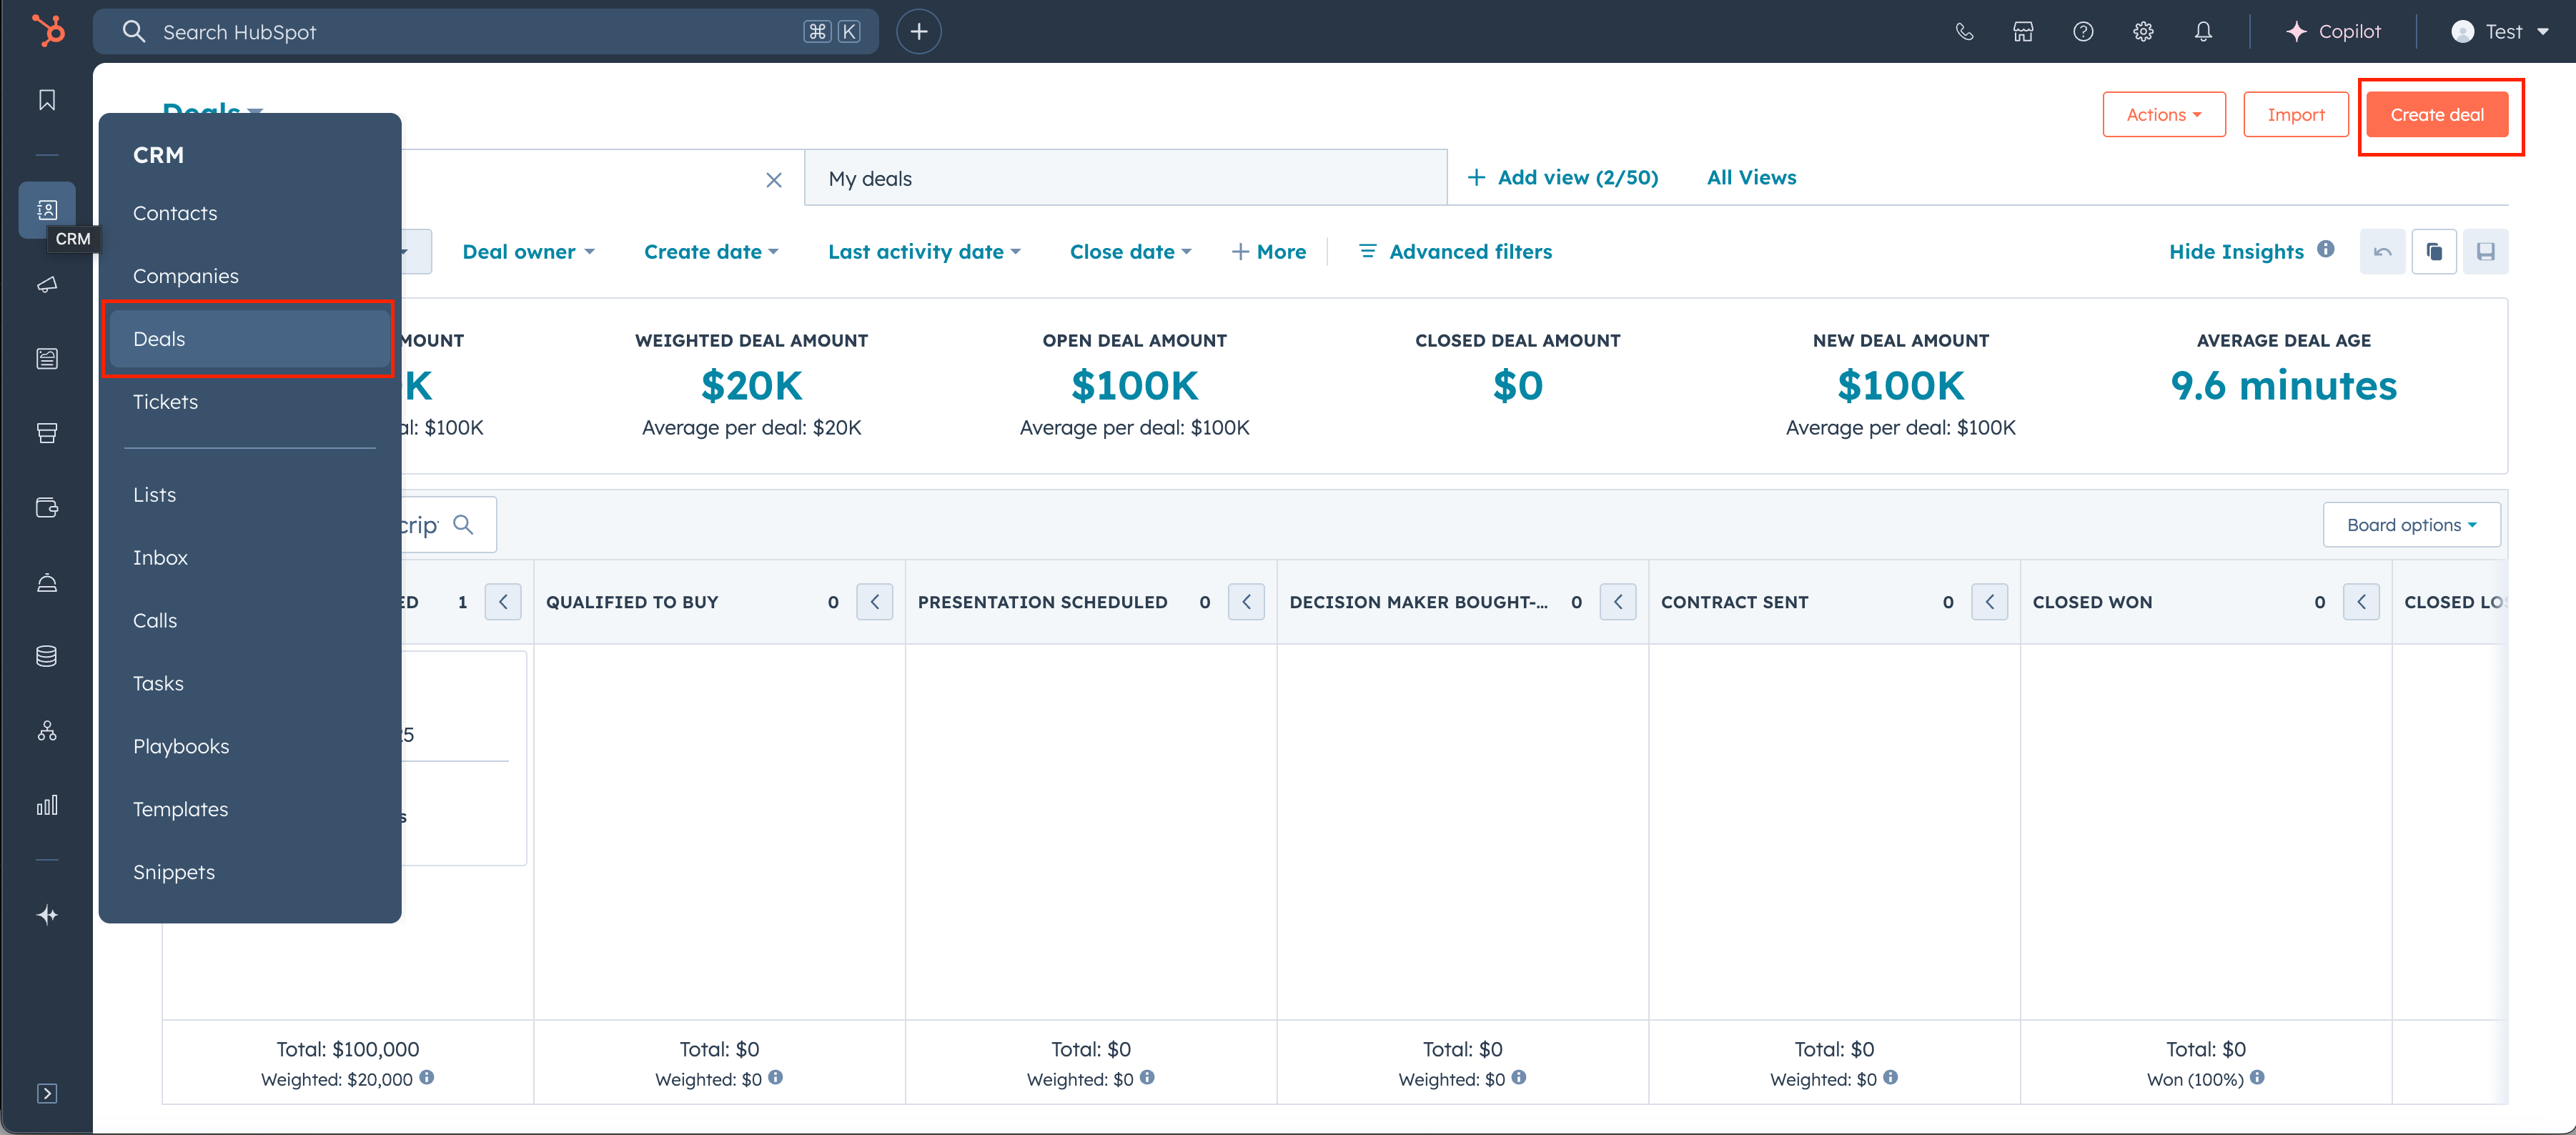
Navigate to deals property and create new deal, enter the test information. You do not need to associate contact in this special case because we are making edits.
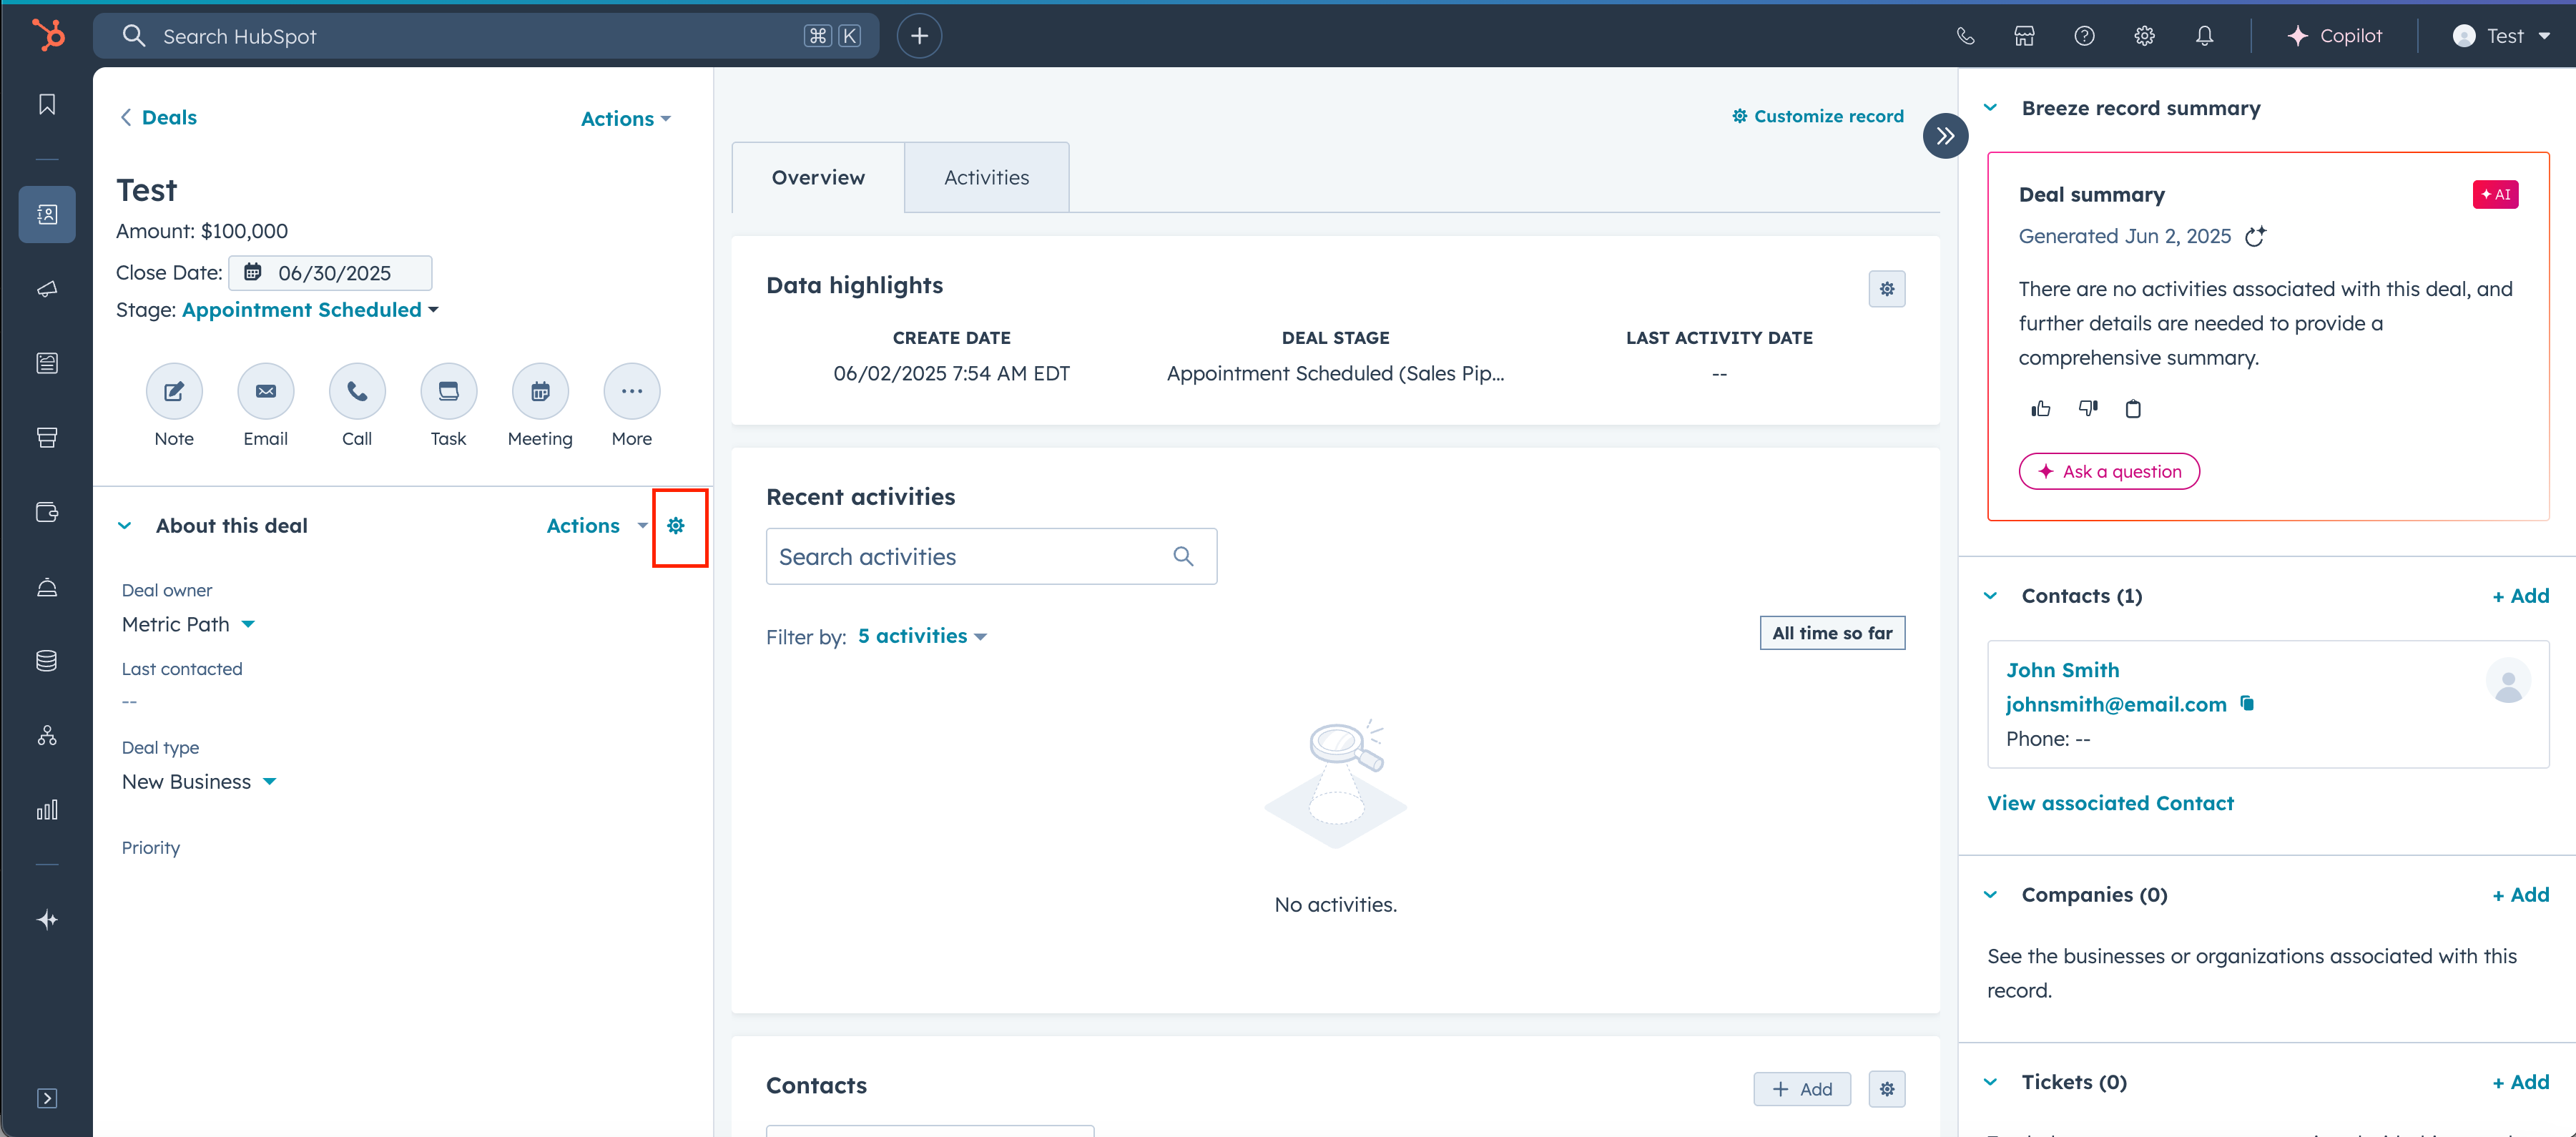
Select the gear icon
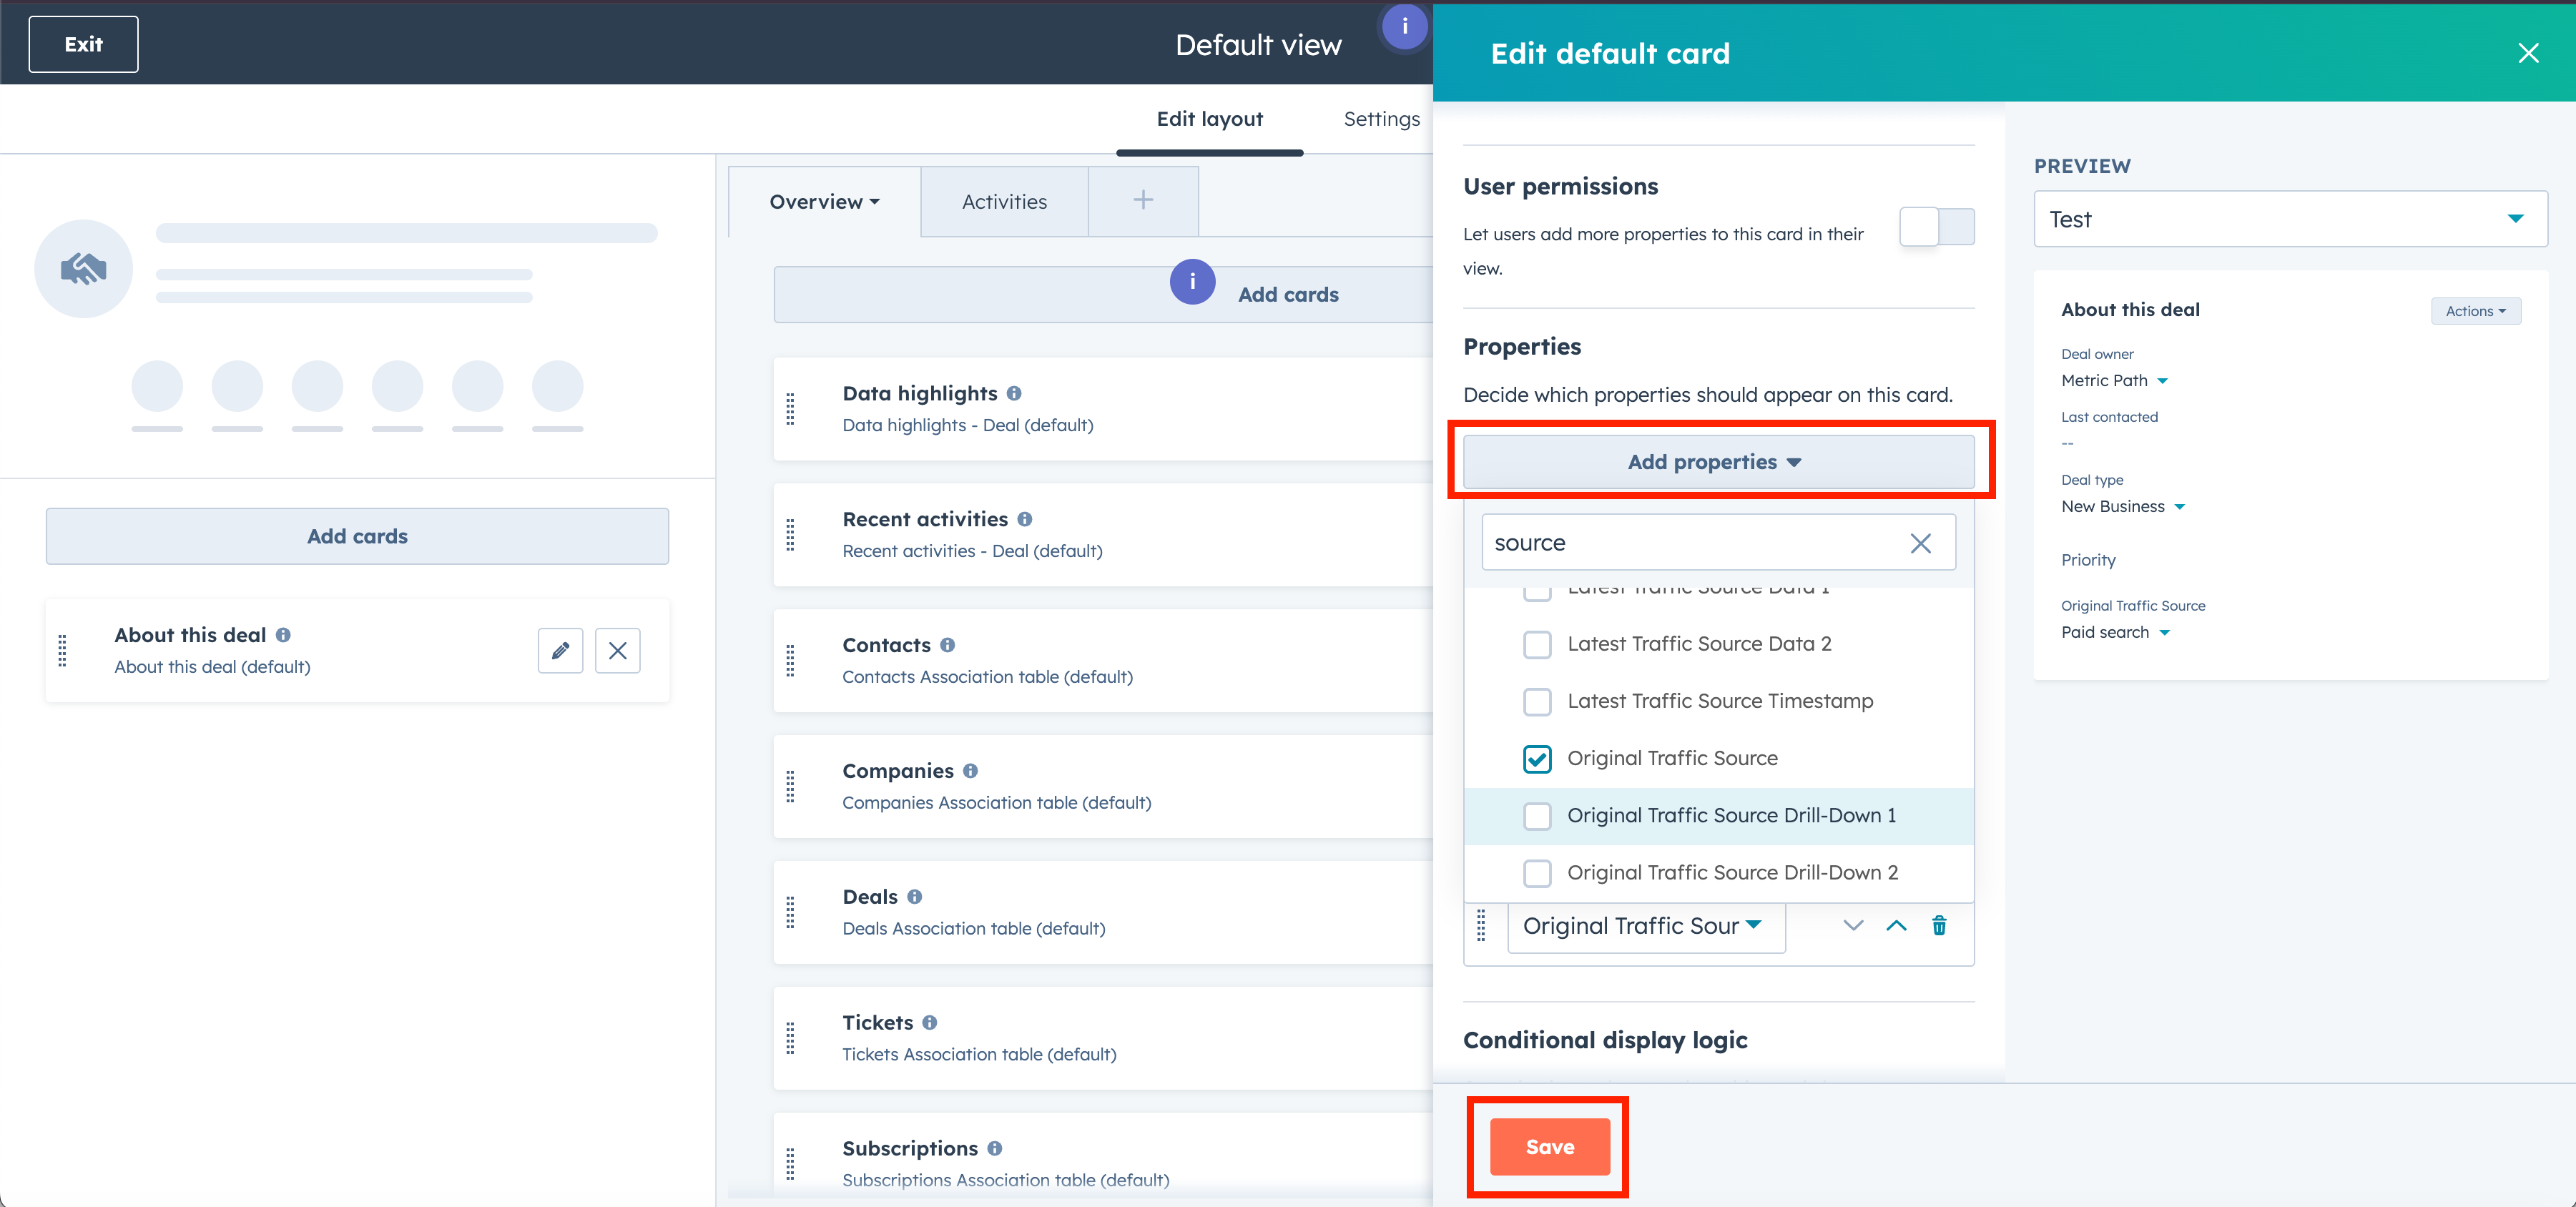
Select add properties, add only Original Source Traffic and then save your changes and exit. The reason we are adding only this source field is because of limitations in Hubspot. Hubspot will not transfer the other fields such as Original Source Traffic Drill-down 1 when creating the automation to transfer this data from contact to deal. There is a work around to this we will do in a later step.
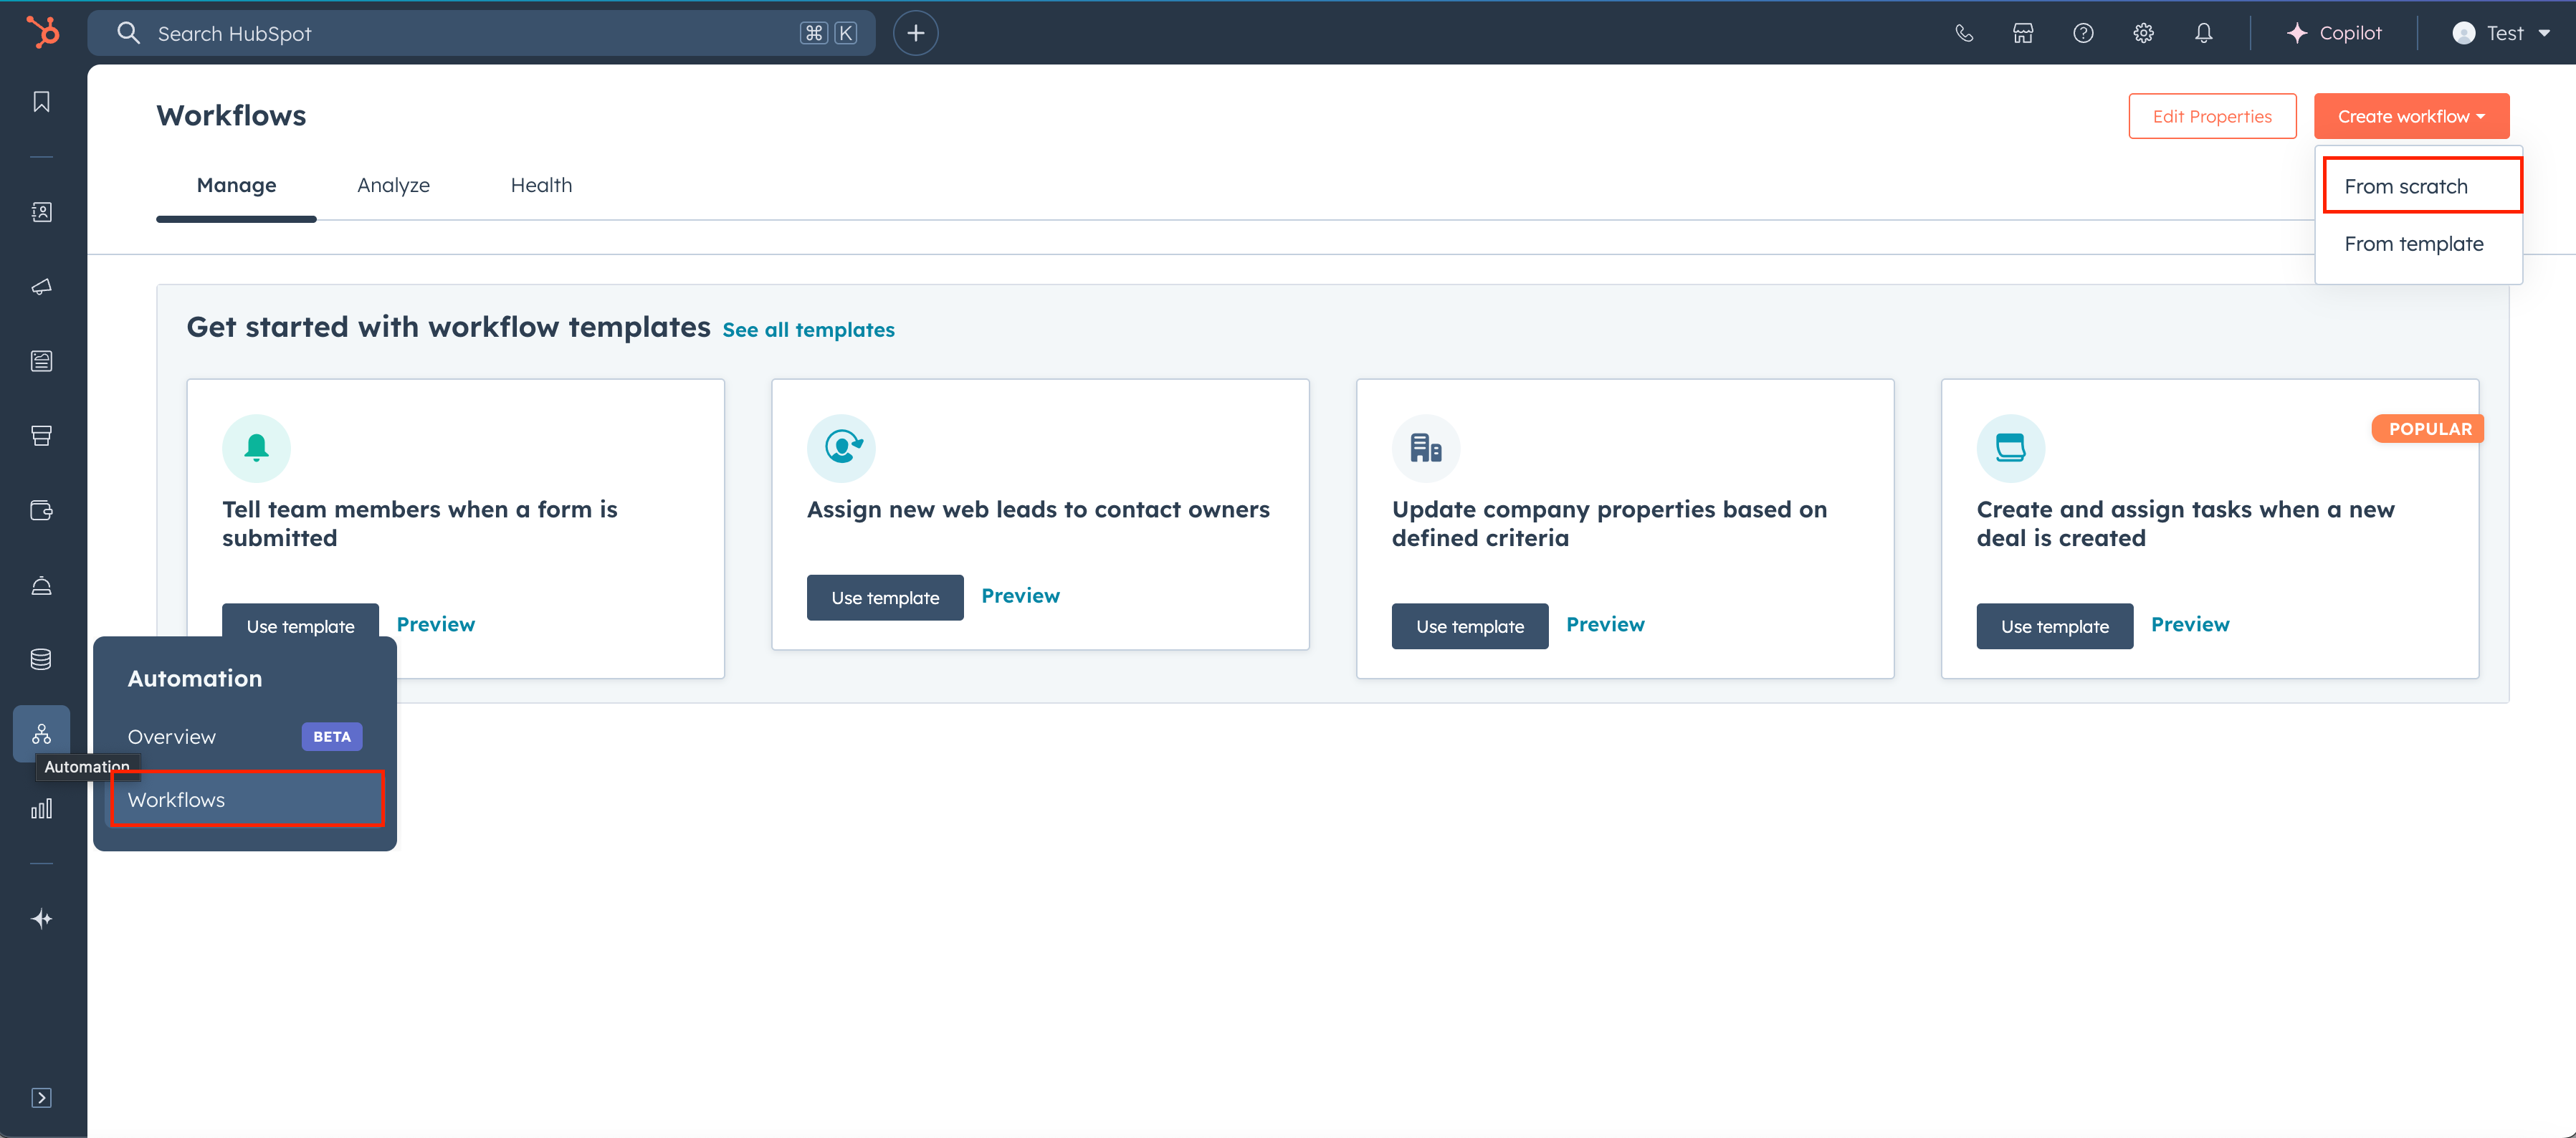
Navigate to Hubspot Workflows and select create workflow from scratch
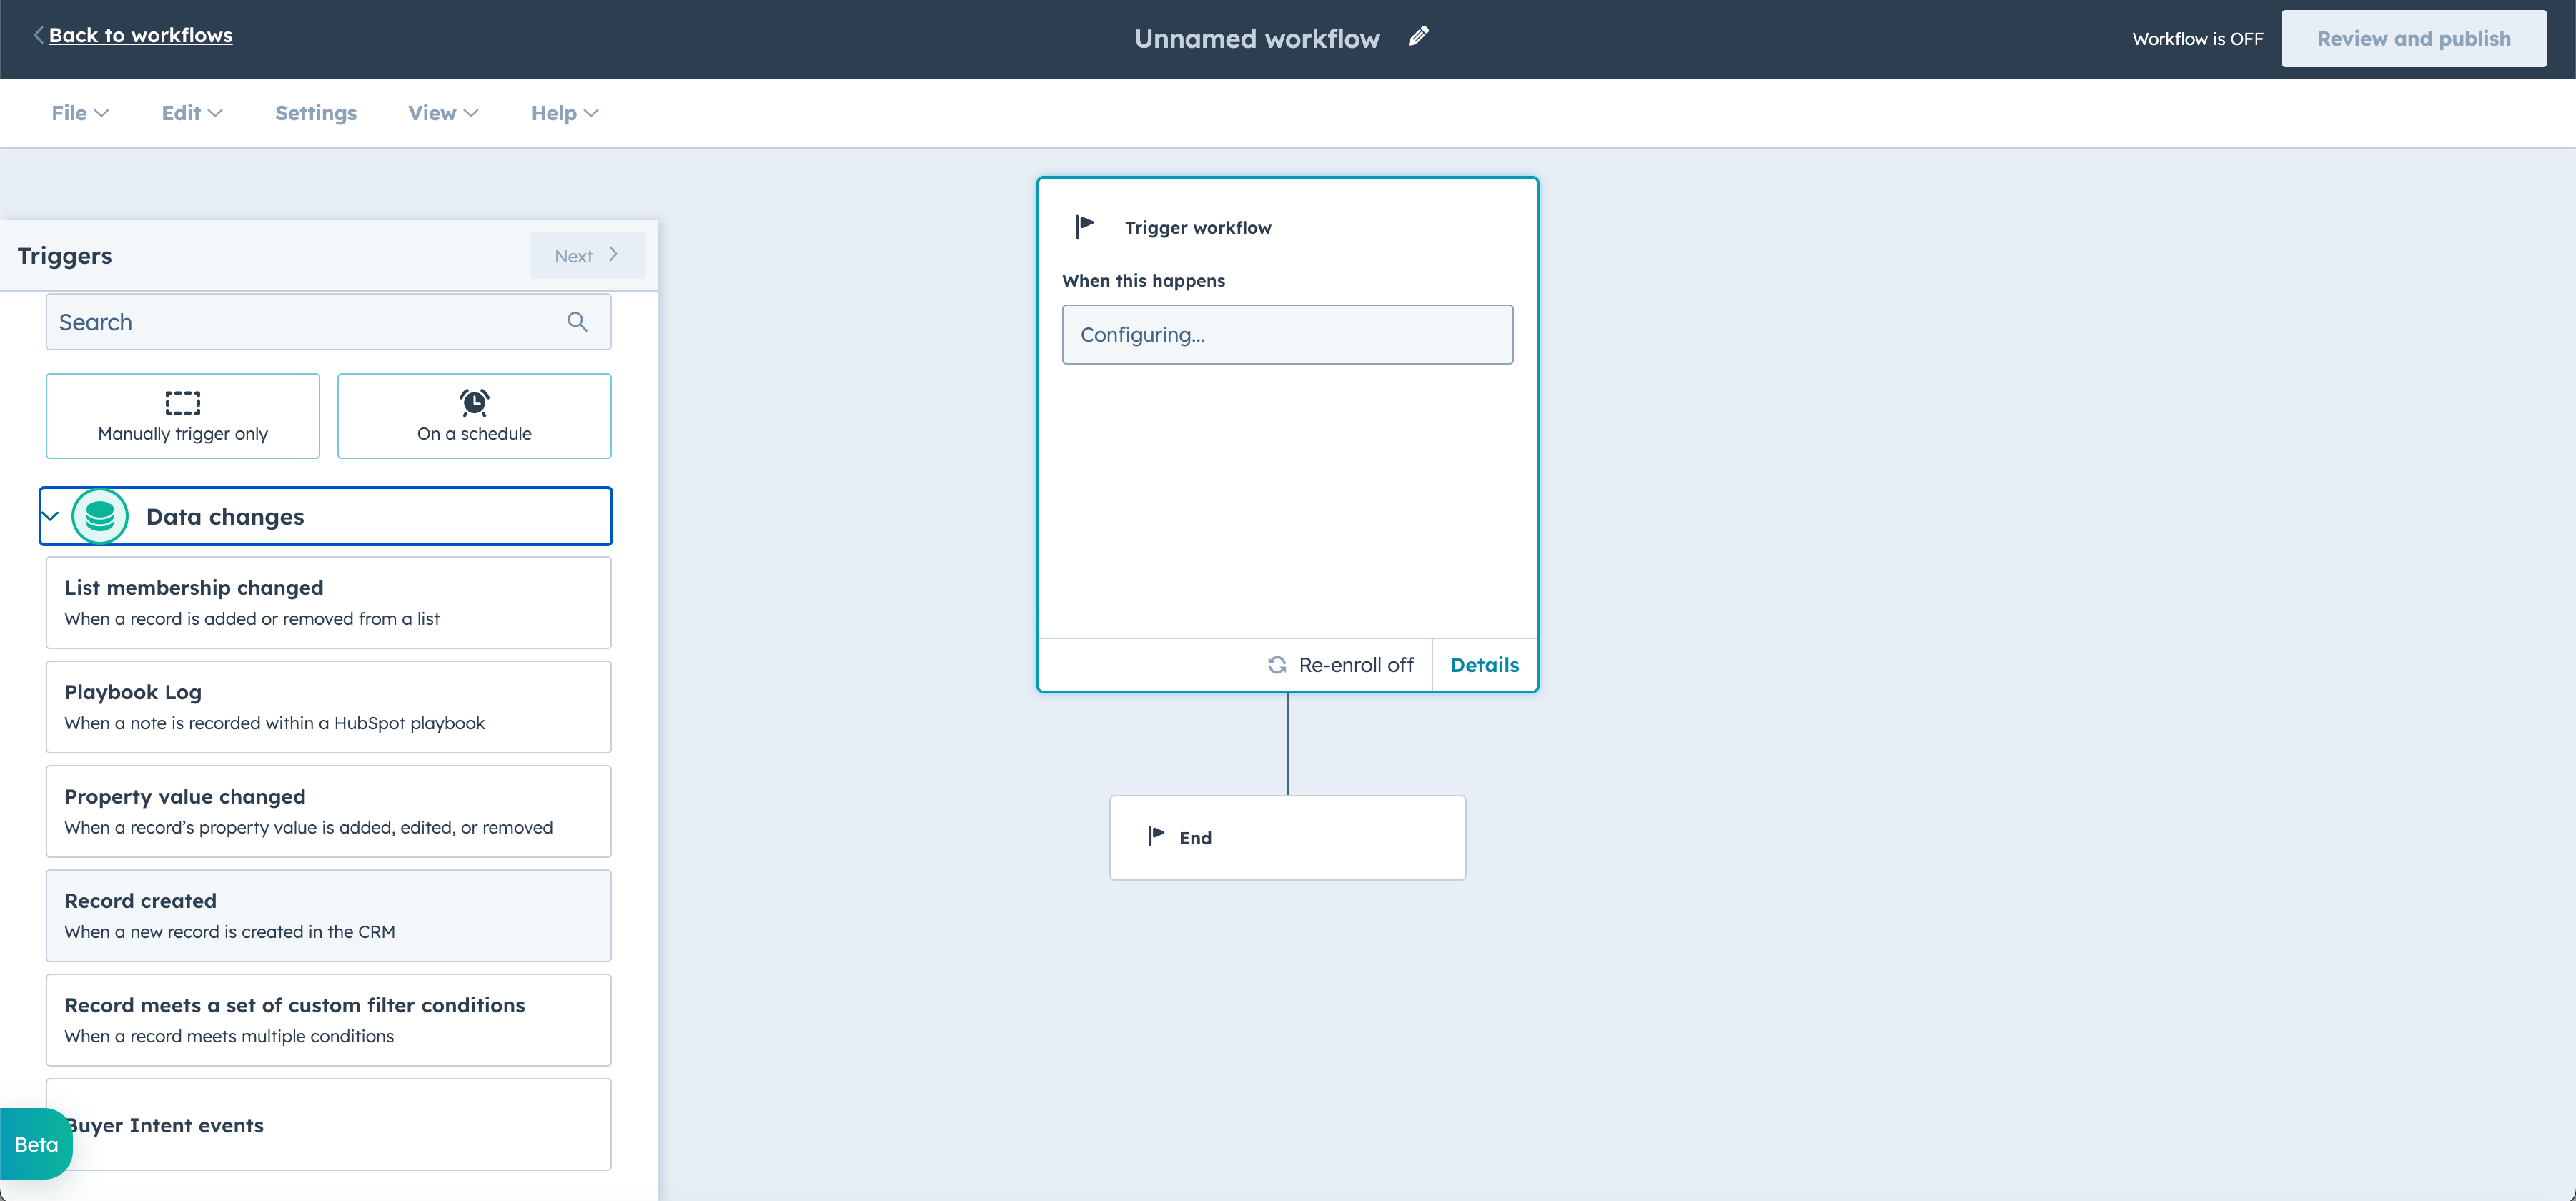
In the workflow screen select Data Changes and then select Record Created.
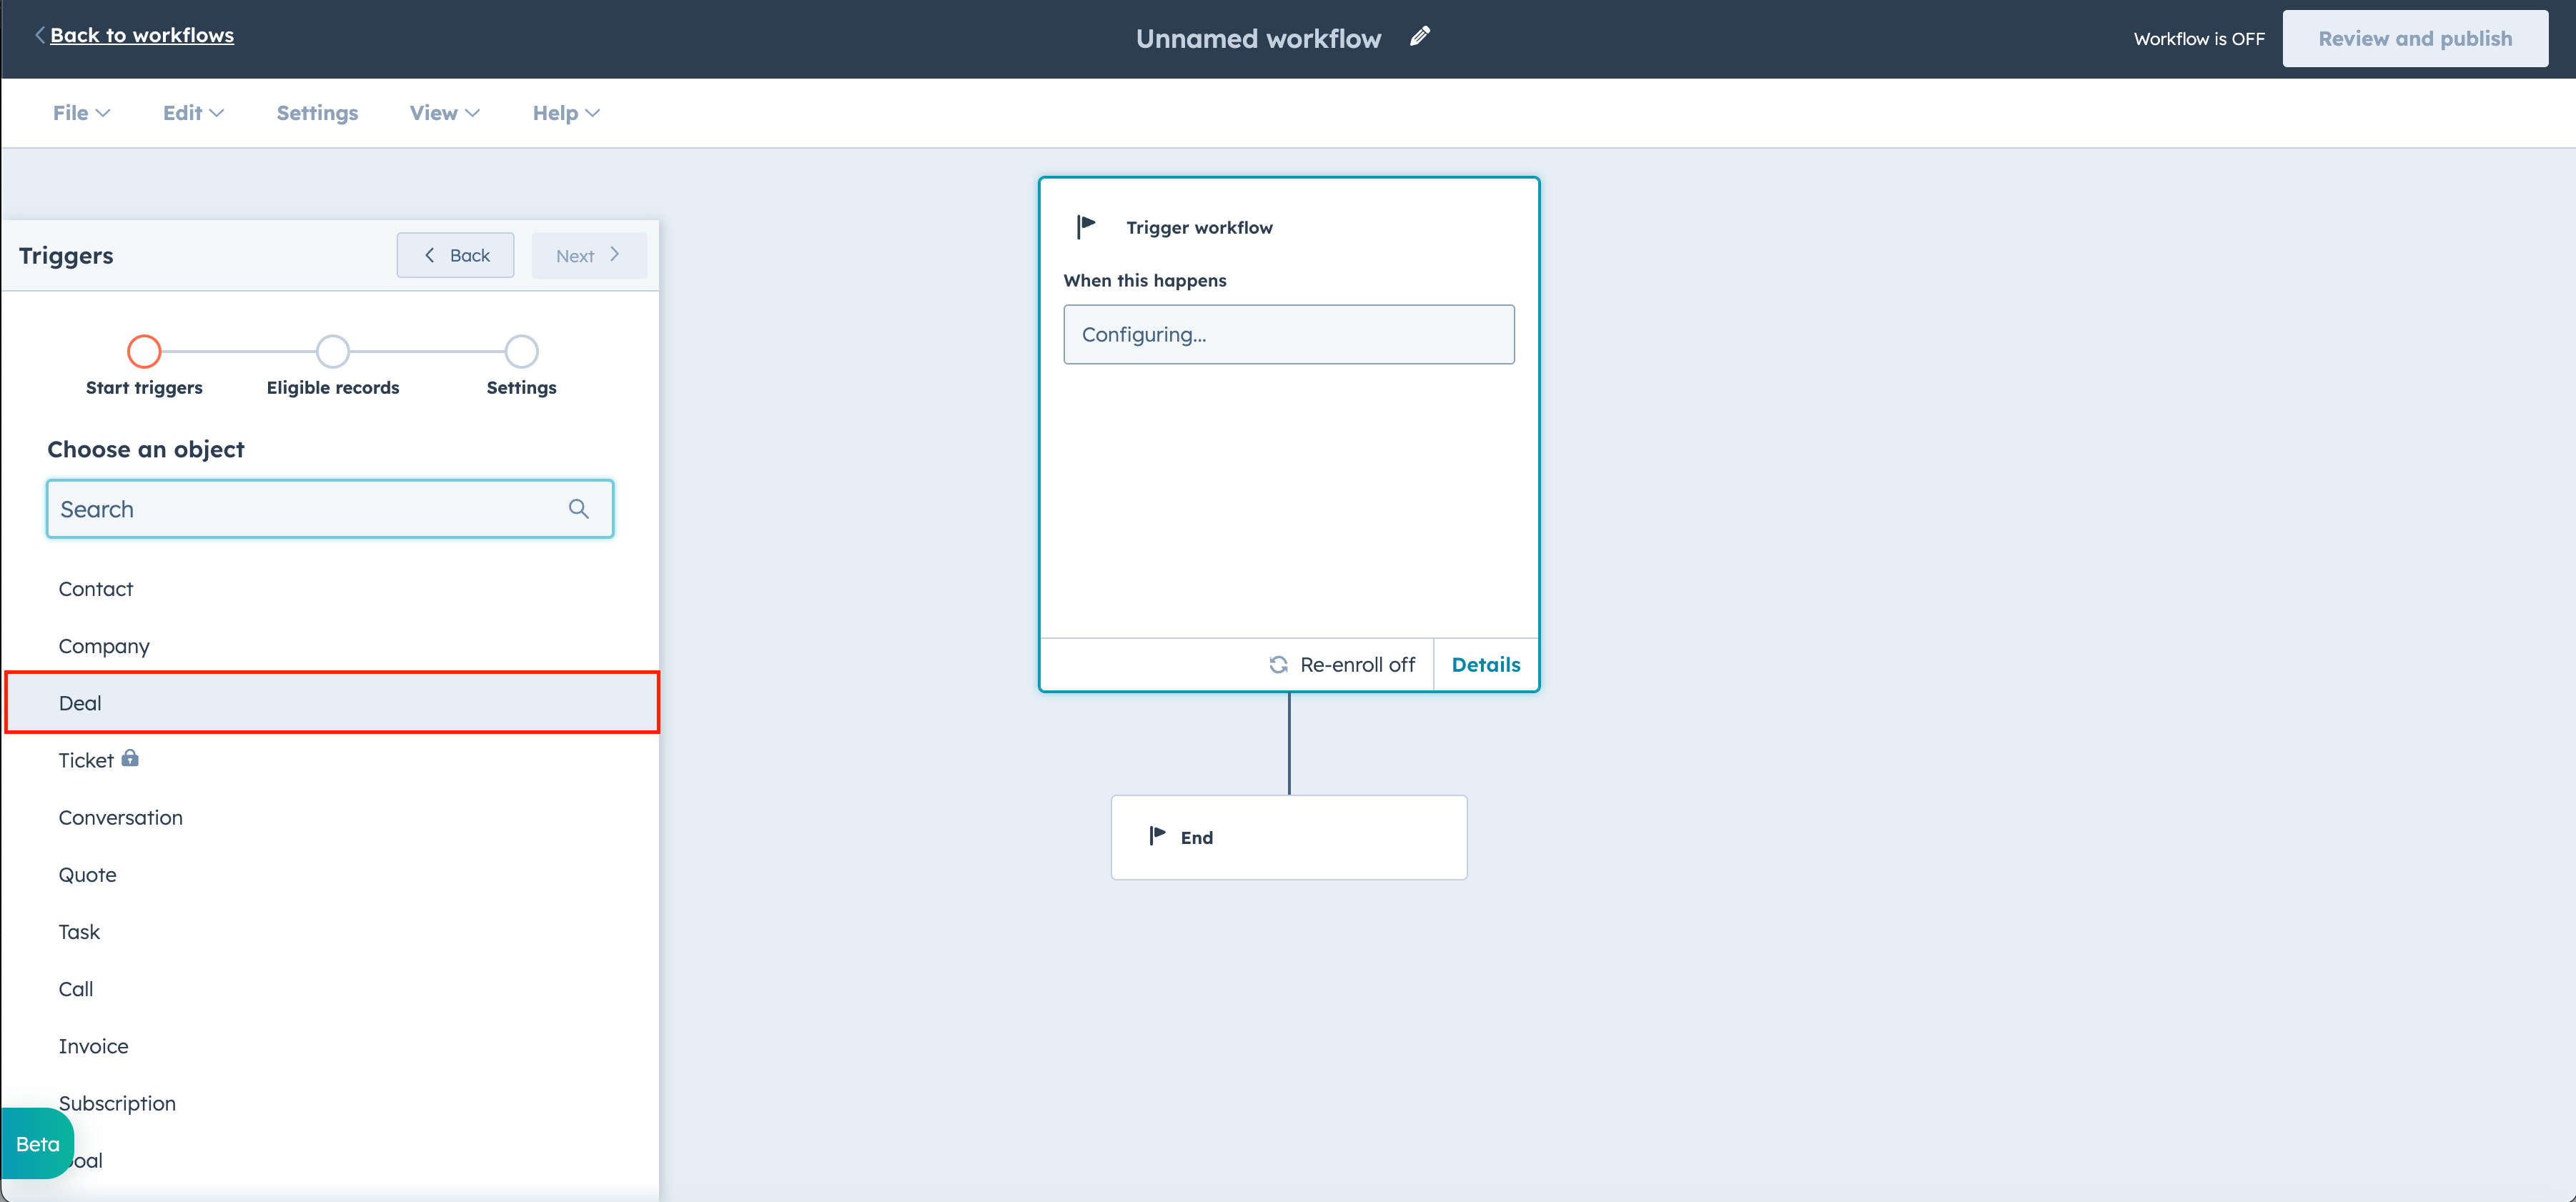
Select Deal Object
Select Next
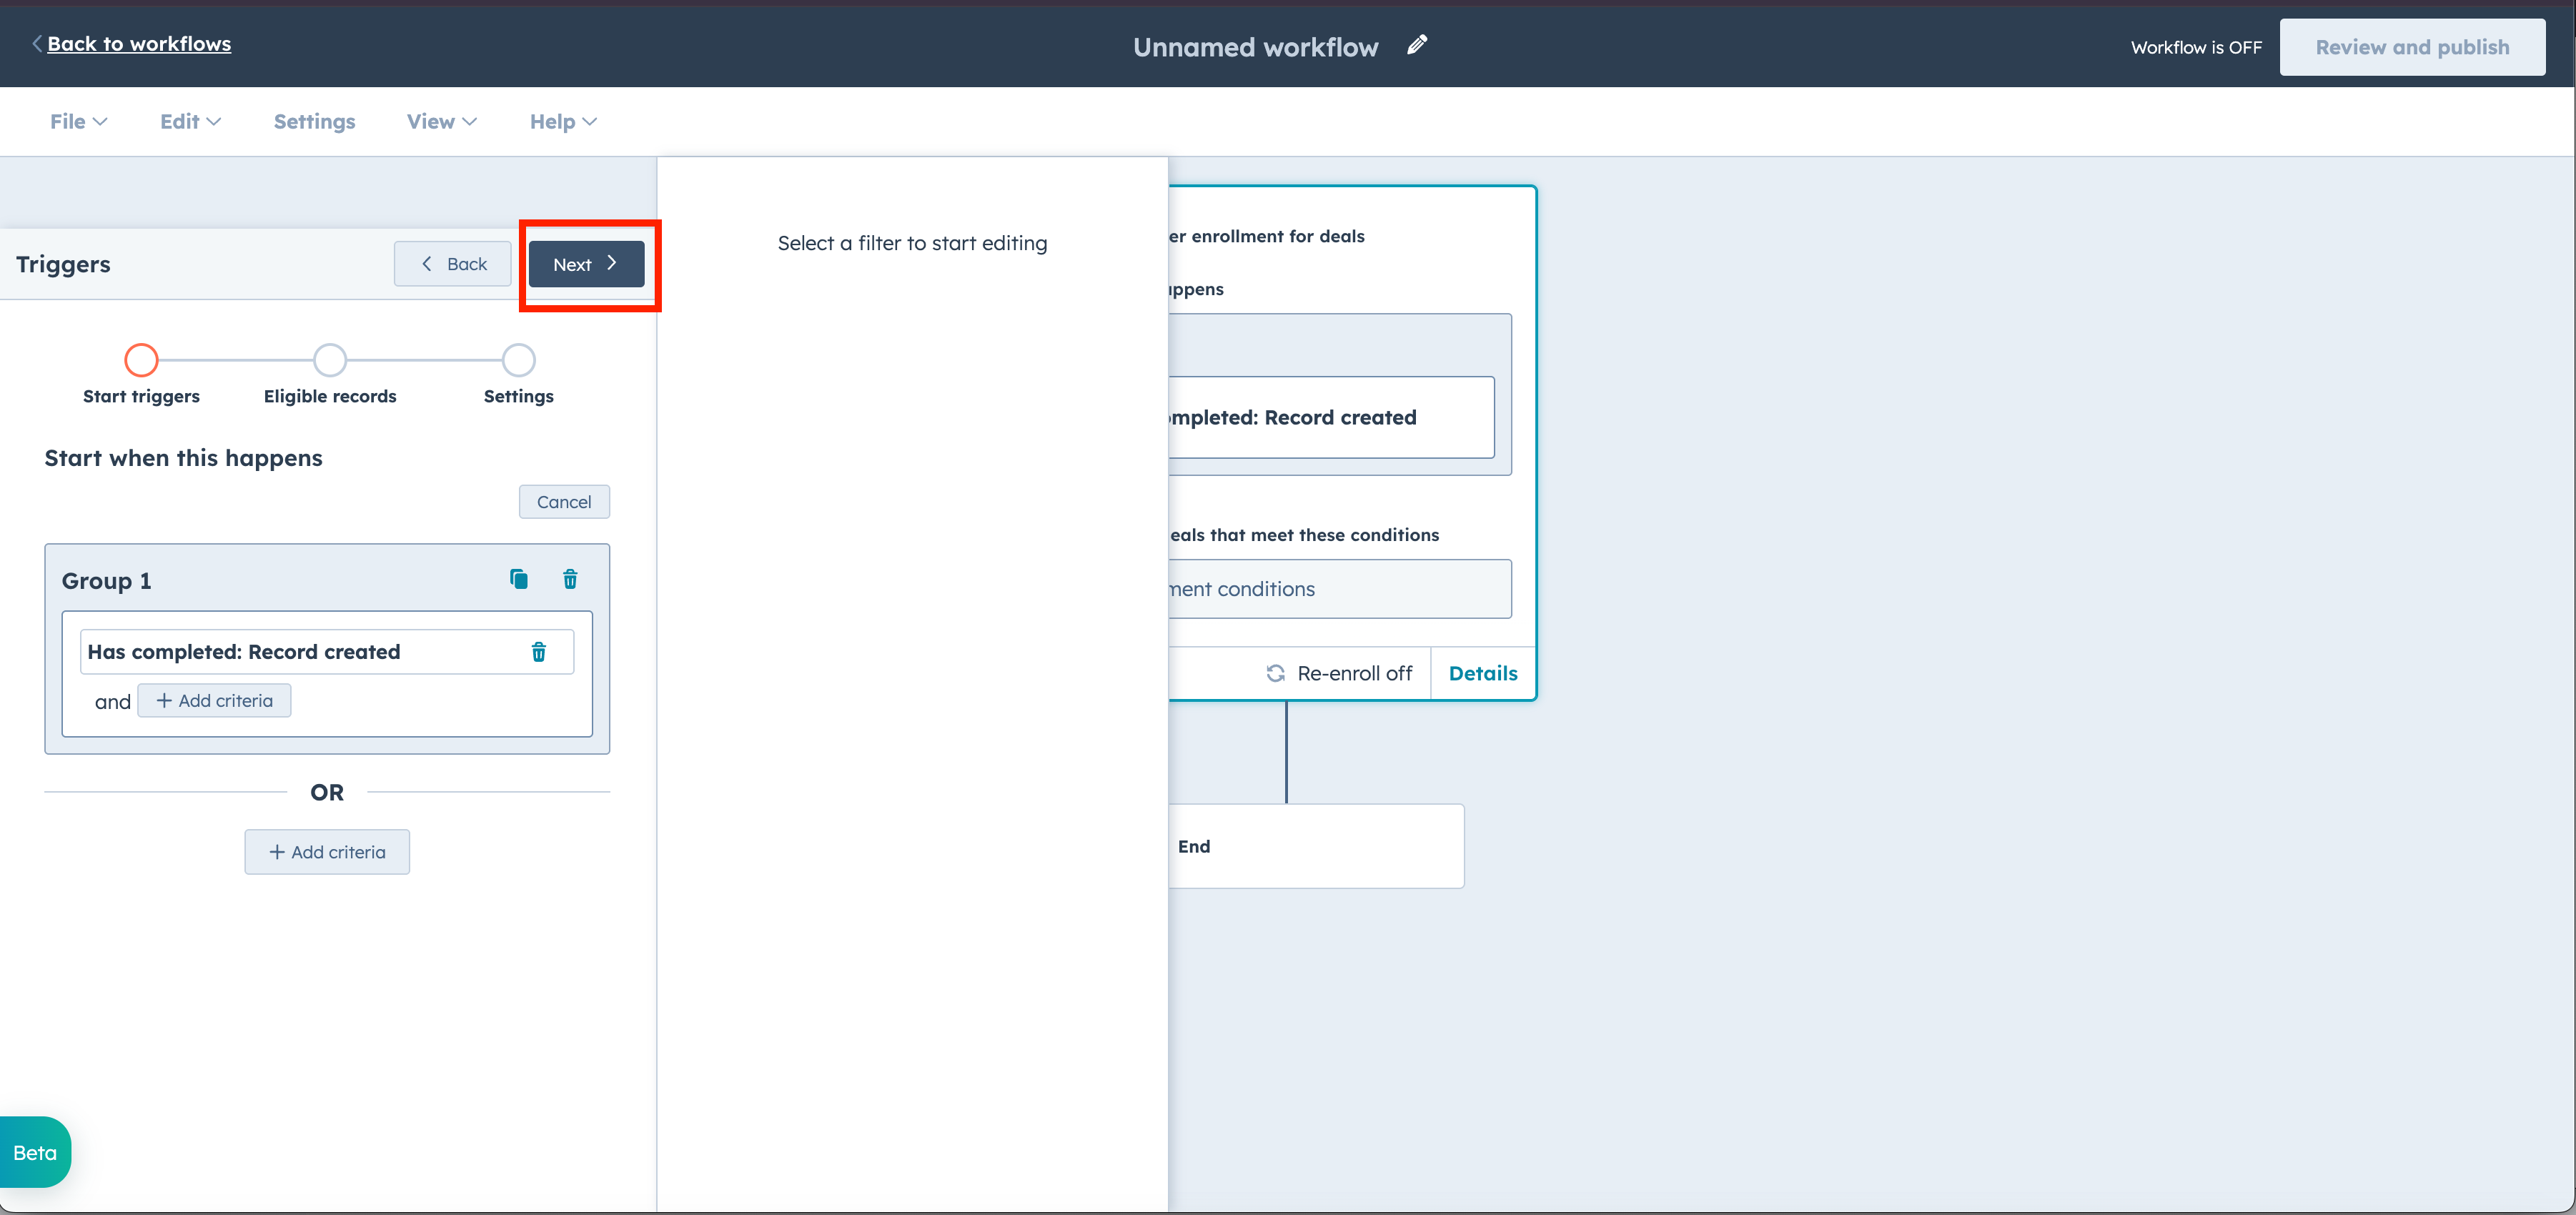
Select Next again
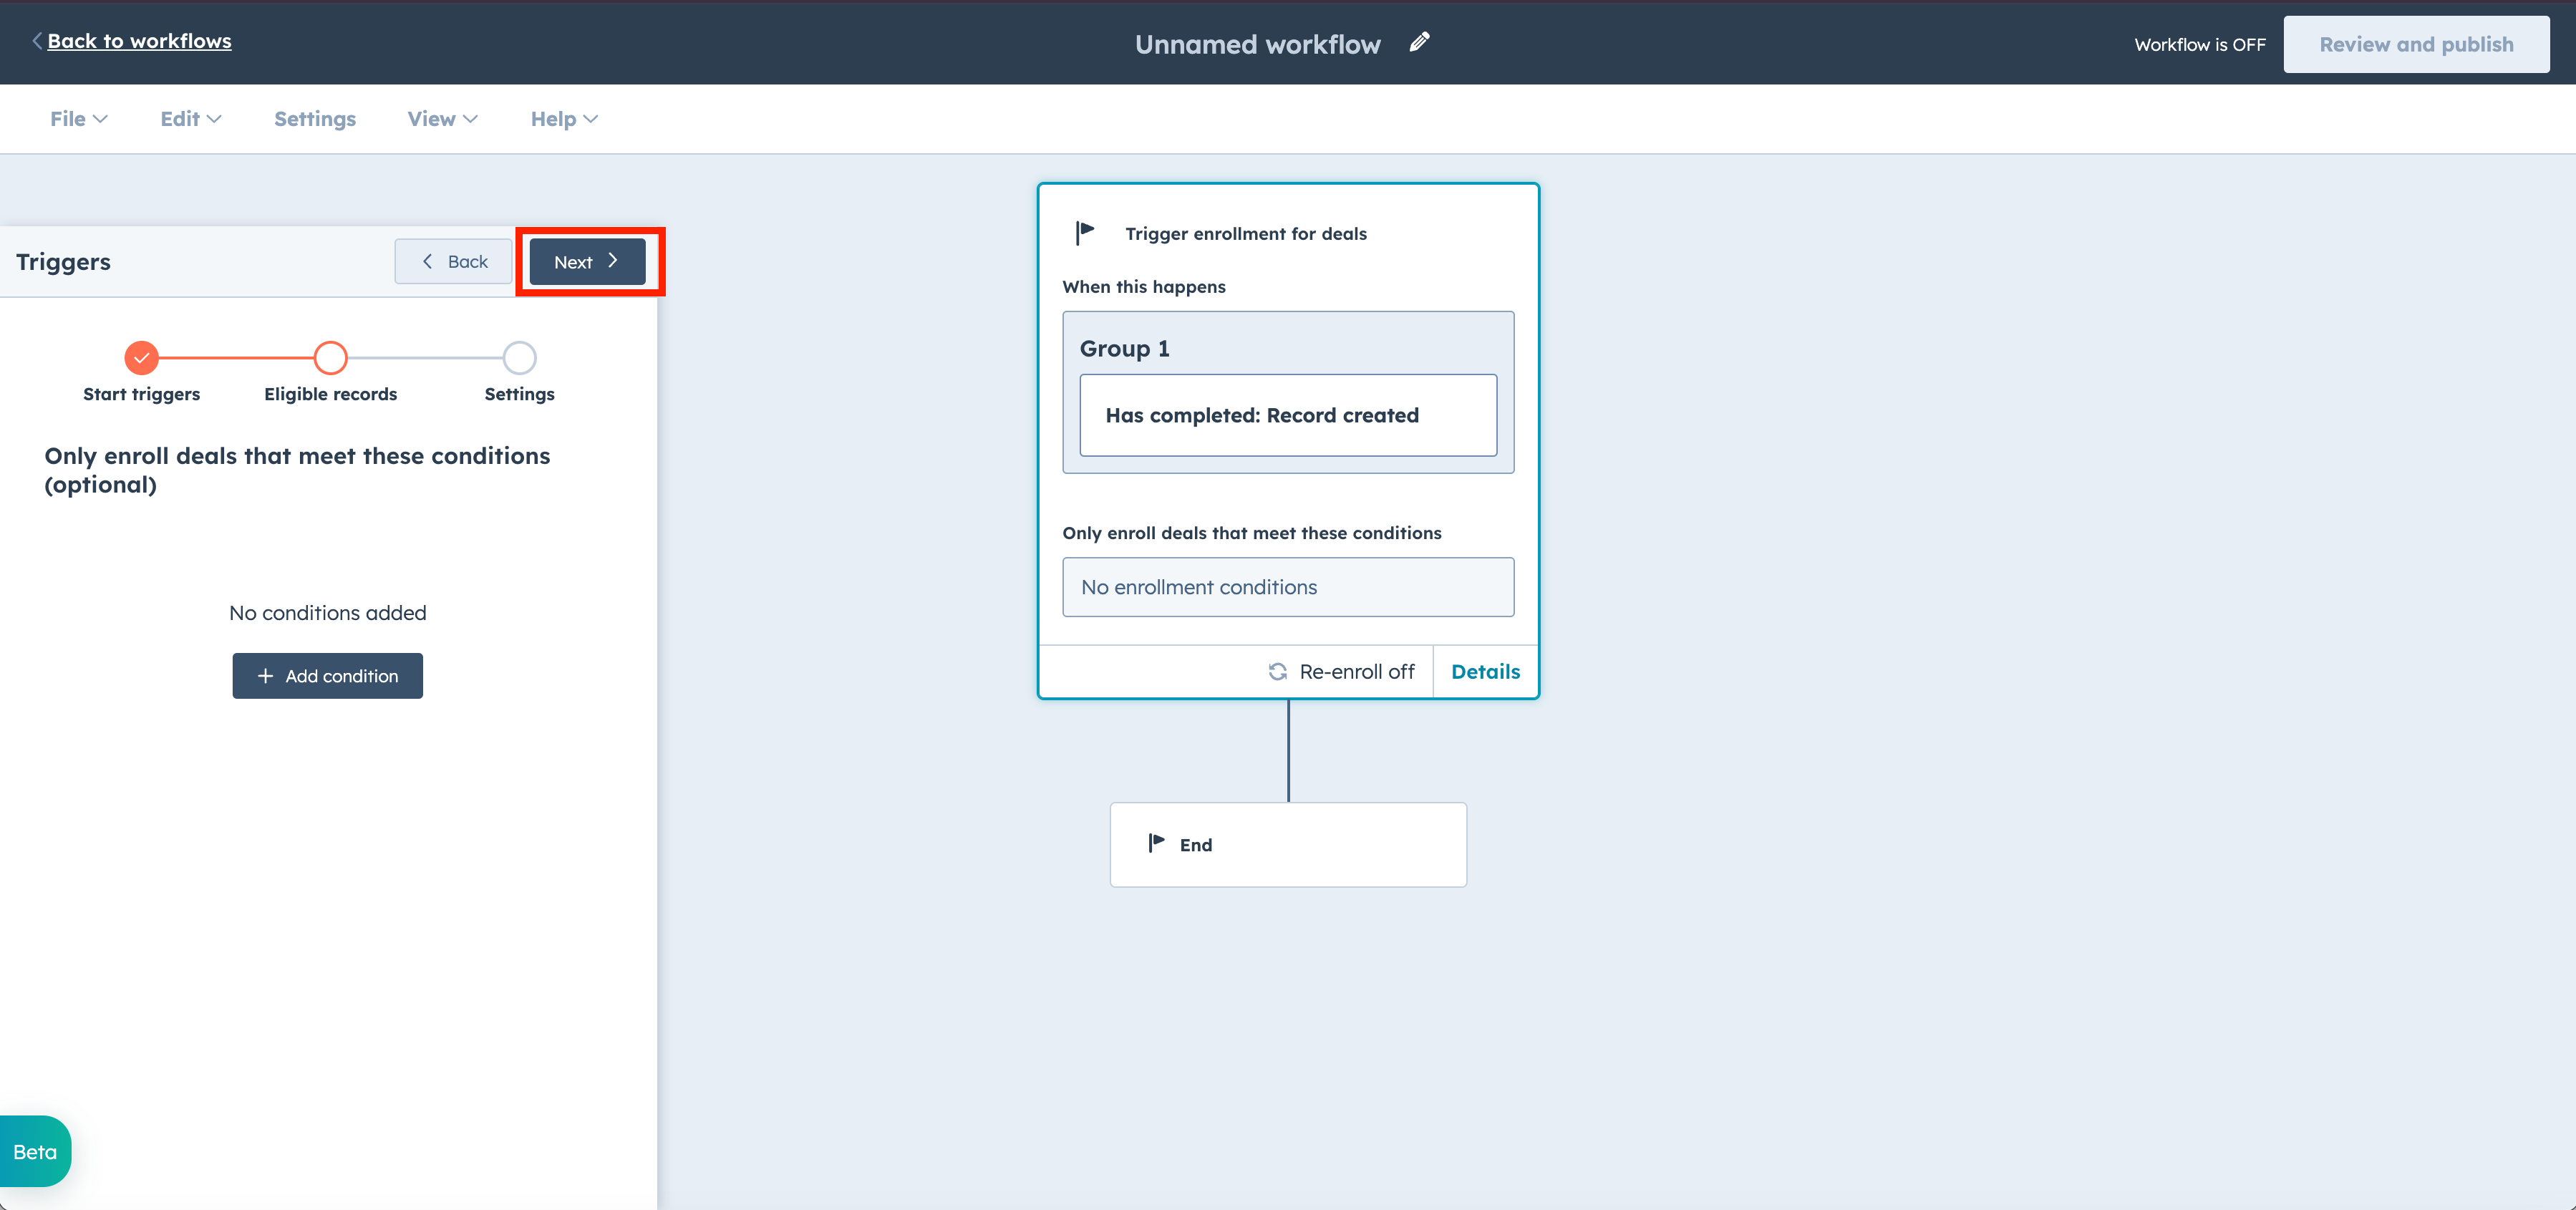
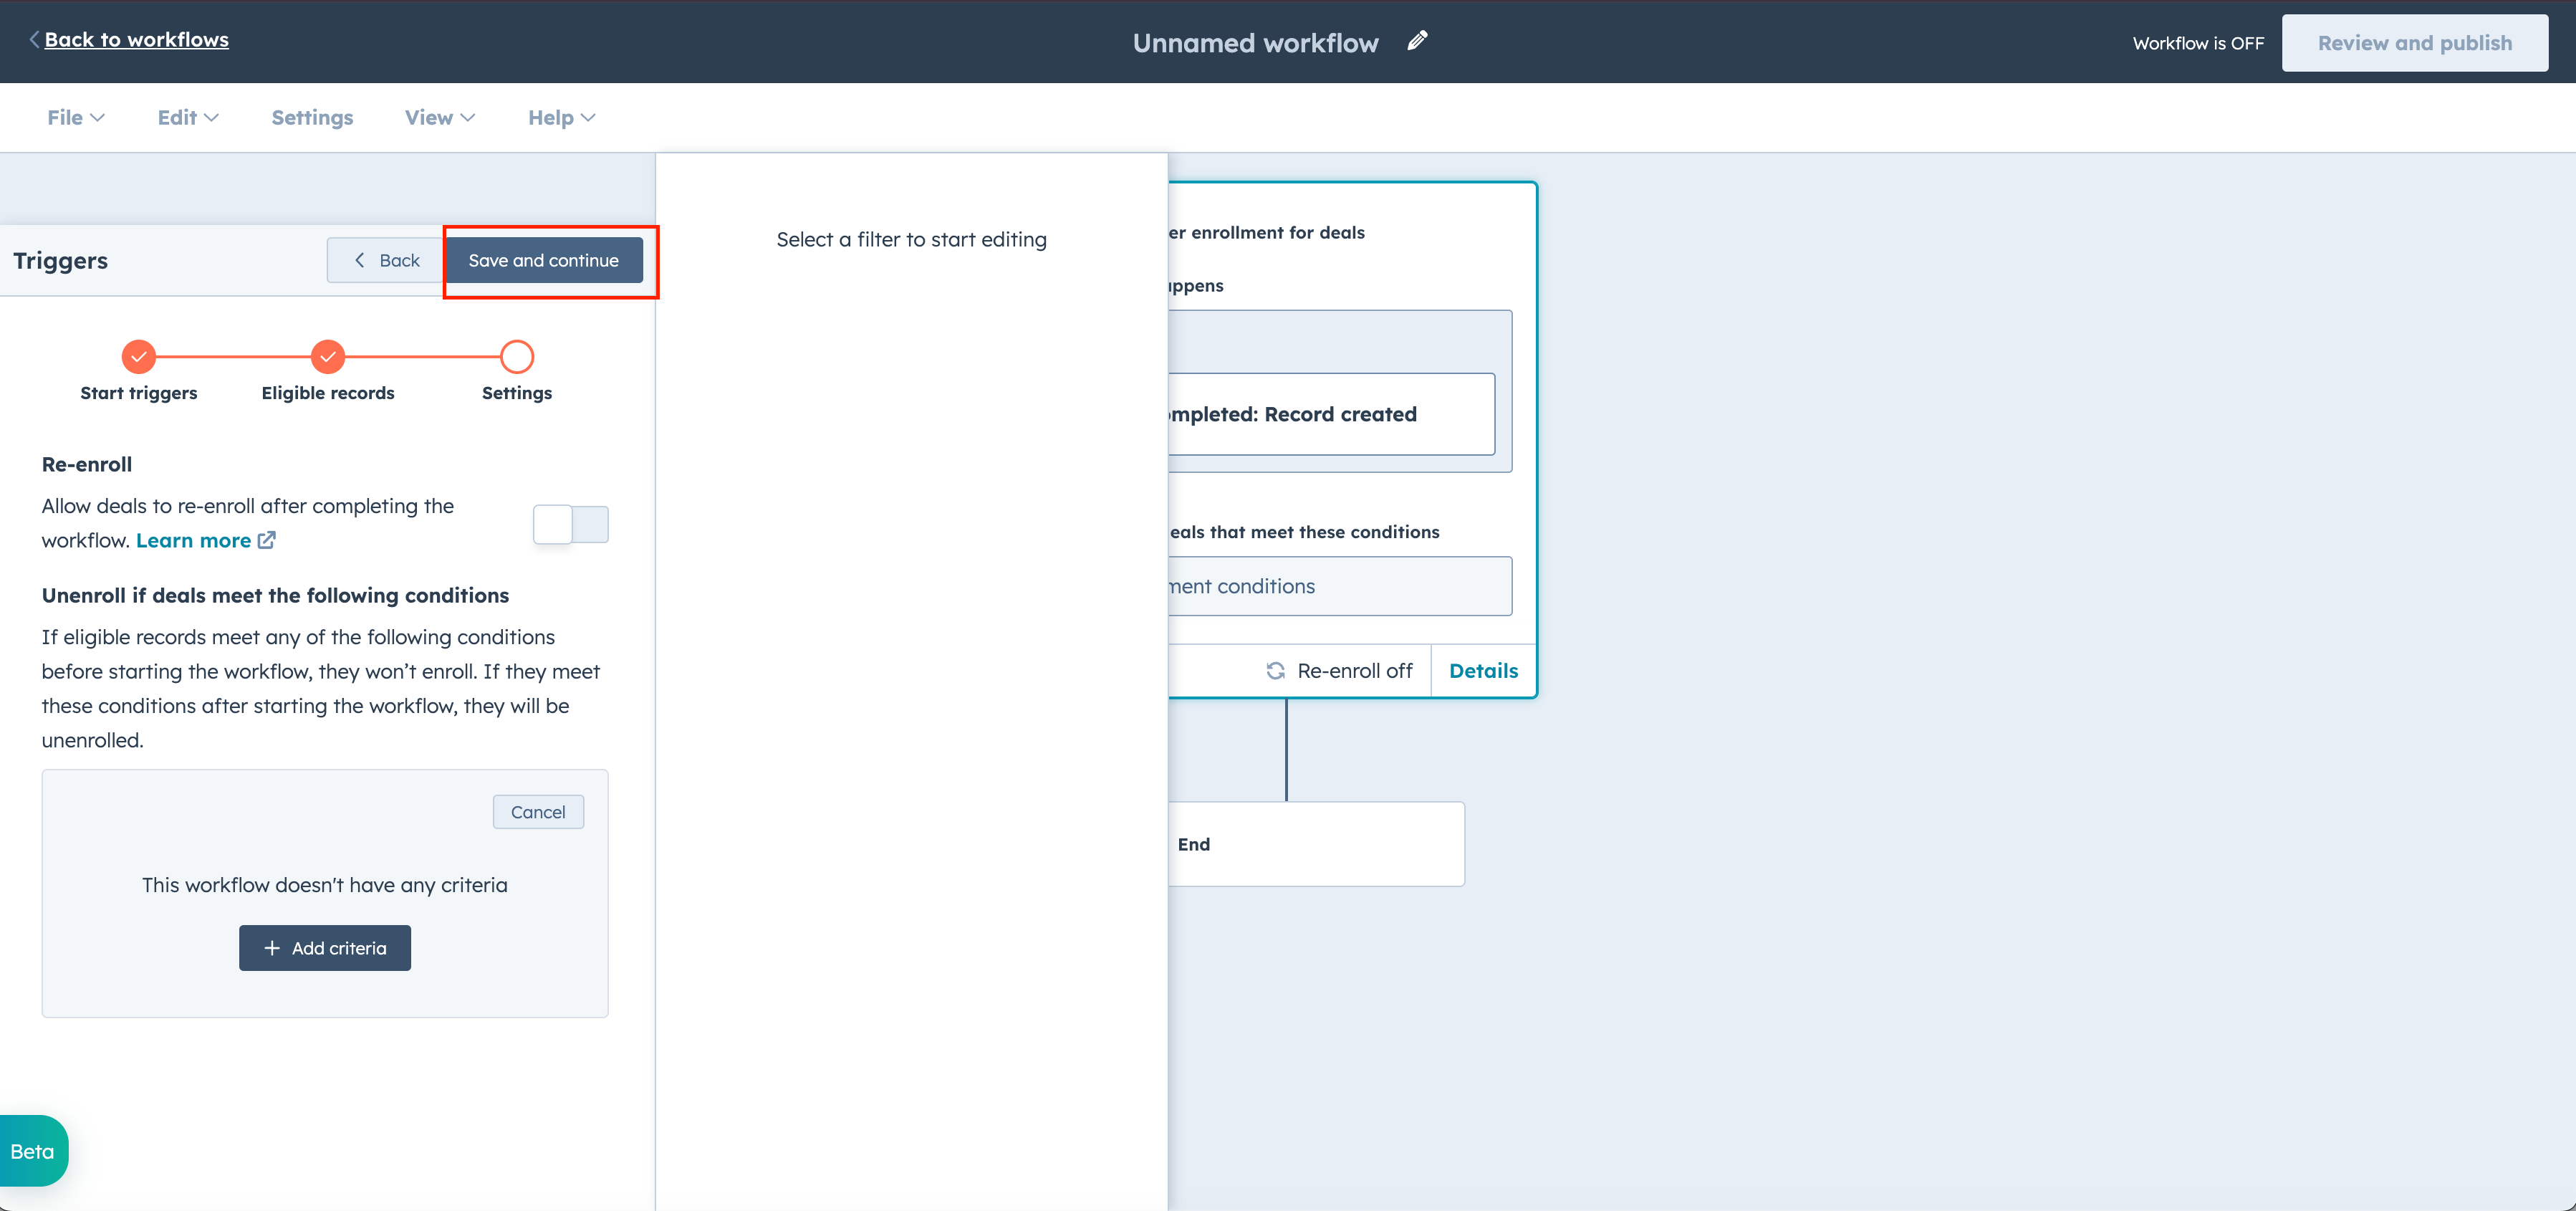
Select Save and Continue
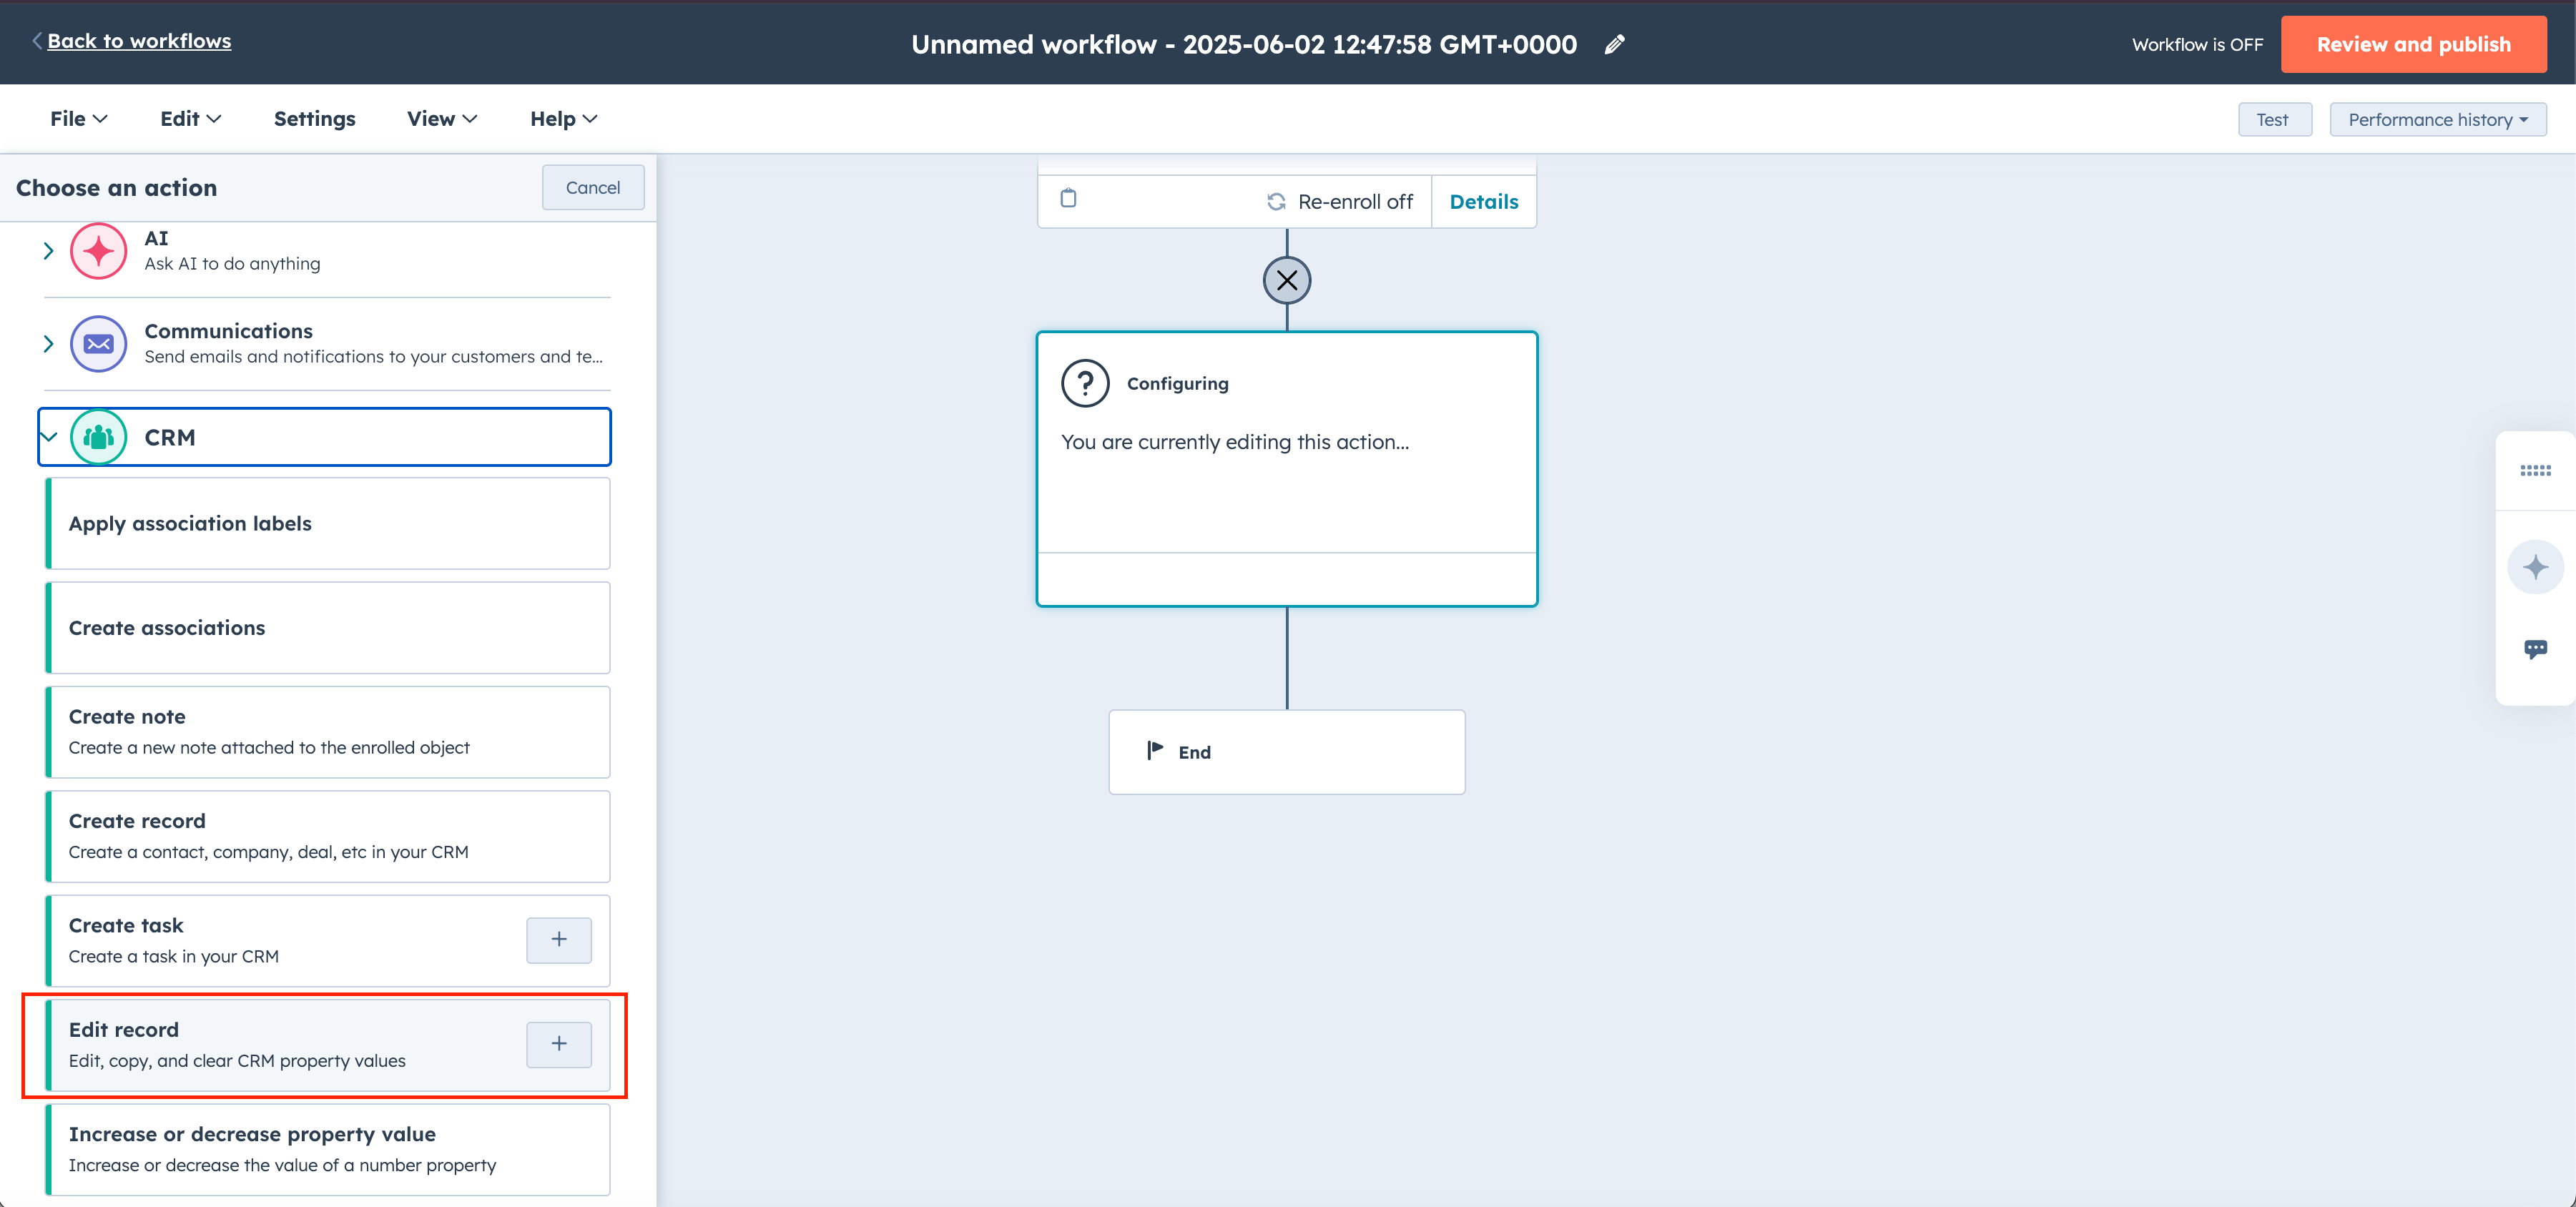
Now that we have our trigger created, we need to have the next step automatically update the Deal object with the data from Contact object. On the left side of the UI, select CRM and then Edit Record.
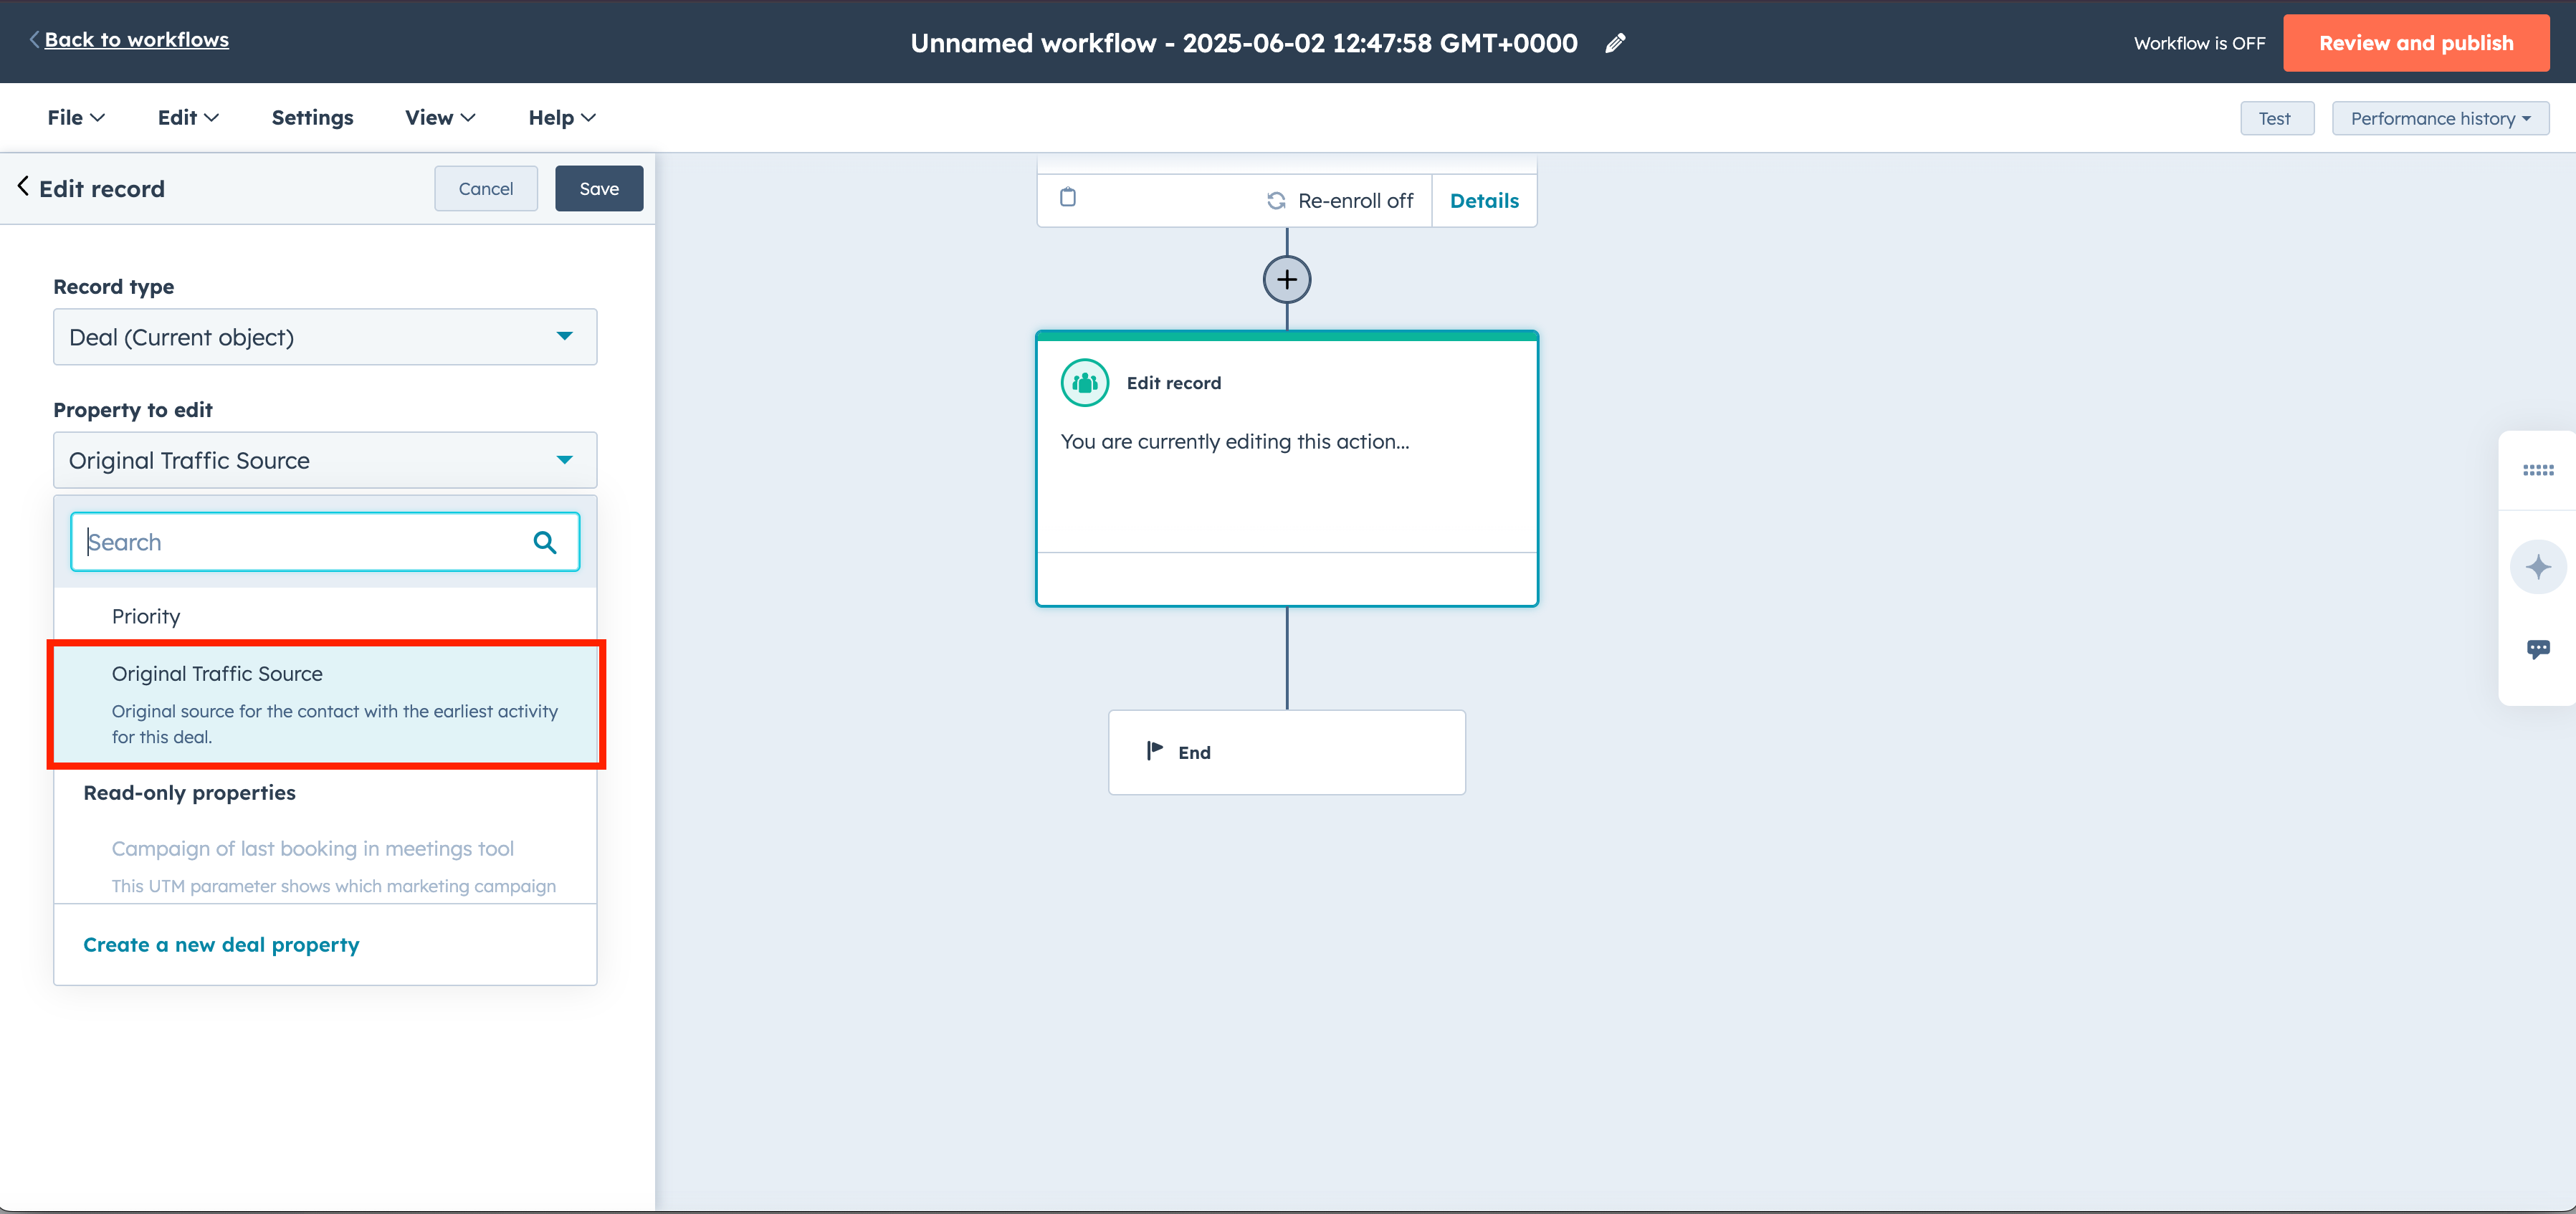
On the first property to edit dropdown, select original source.
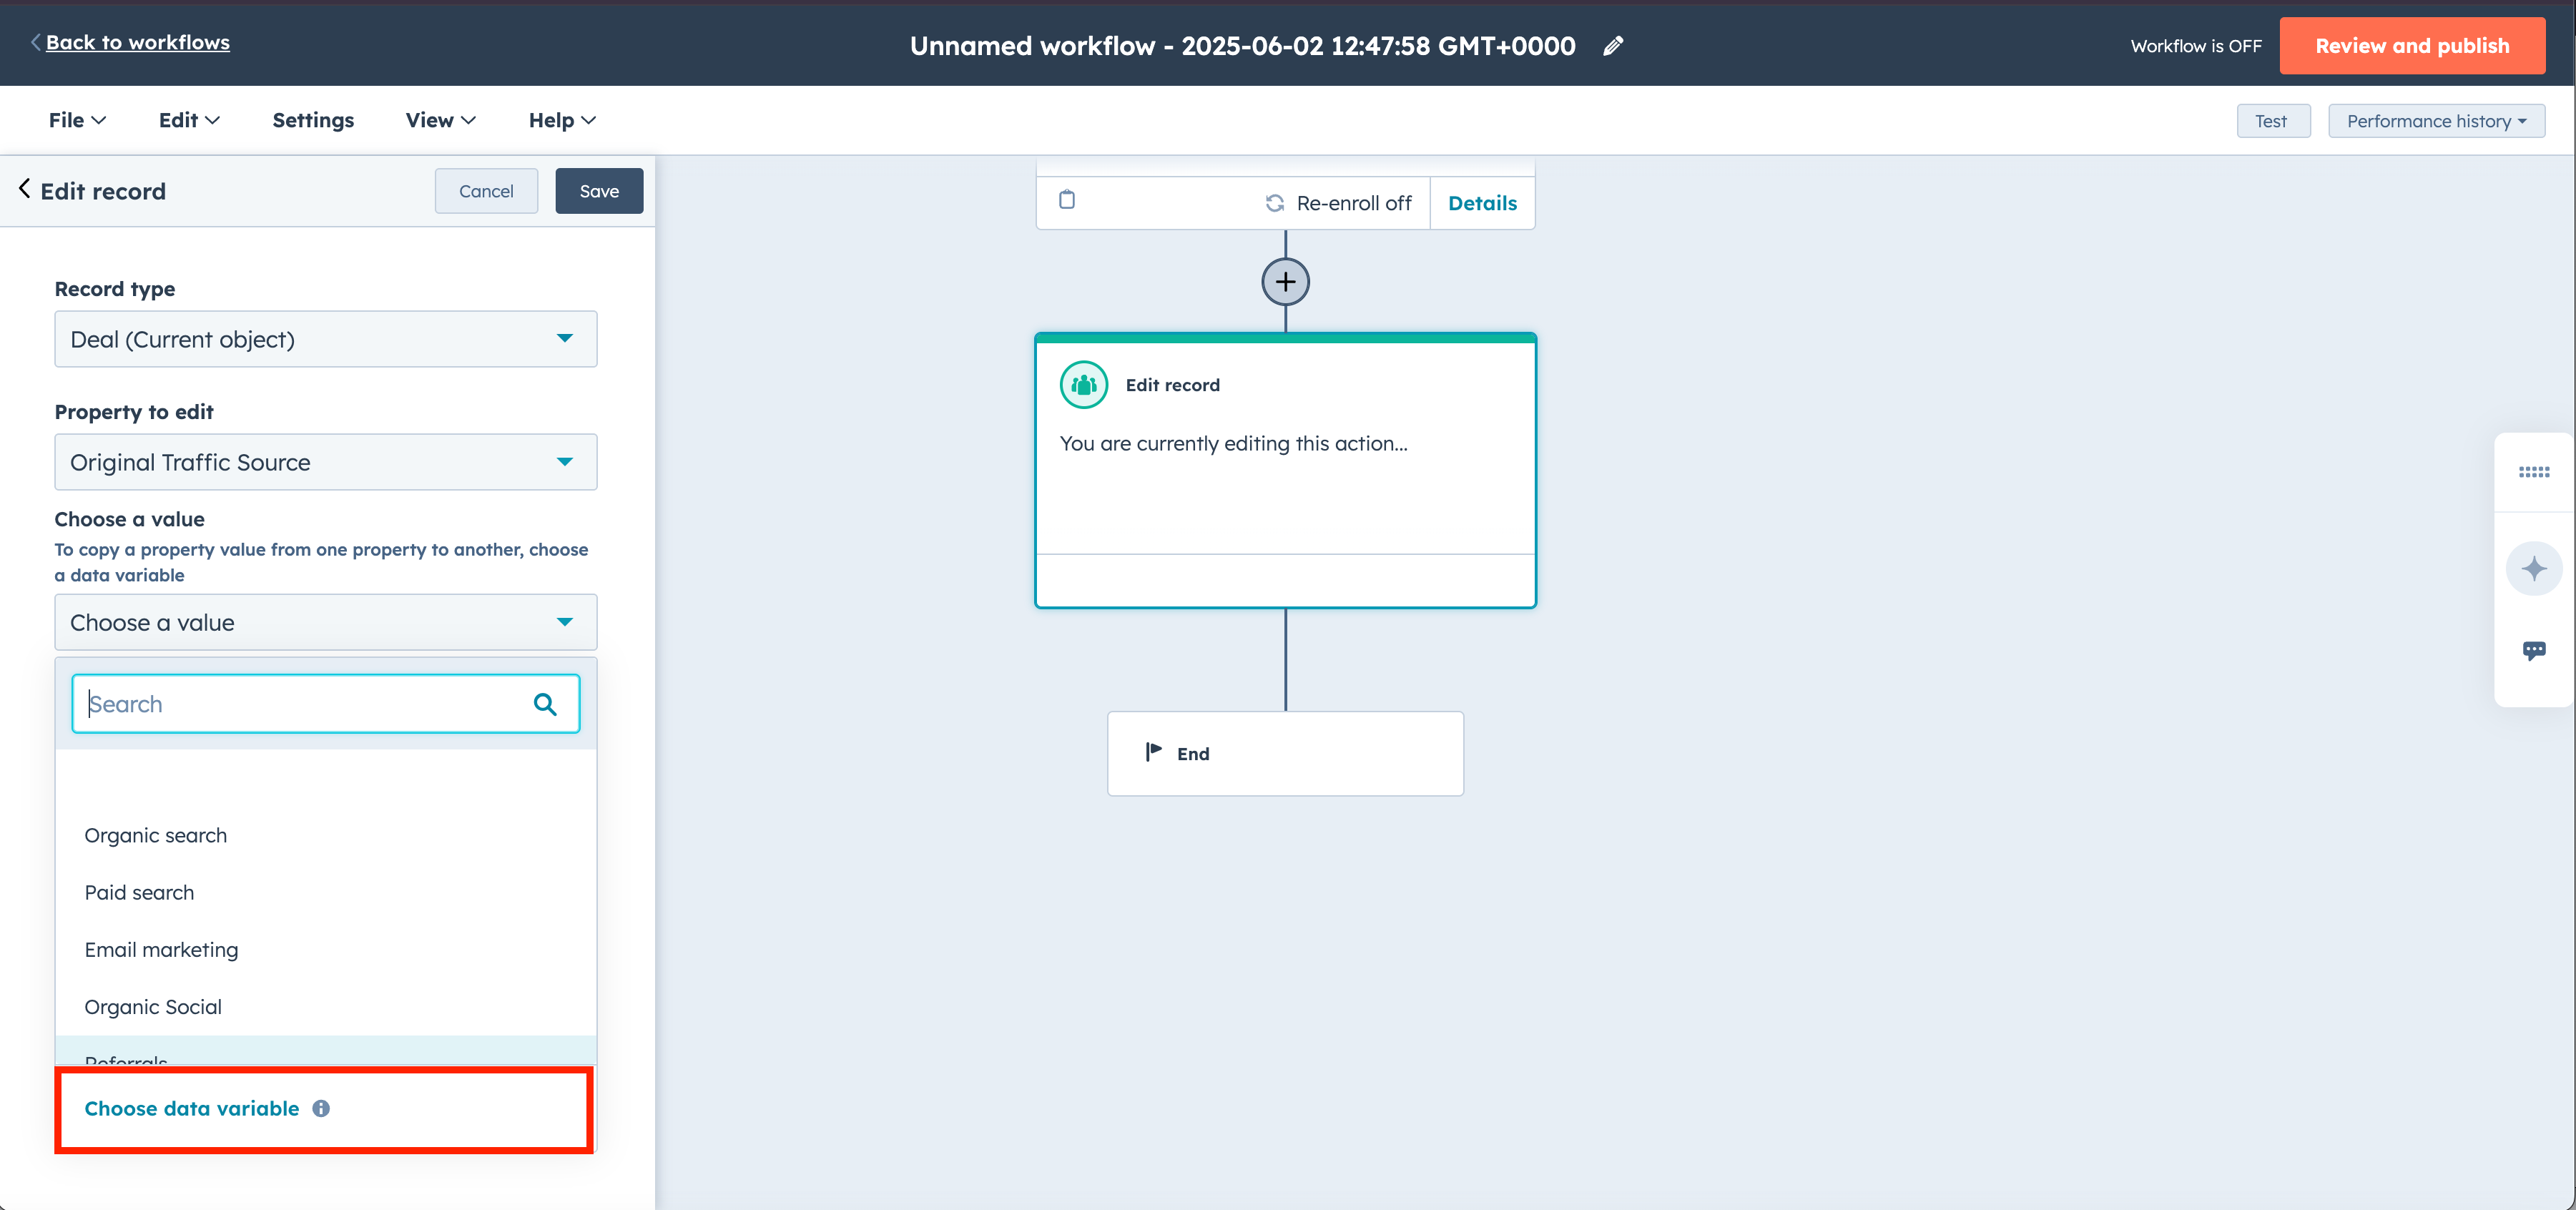
In the choose a value dropdown, select choose data variable.
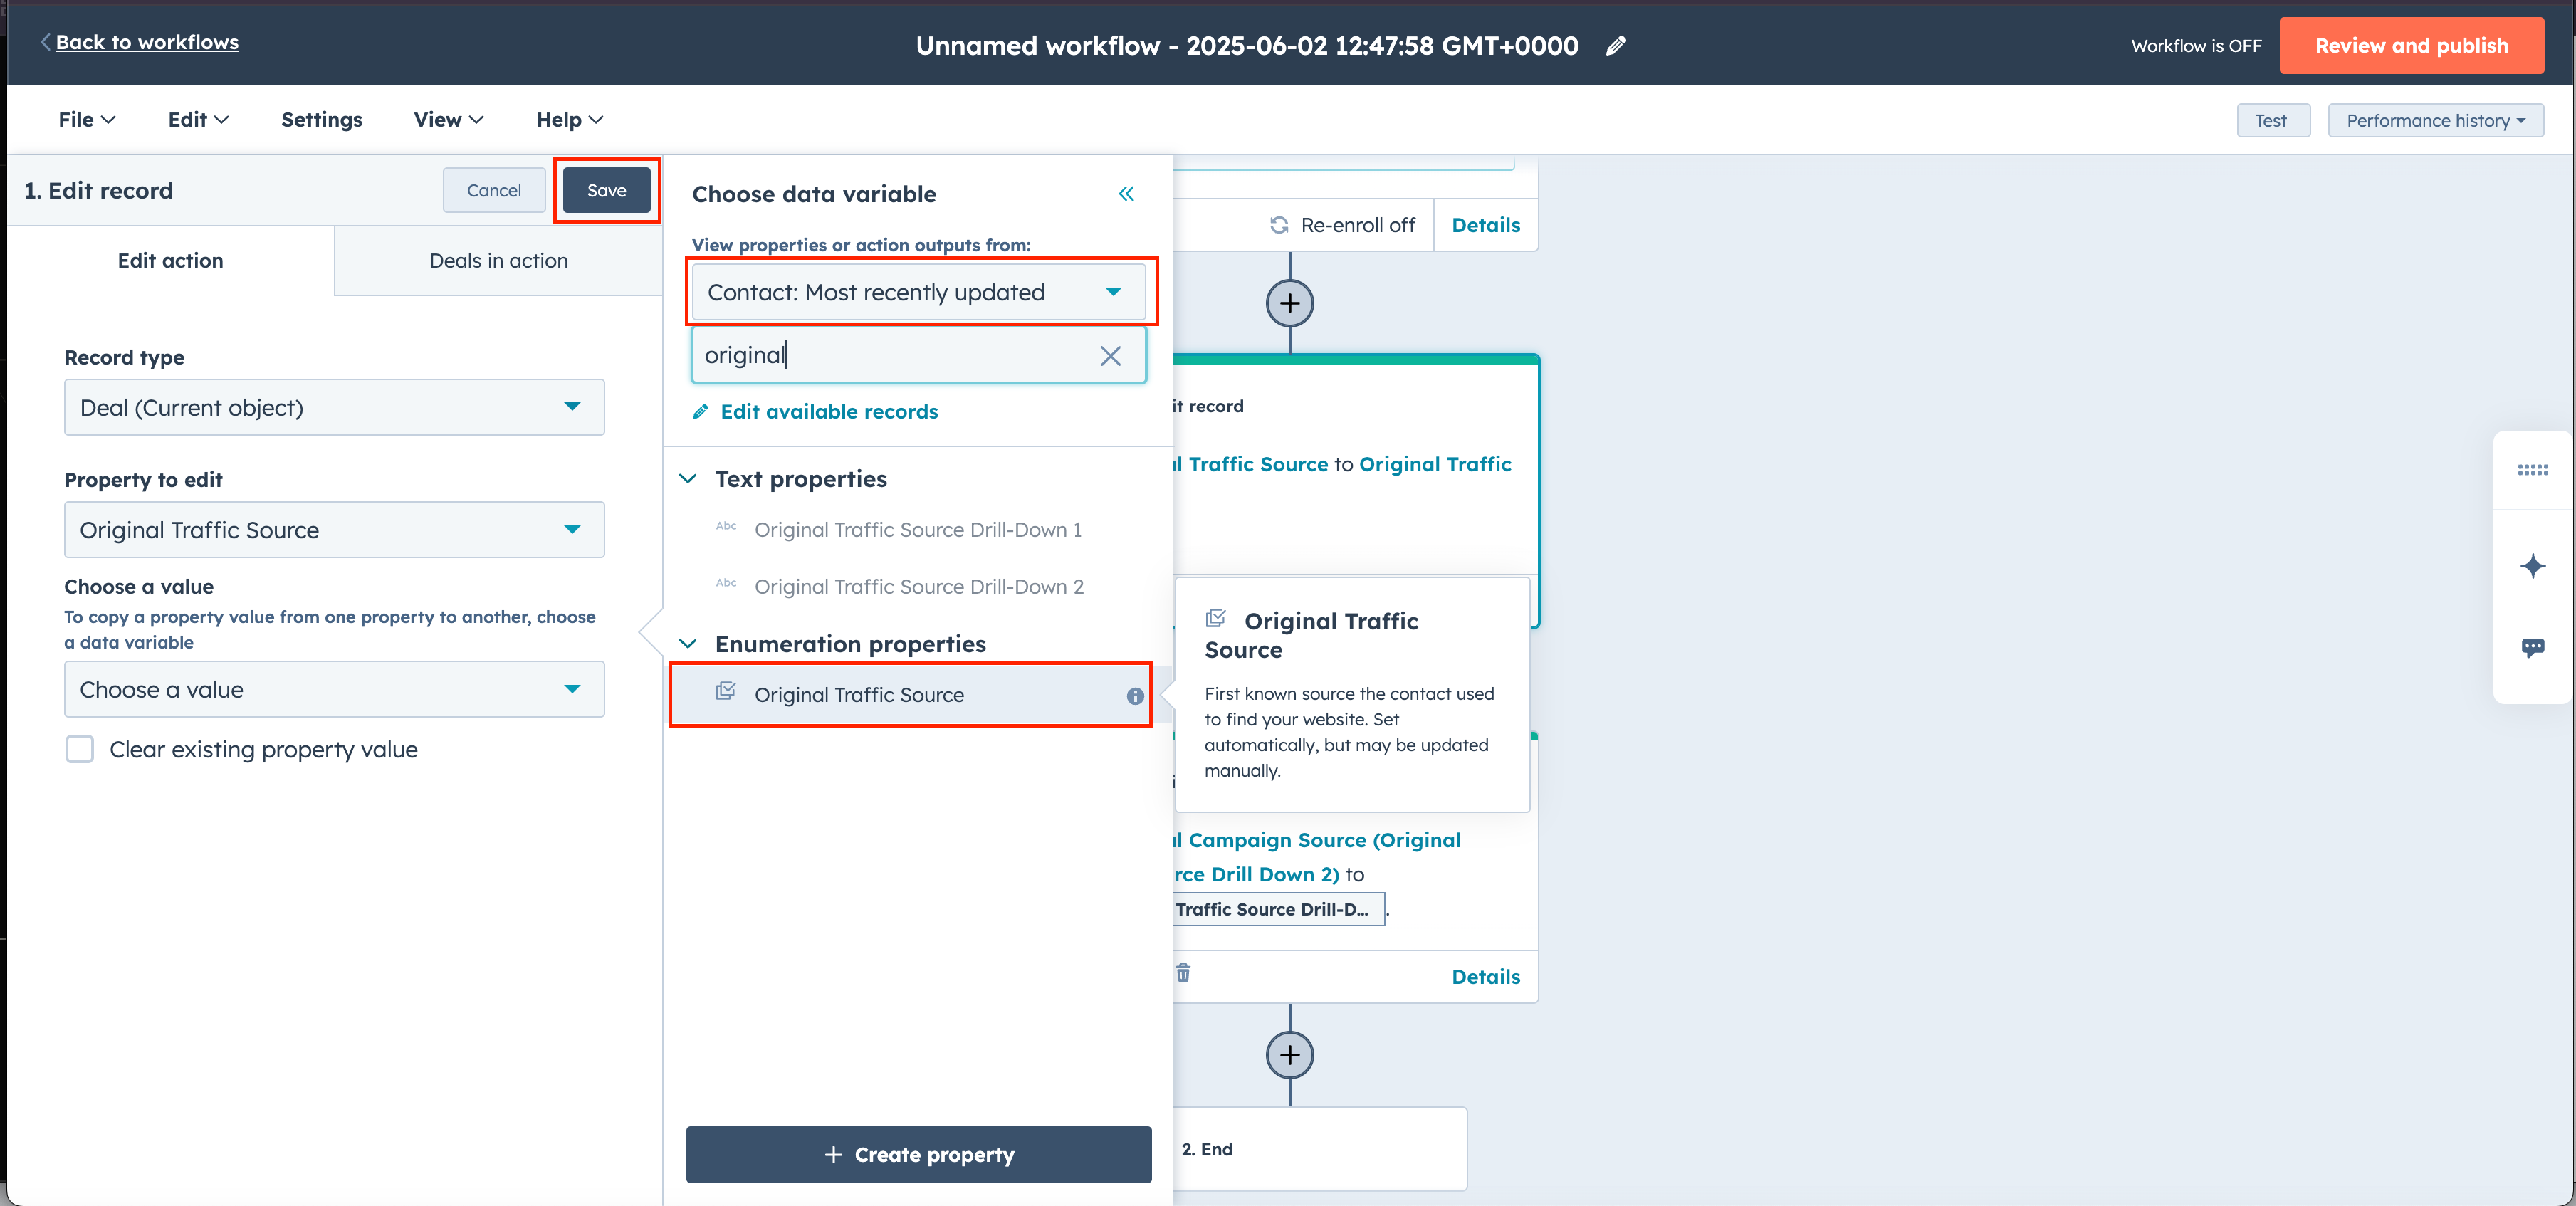
Under enumeration properties, select Original Traffic Source and then save your changes.
You might have noticed in the previous step, that you can only do this for the Original Traffic Source field. If you tried doing this step again for Original Traffic Source Drill Down 1 the selection are disabled. To work around this limitation, we have to create new properties which we can do in this workflow editor.
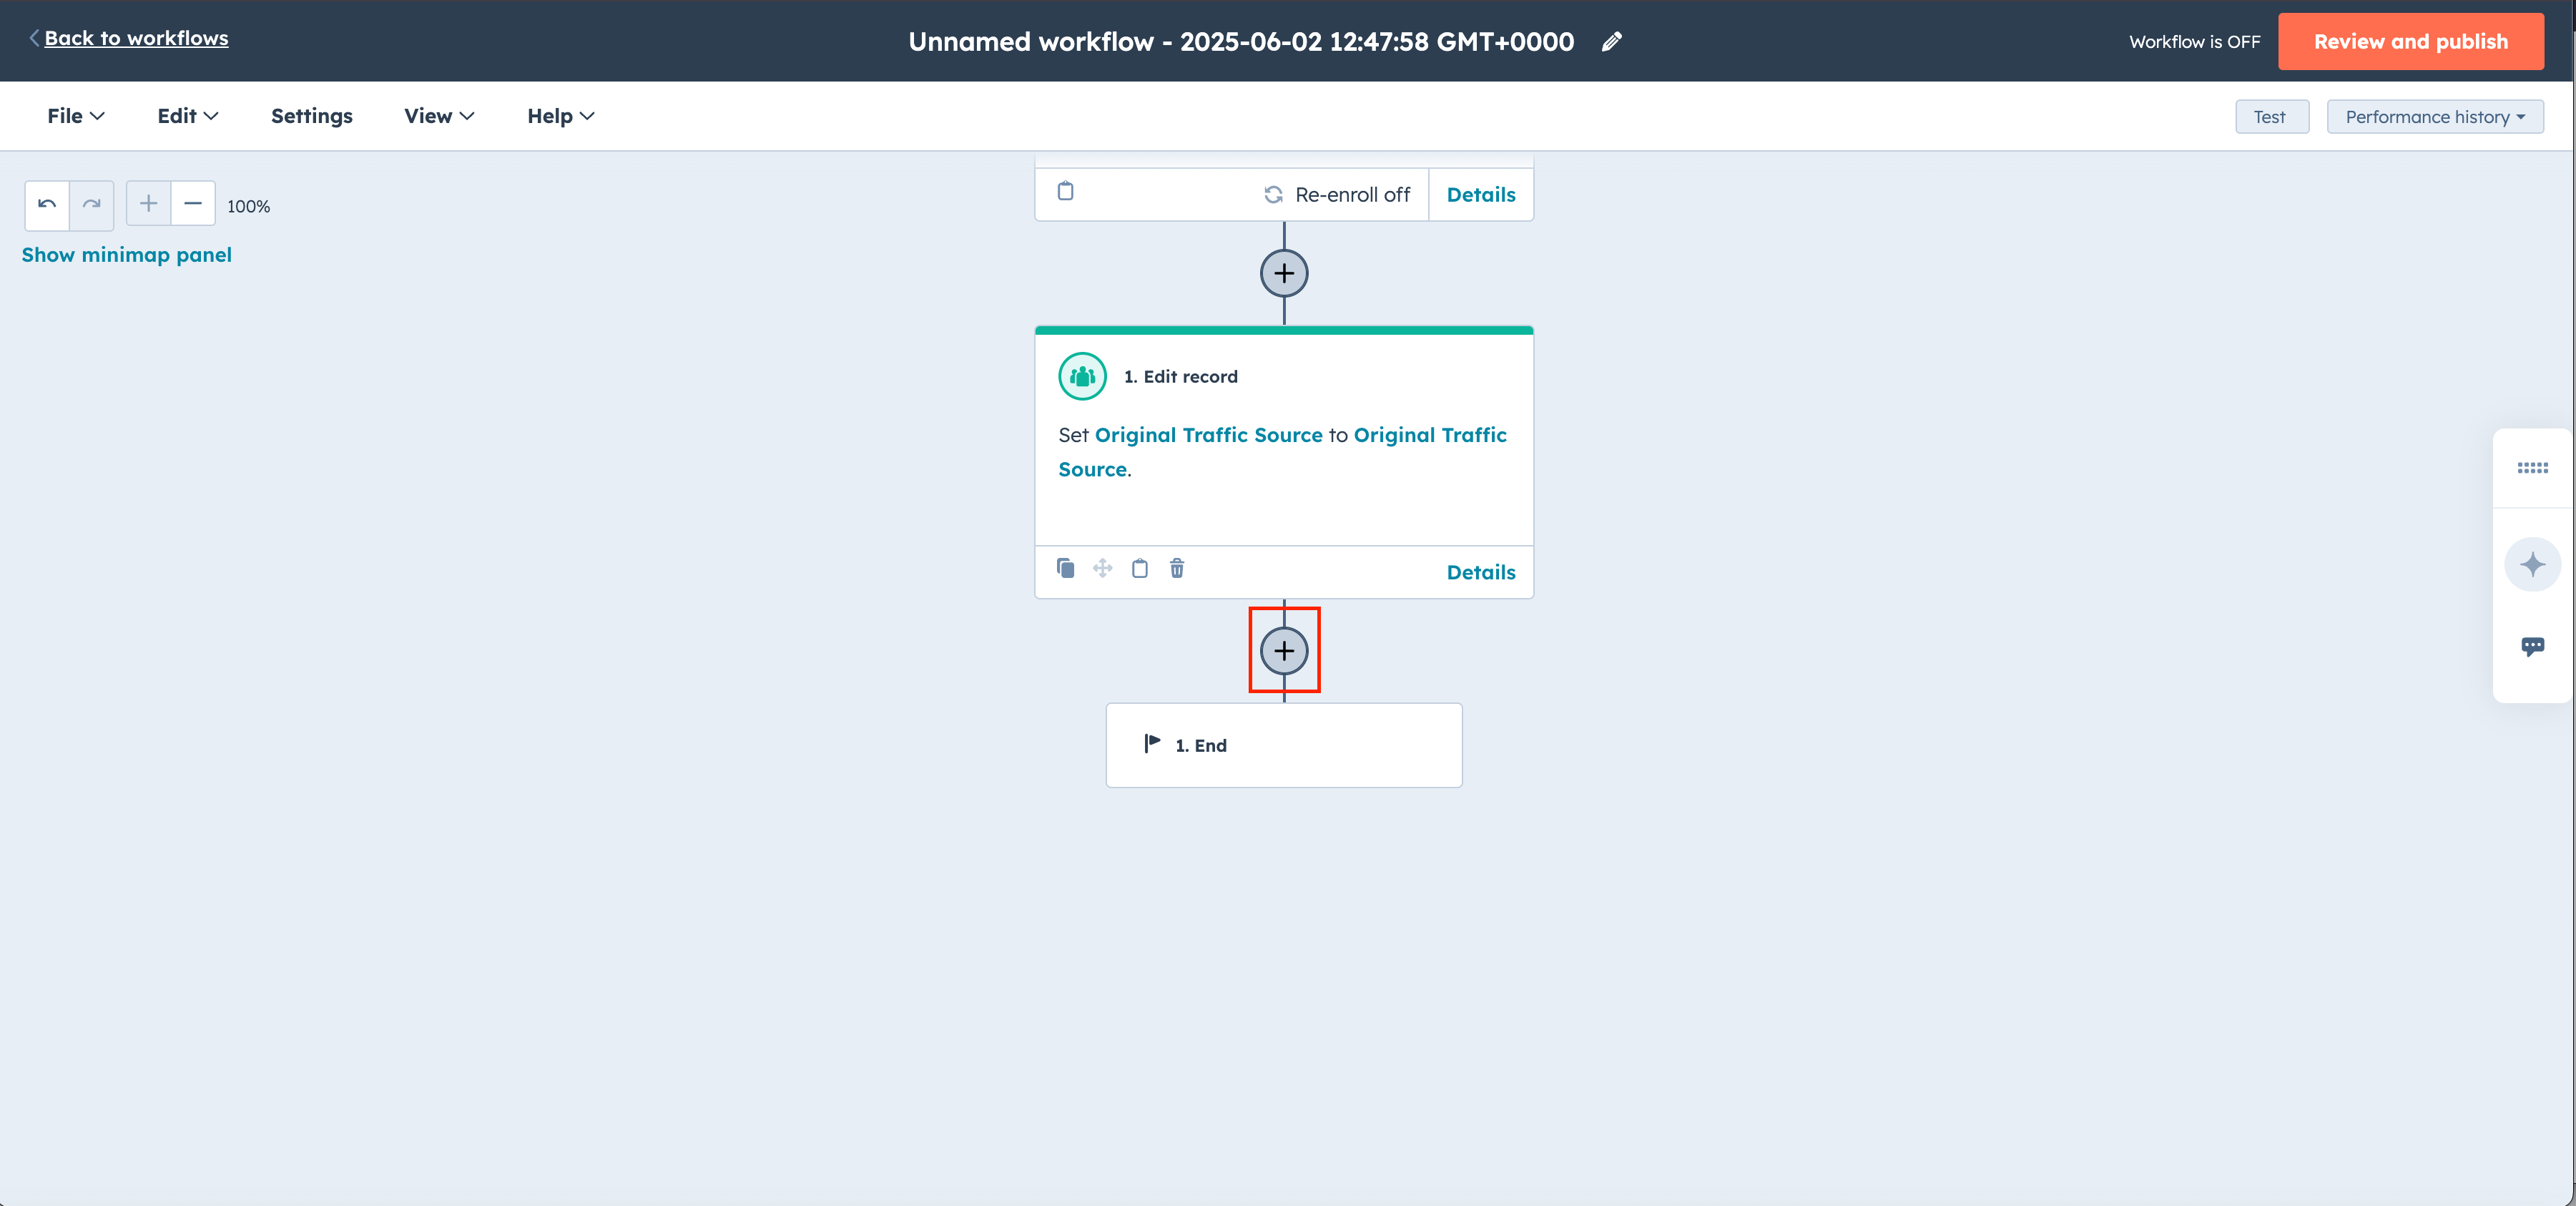
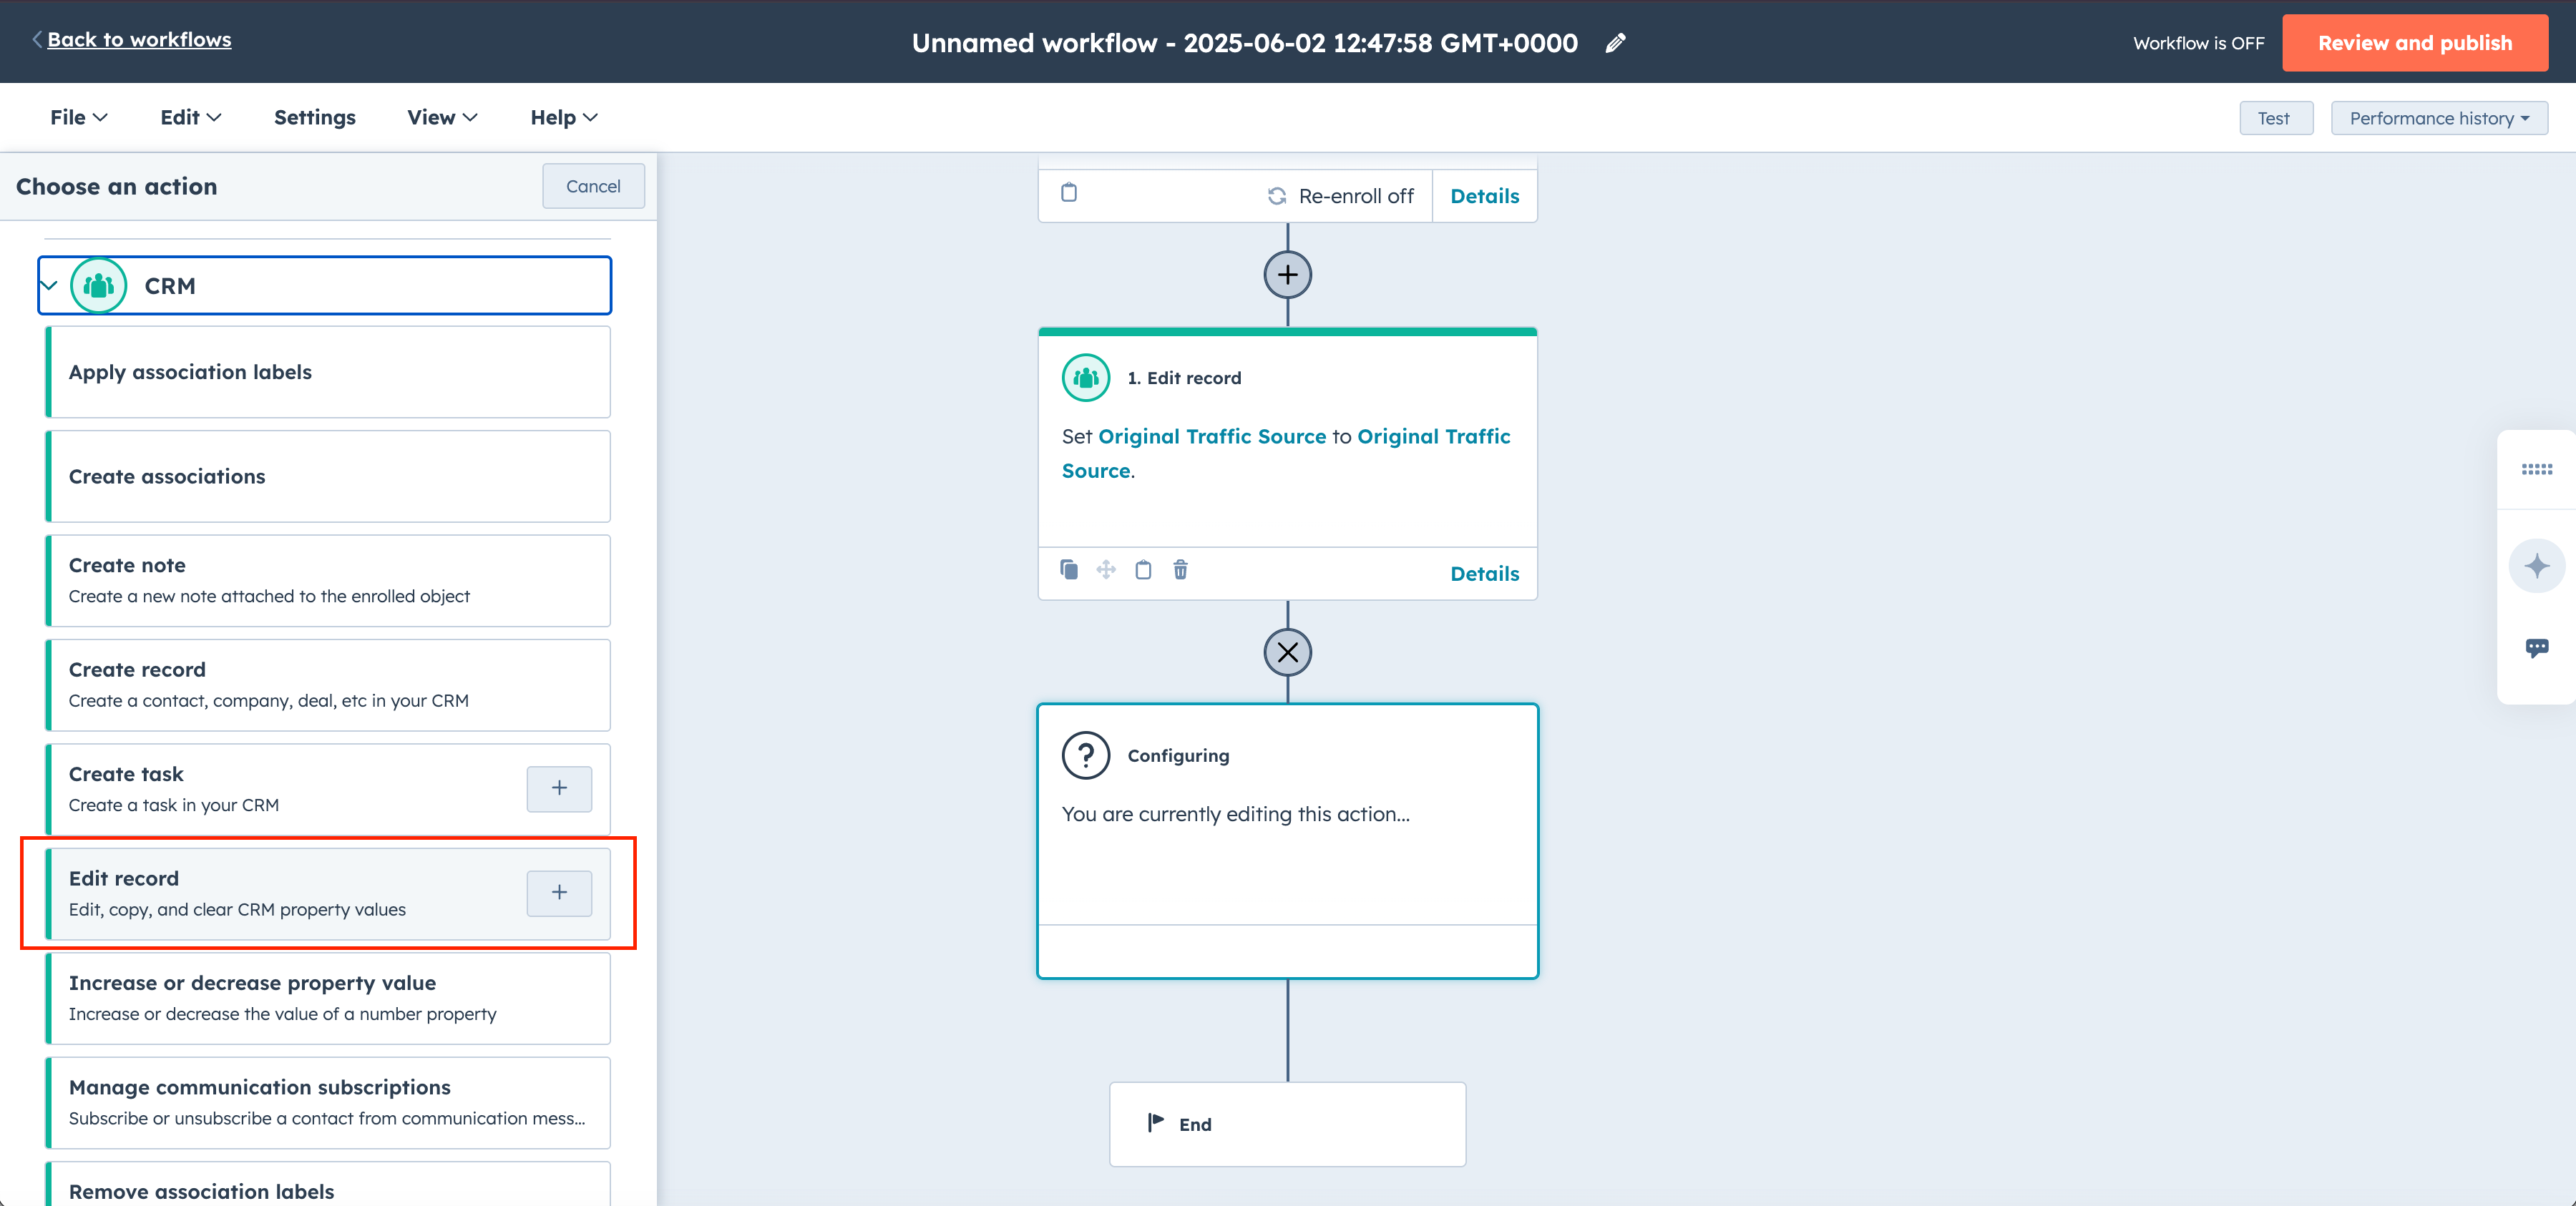
Select Edit Record again
Select create a new deal property.
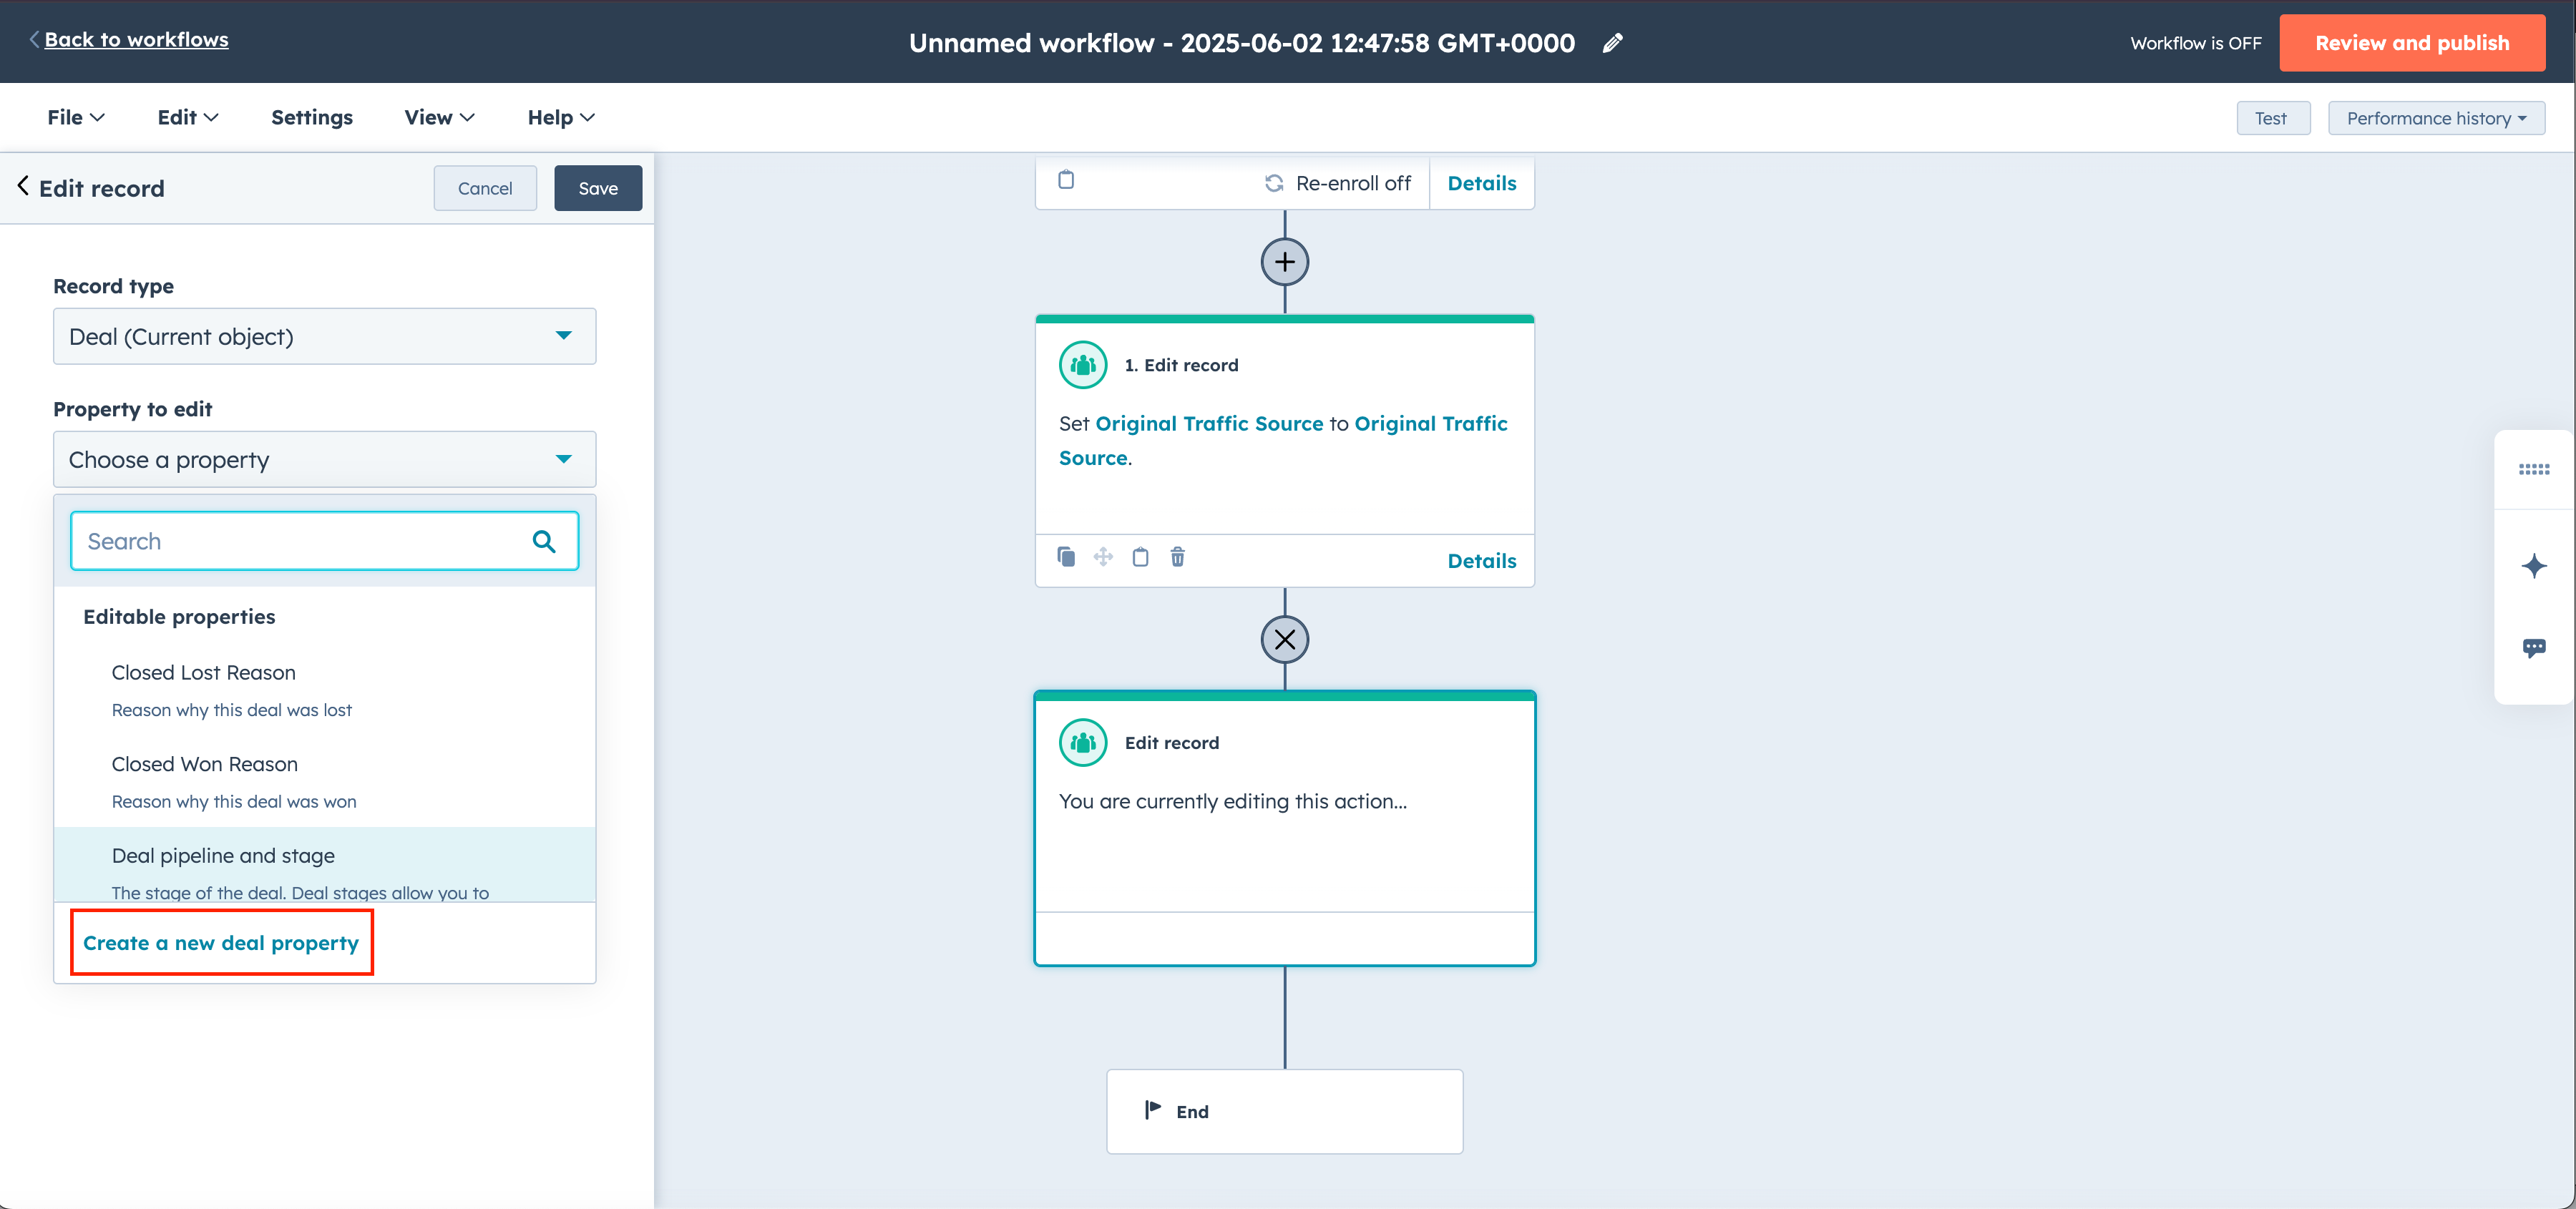
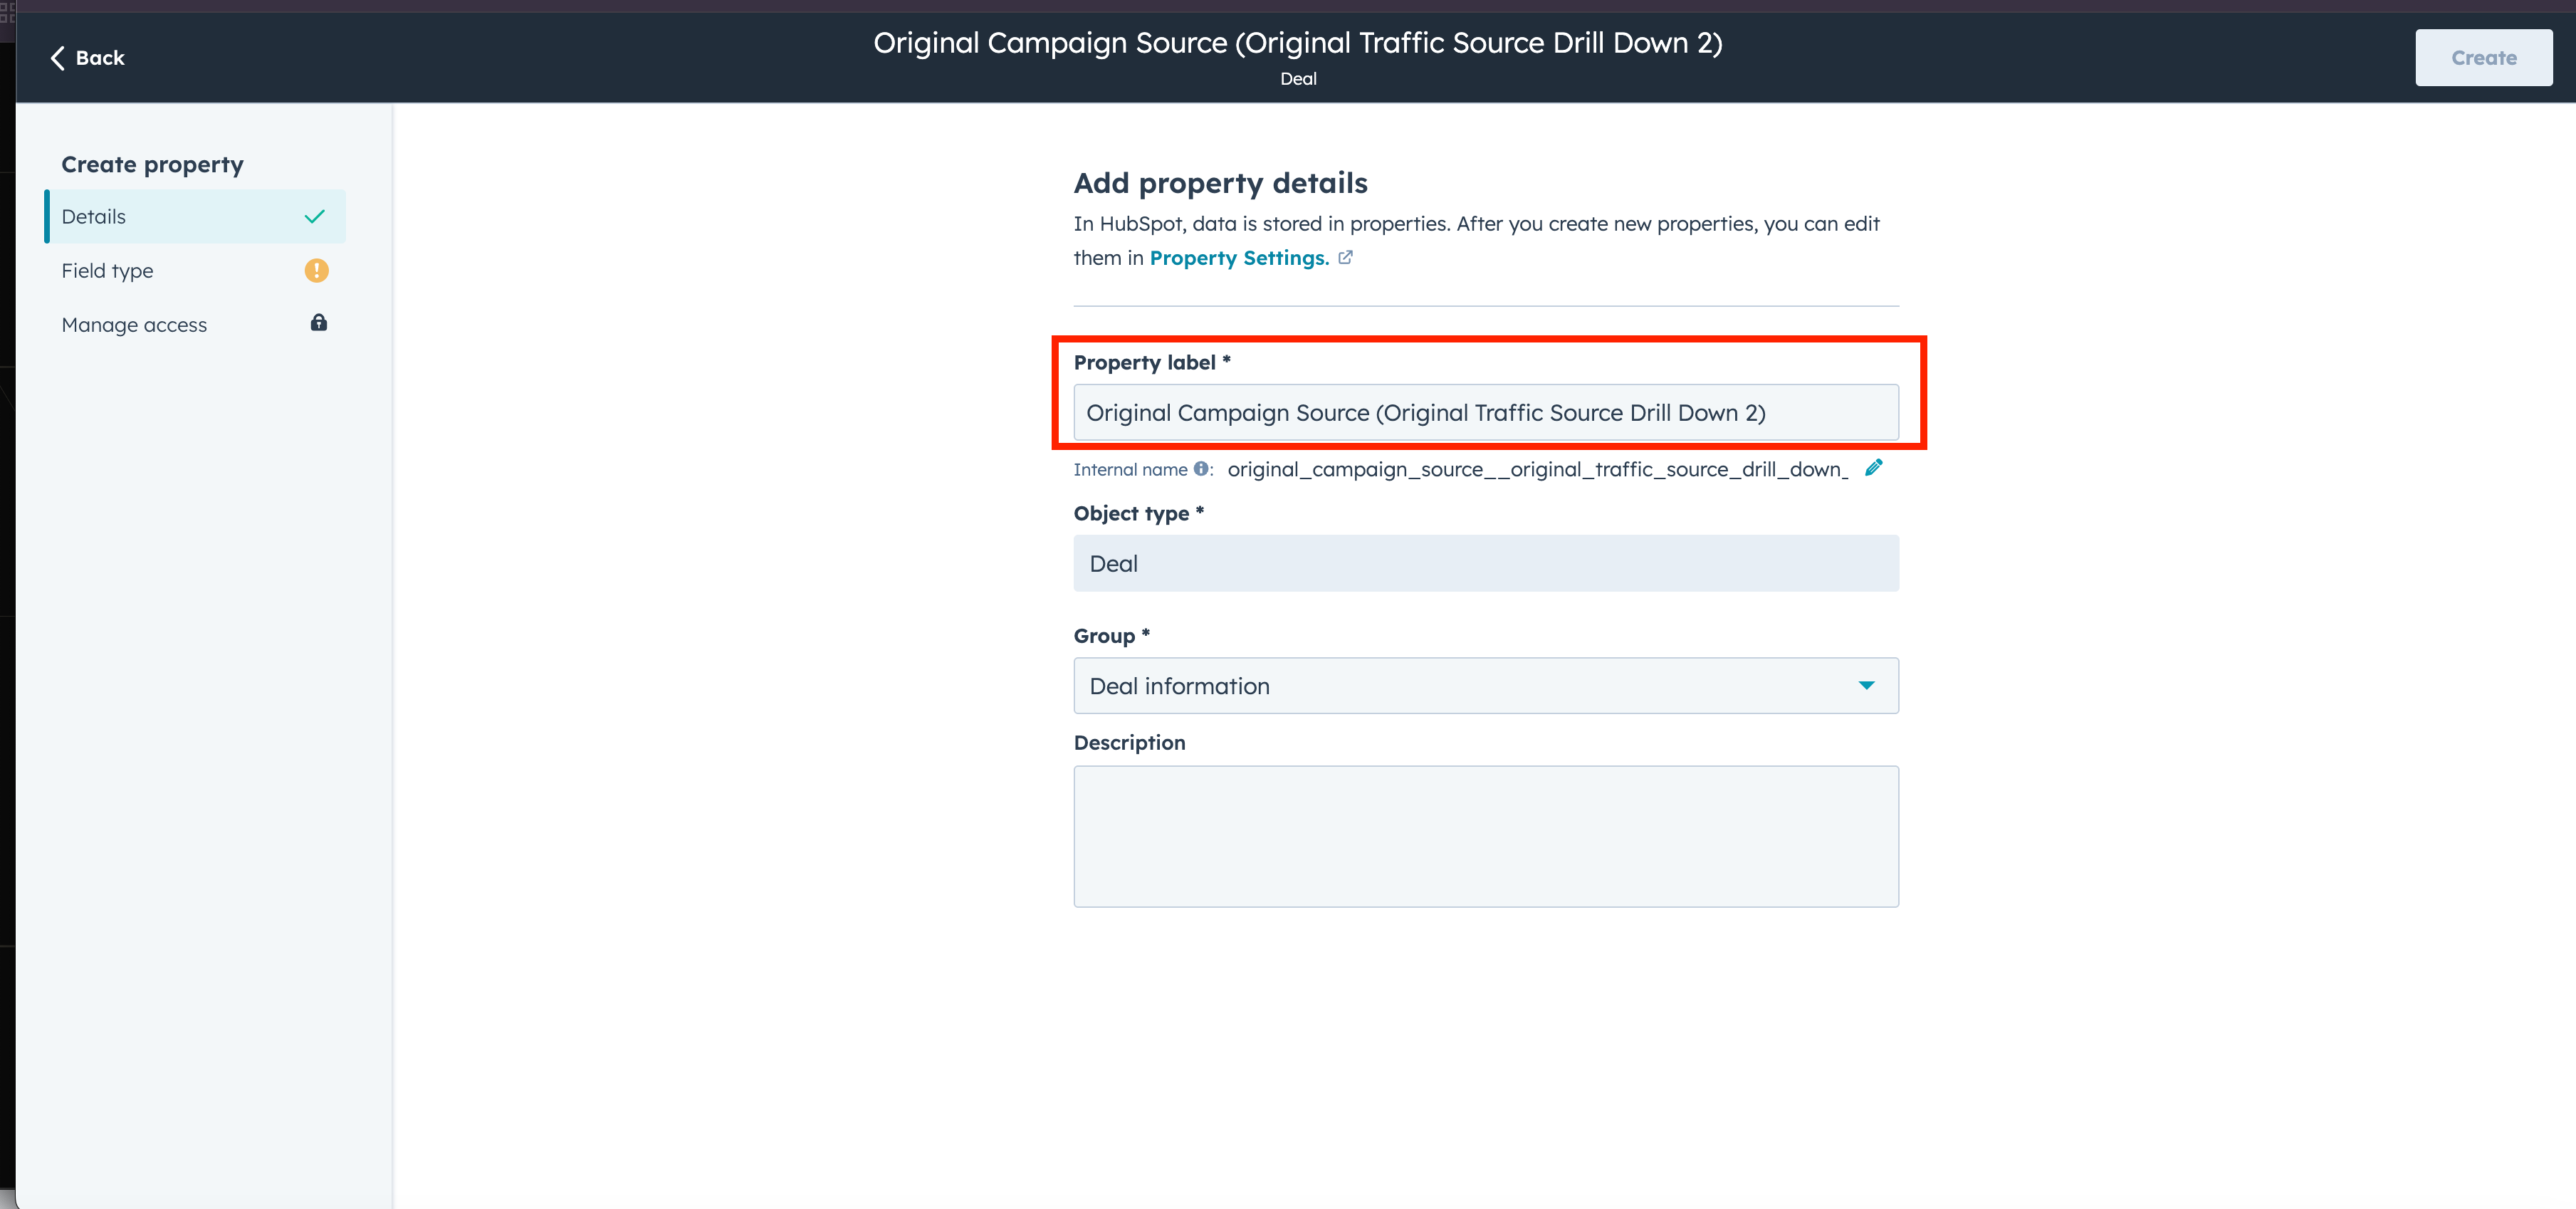
Add a property label.
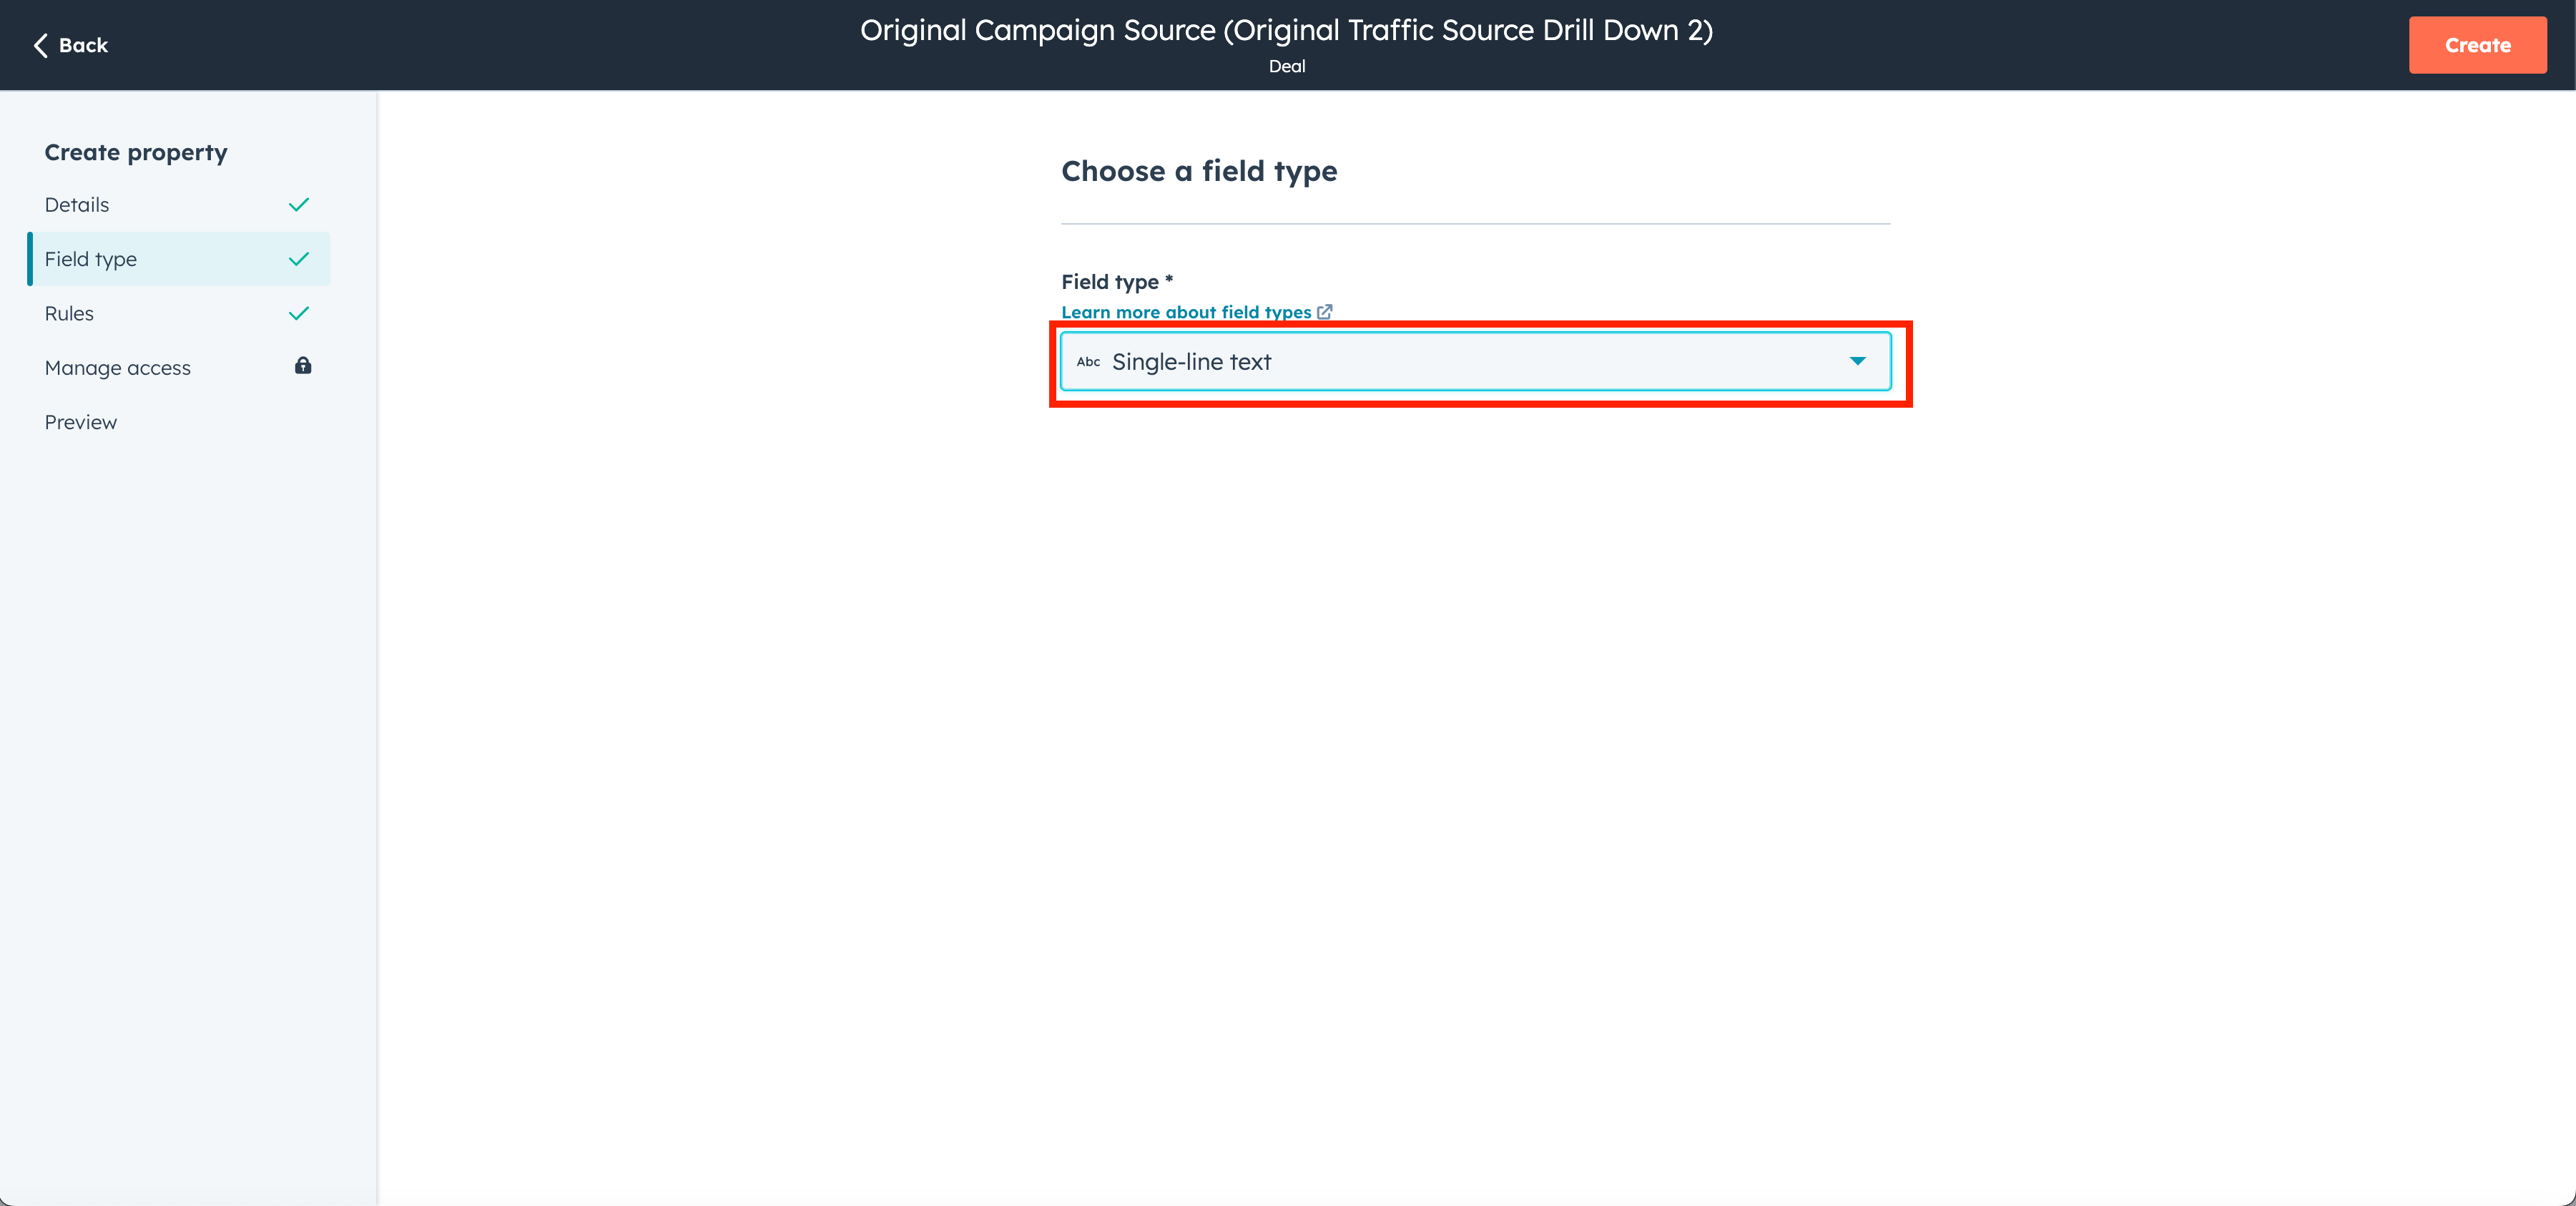
For field type choose single-line text and then select create.
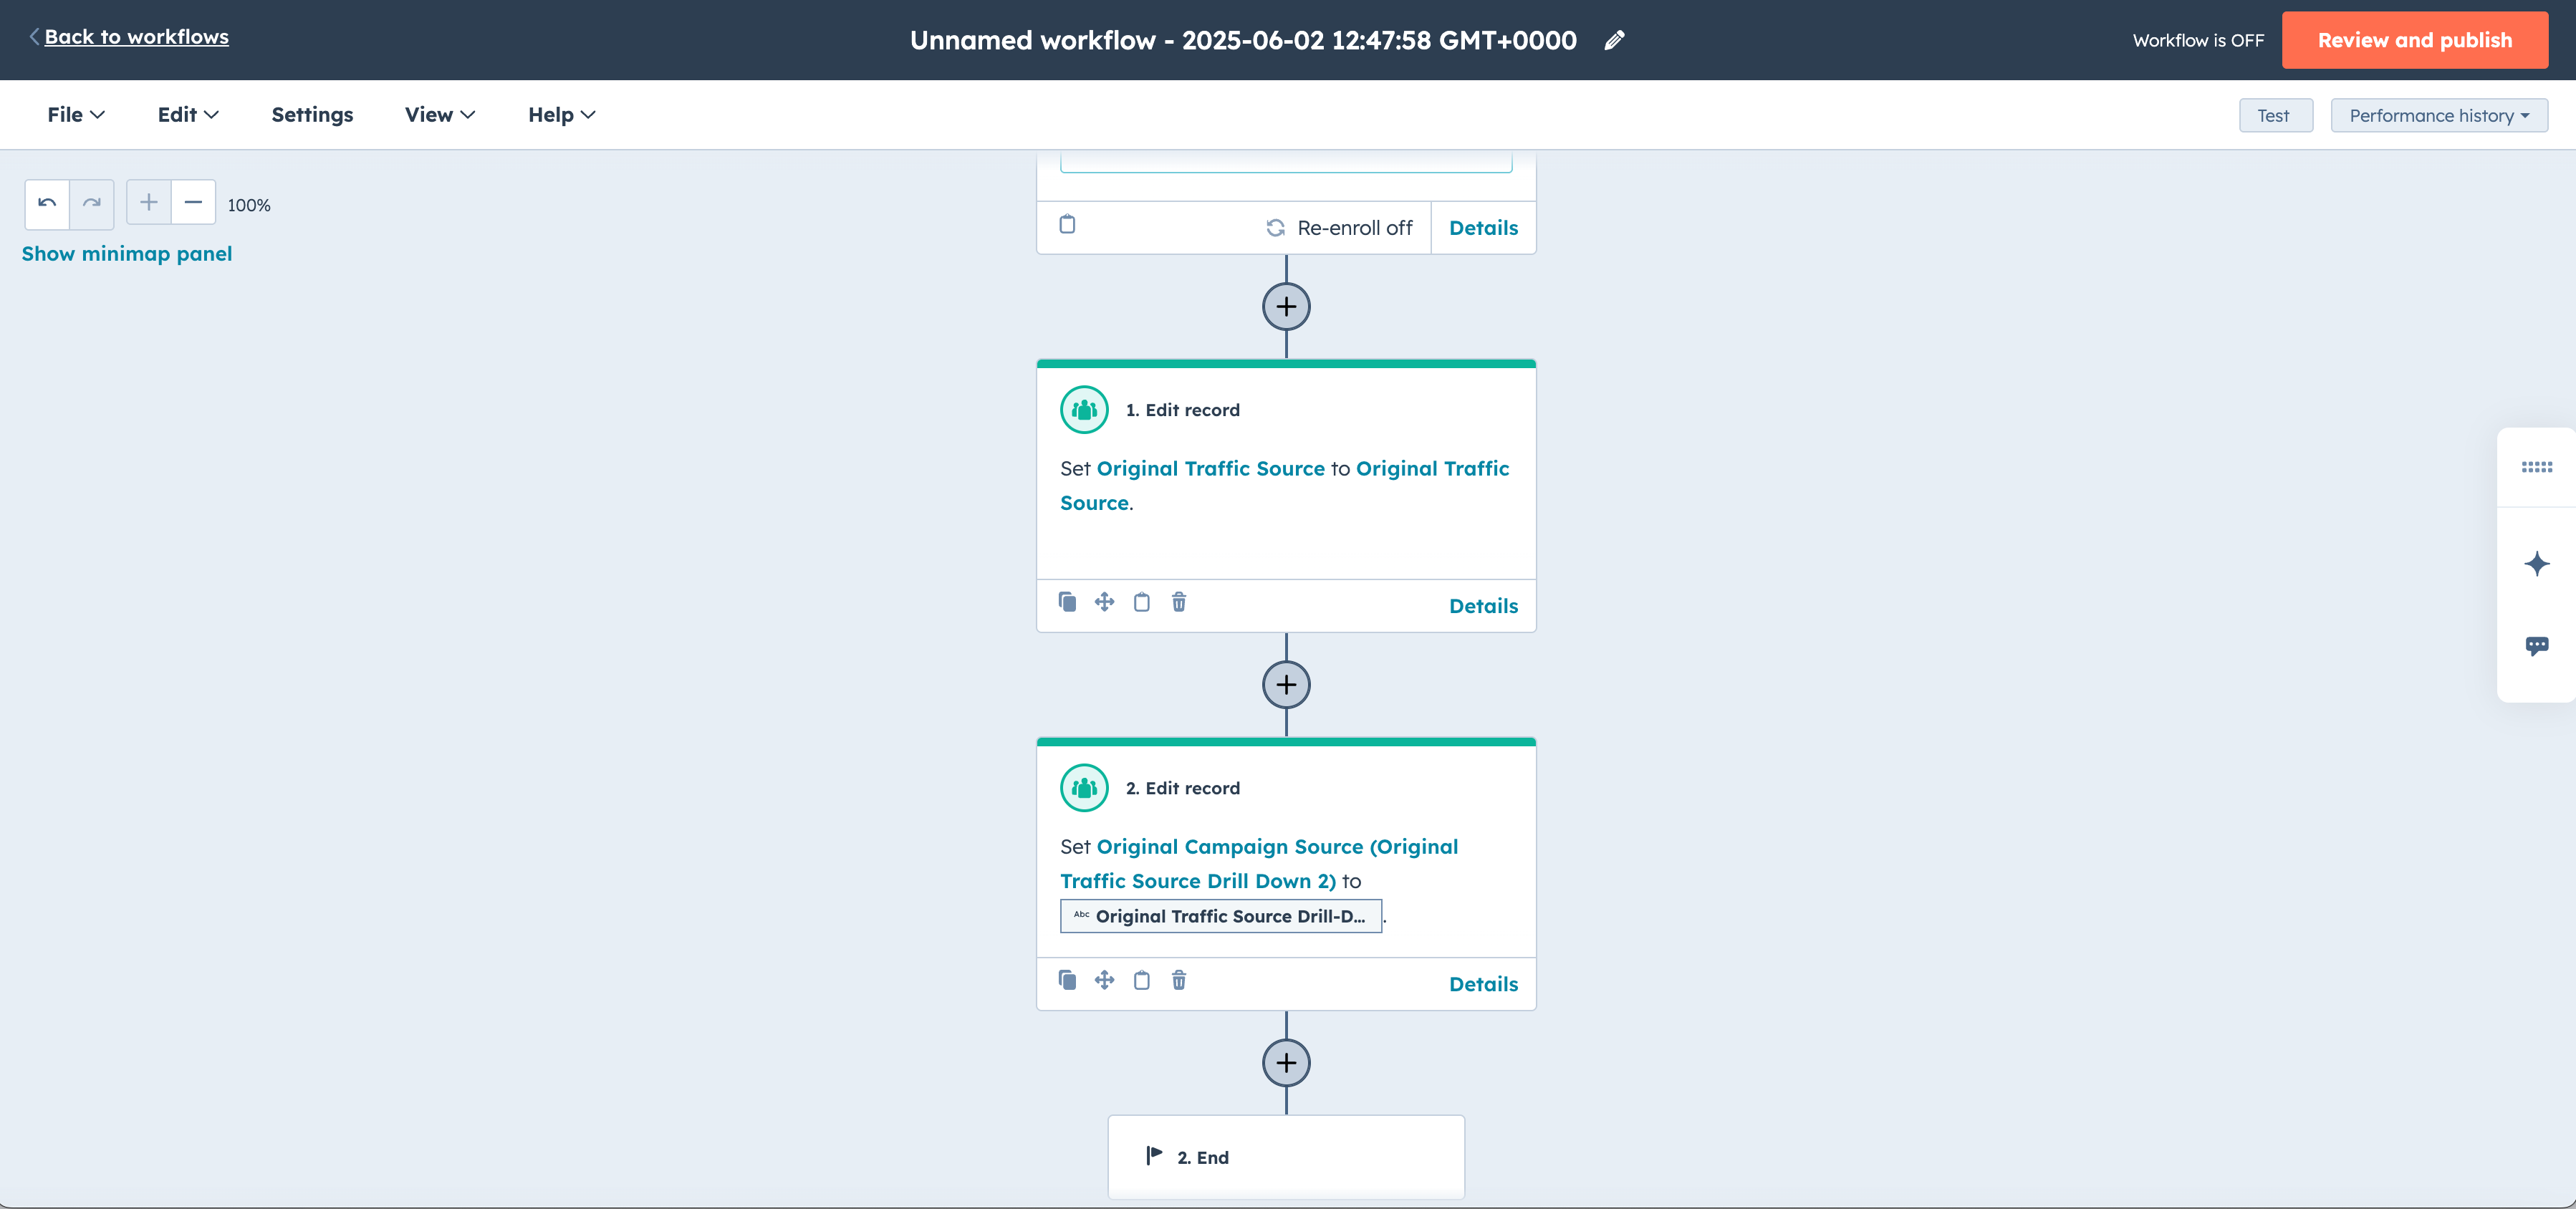
Once you have the new property is created, selecct Contact most recently updated, and look for original traffic source drill down 1.
Repeat the previous steps for other info if you want.
Review and Publish
Now that you have your workflow created, let's create a test deal to see what information is populated.
Navigate to a contact, and create a new deal.
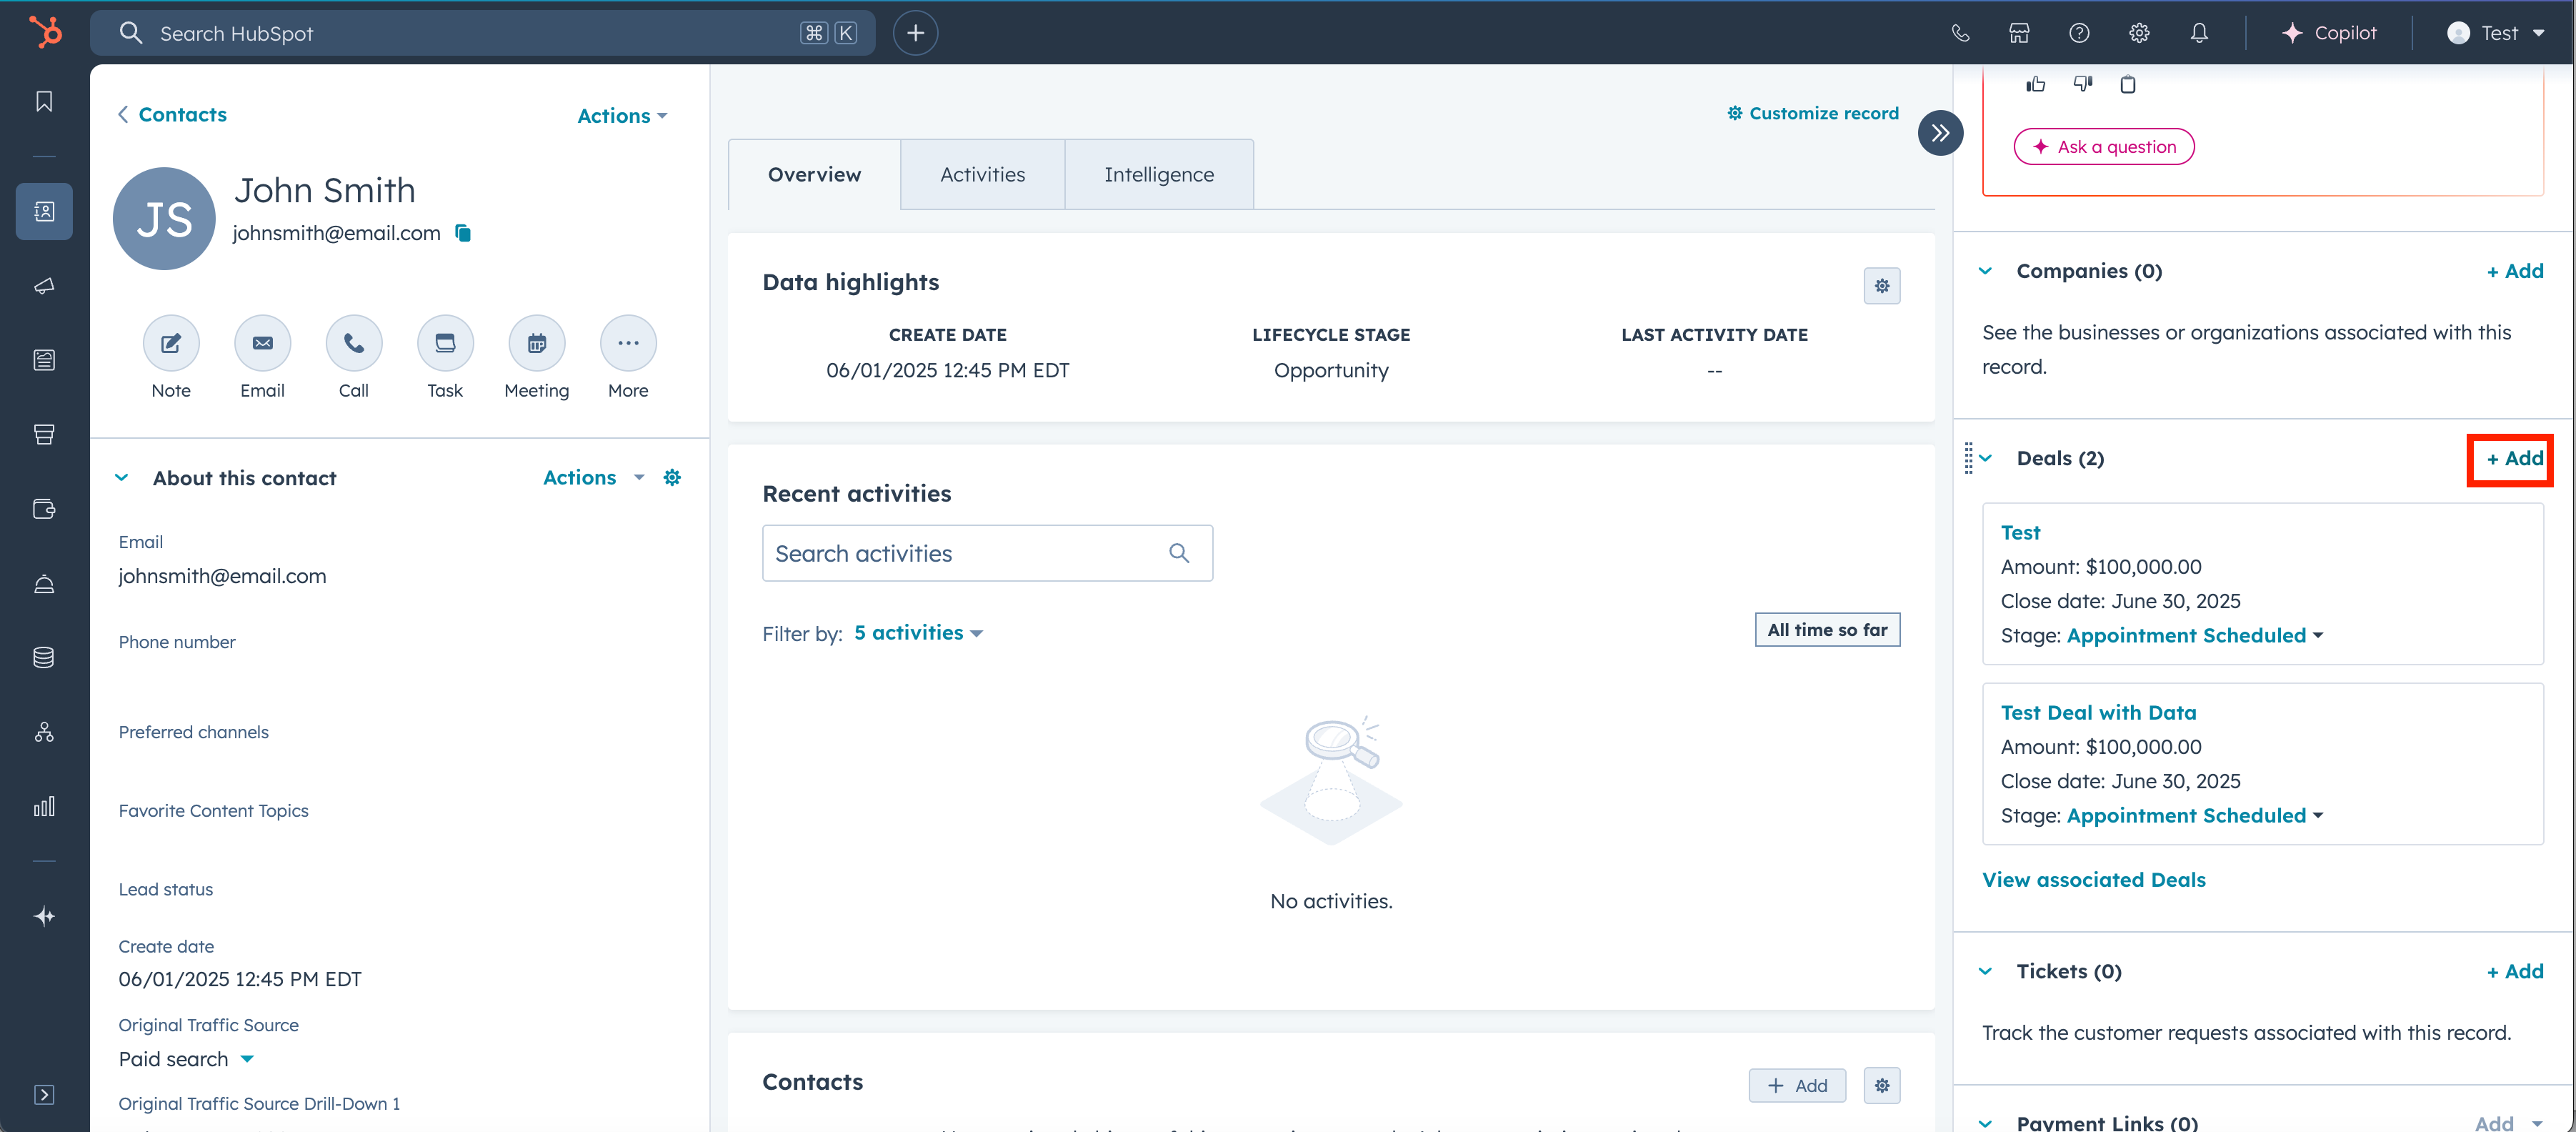
You'll be redirected to the deal screen, we also need to add the new created property into the info card, select the gear icon.
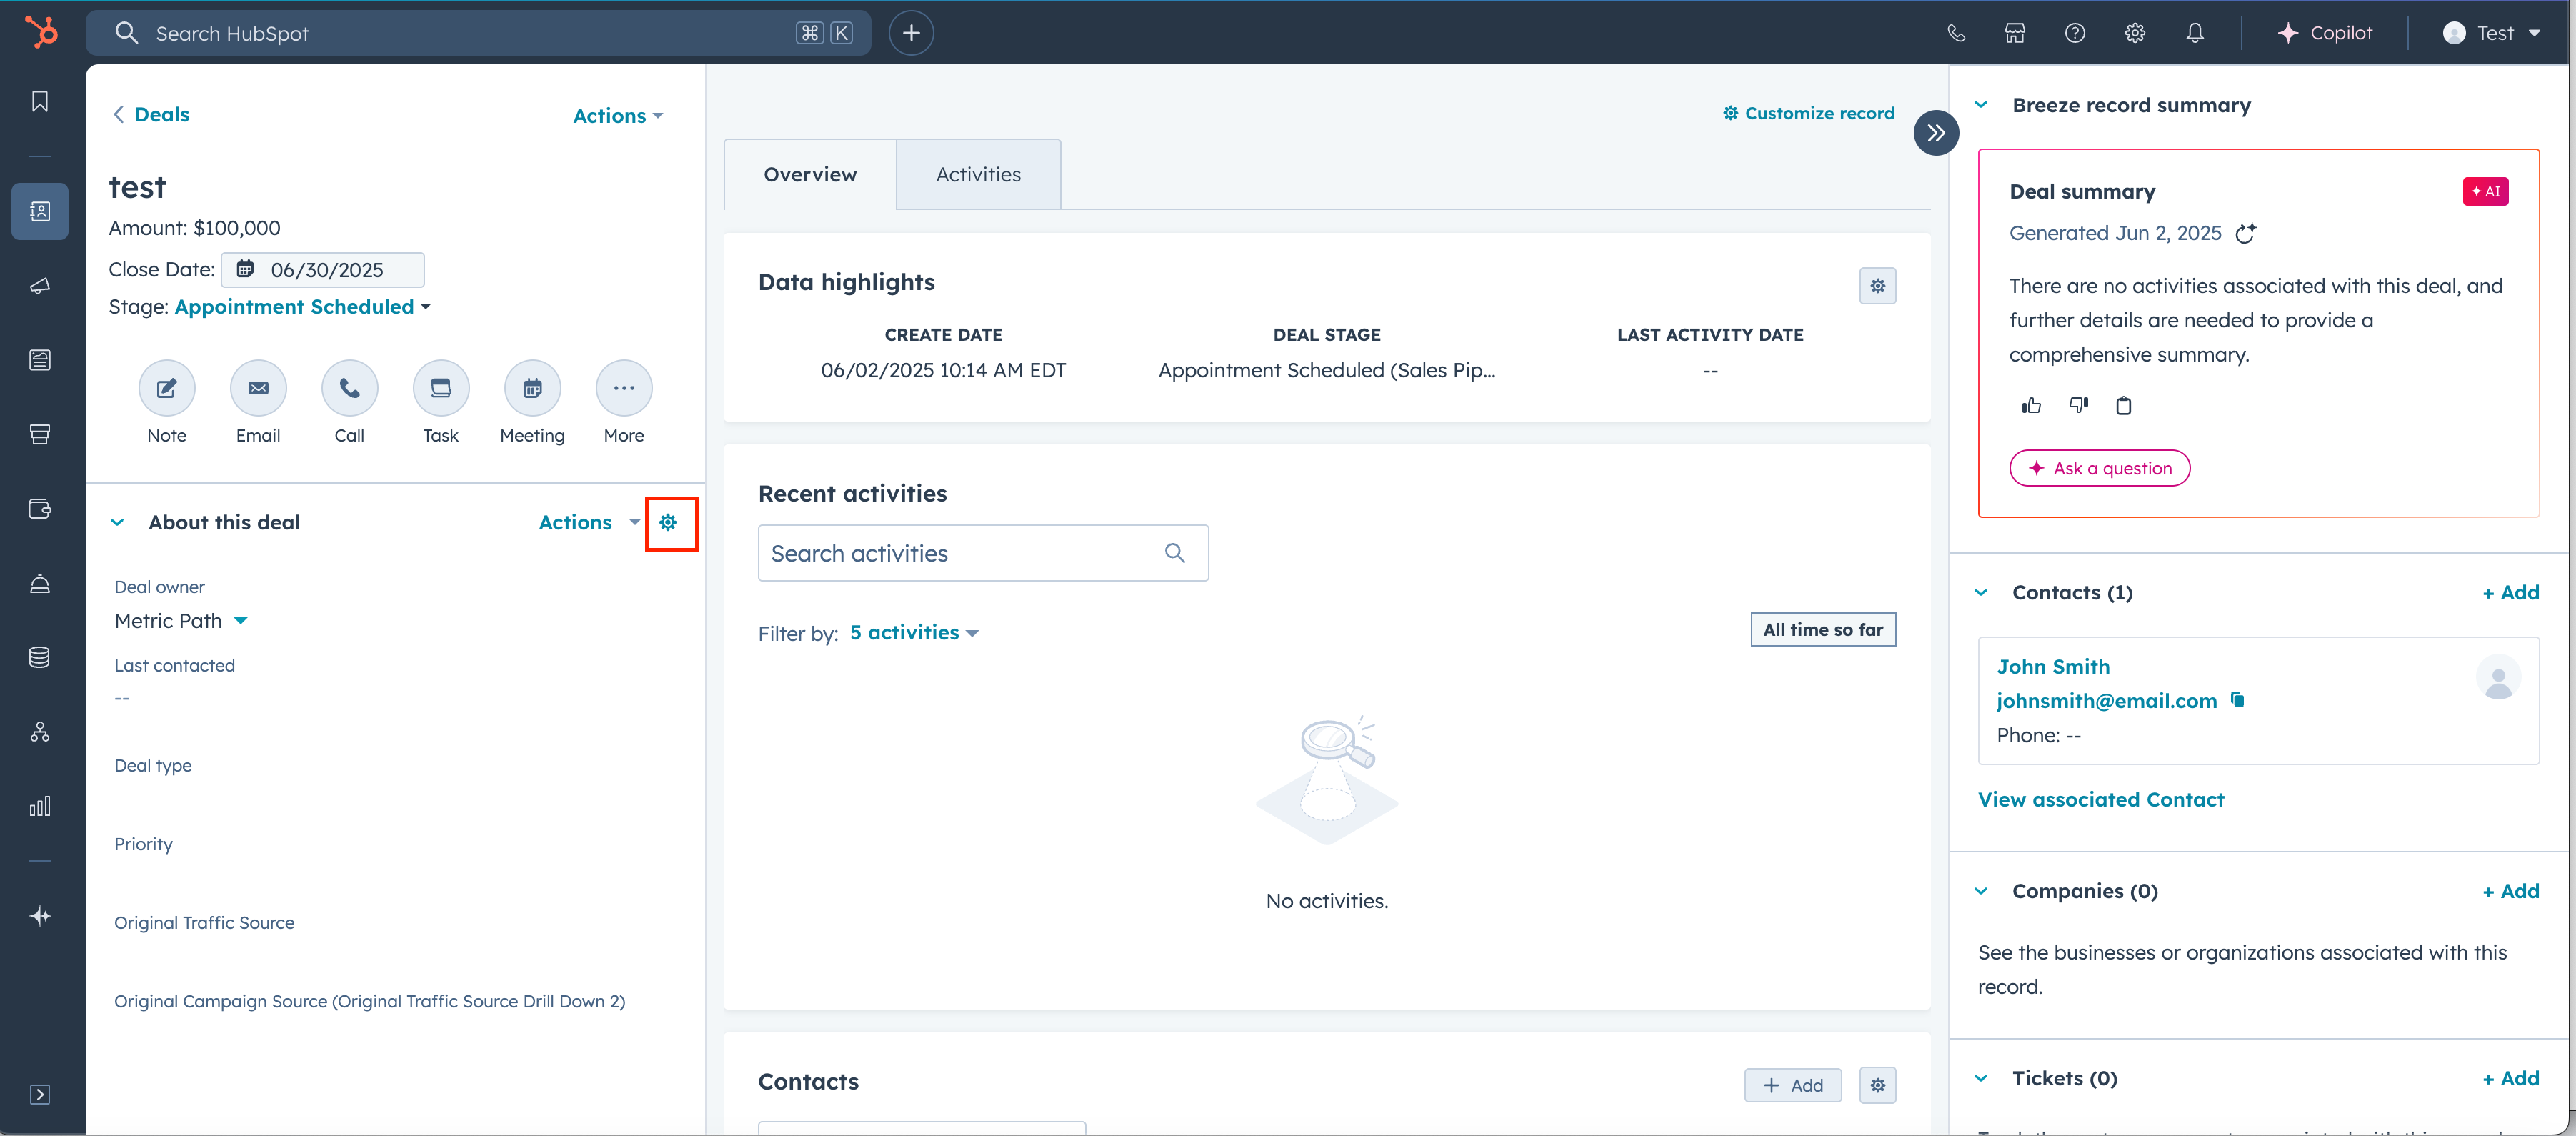
Add the new property created from the previous step
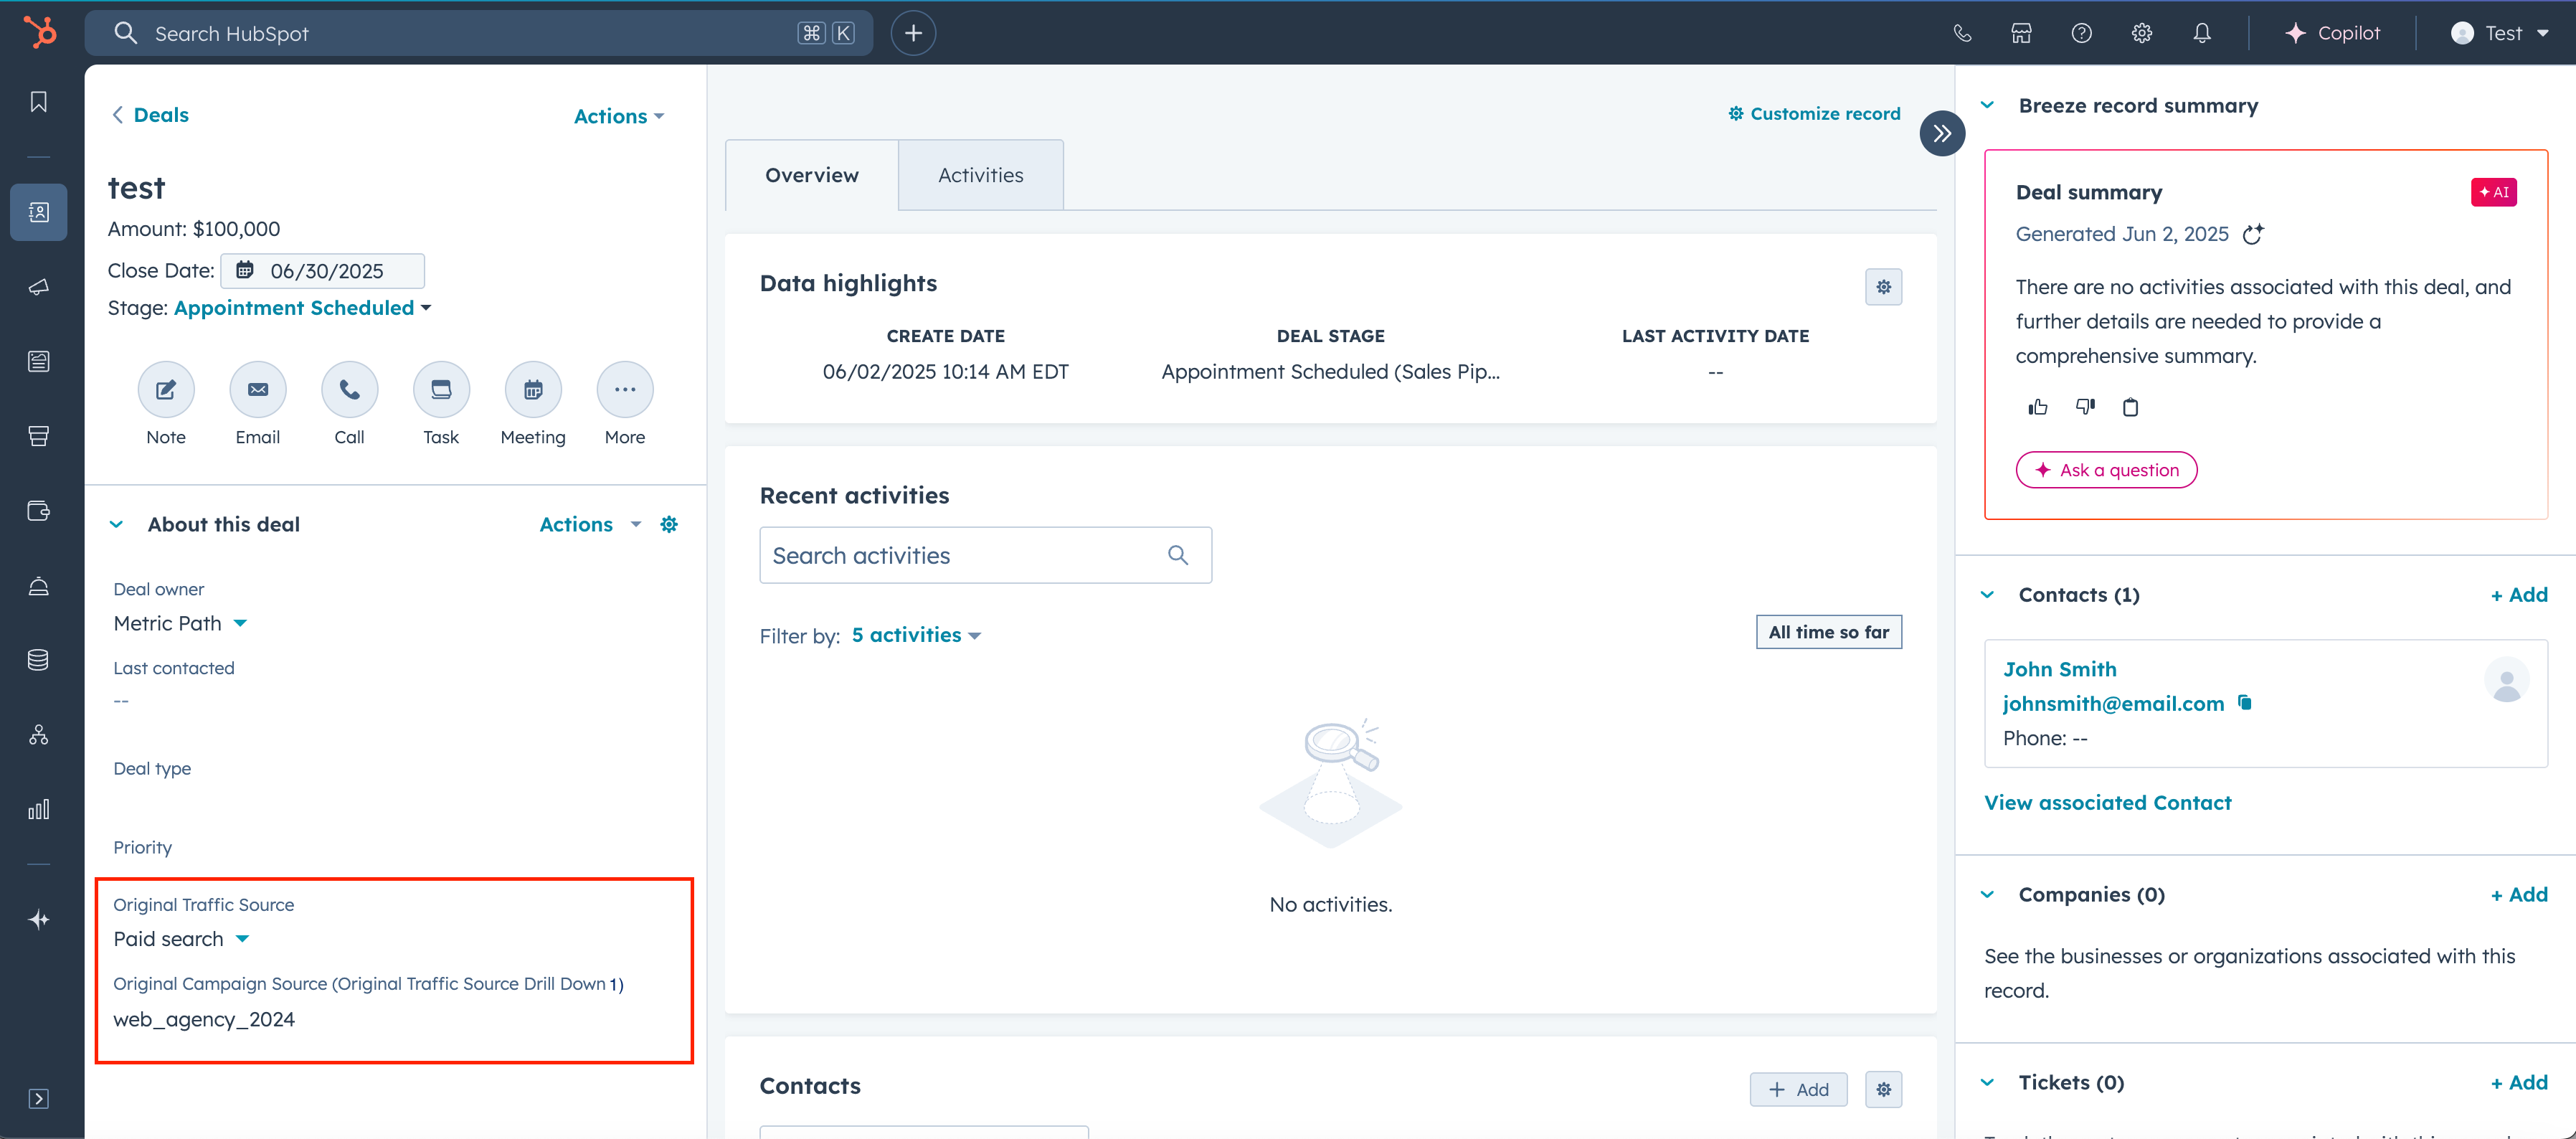
Create a new deal from the contact, ensure fields are updated automatically.
Edit the columns so you see deal information in the deal table.
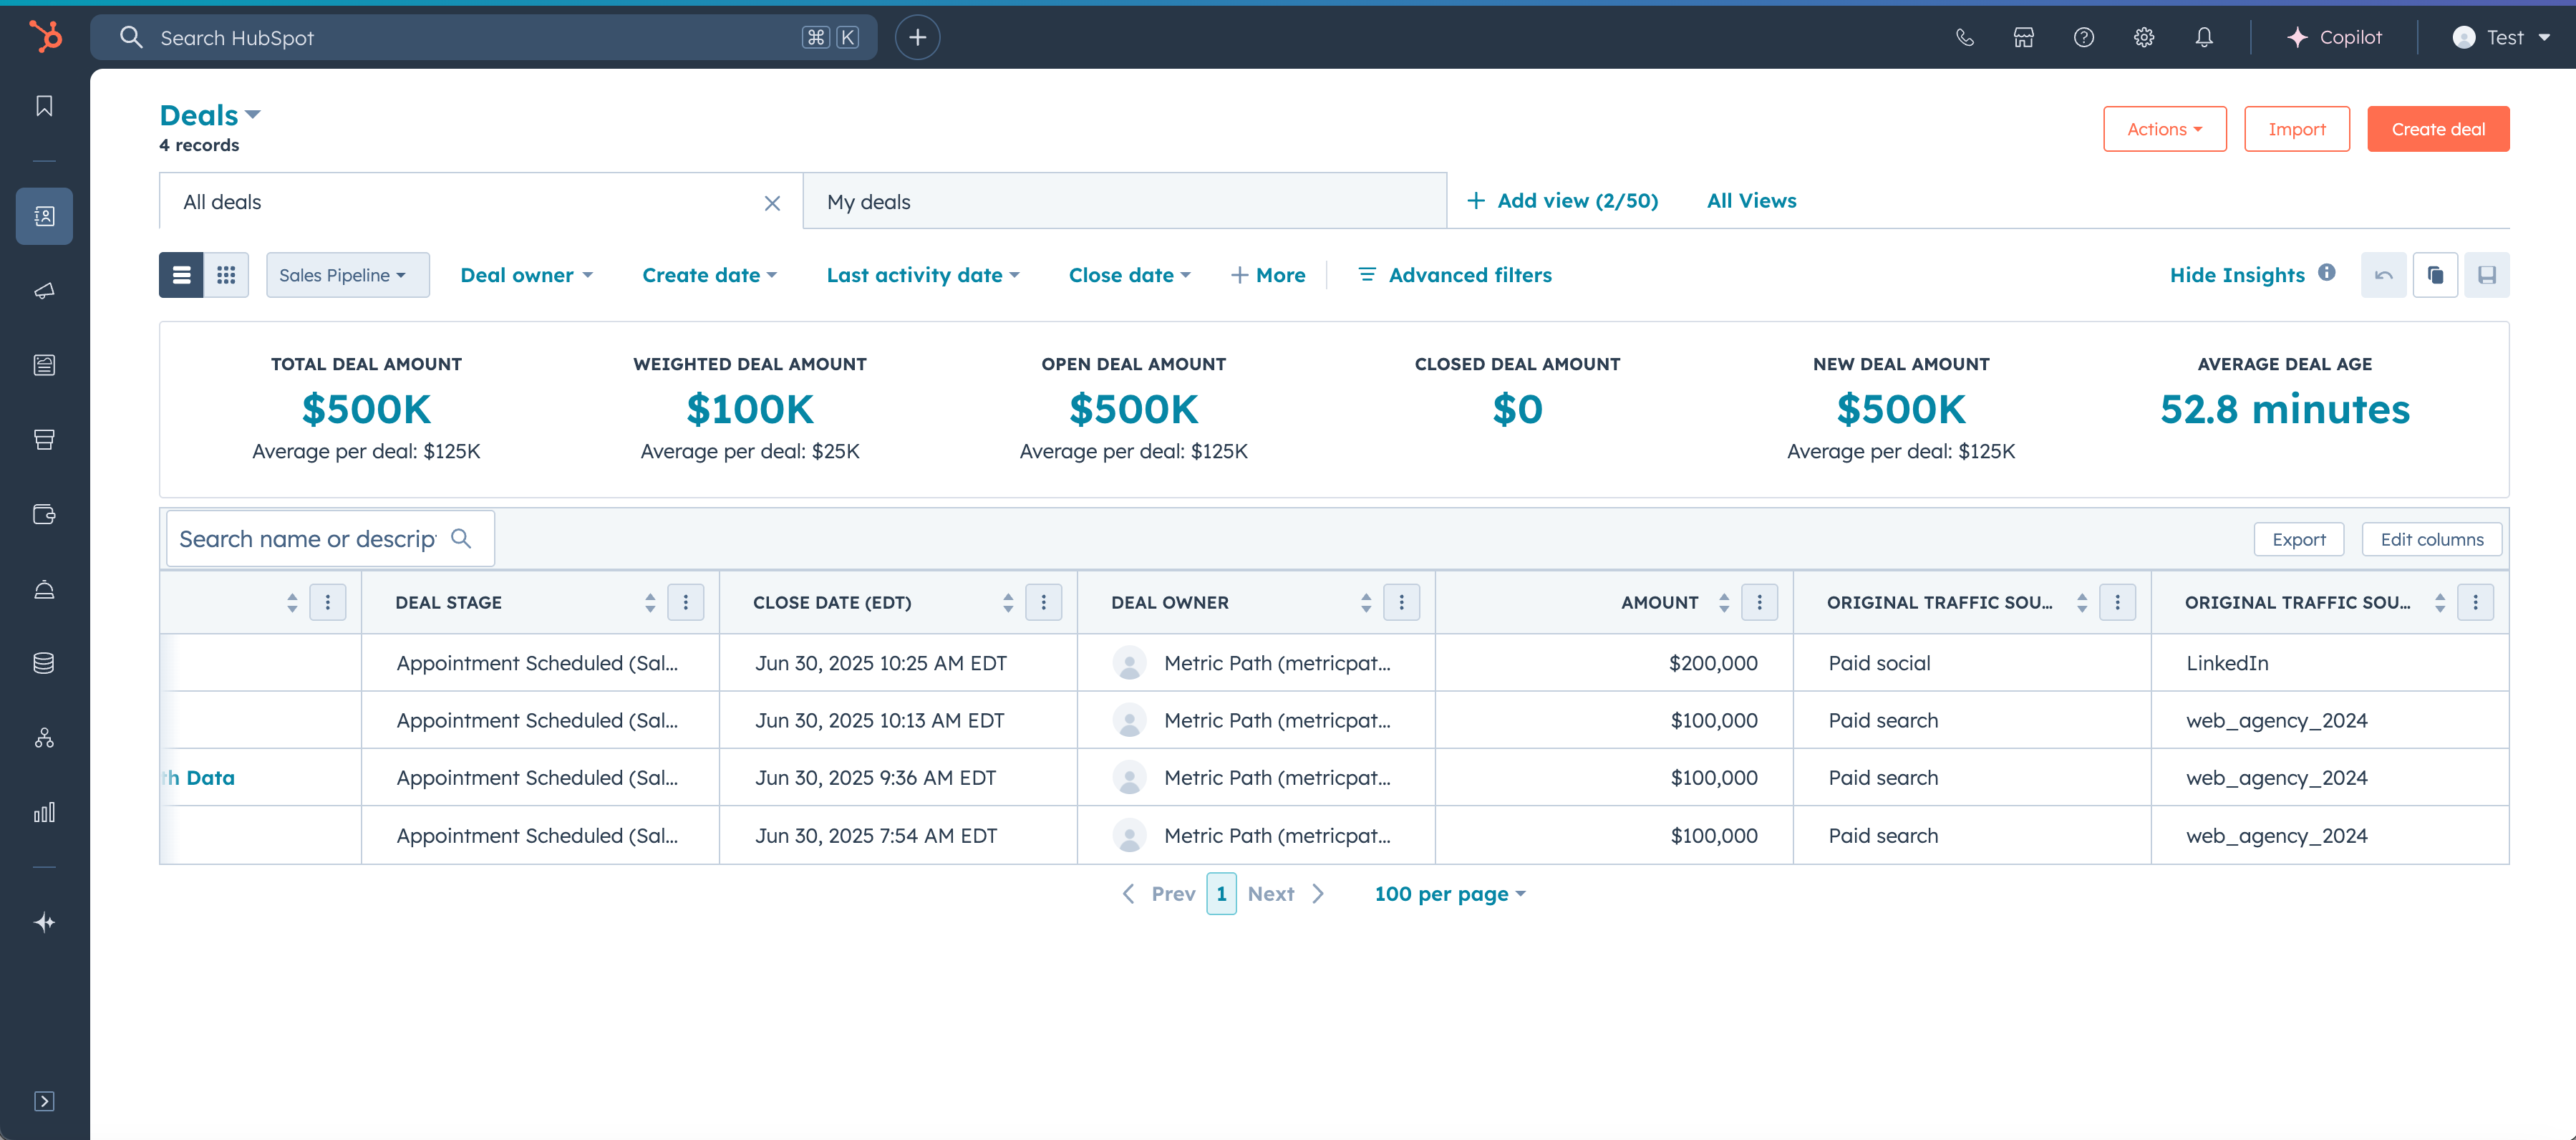
You can use this spreadsheet to track Marketing ROI
https://docs.google.com/spreadsheets/d/1DgIhm0CyIIvL2lvBKMOyx0rImYjyy3HtobCDxAIlEs0/edit?usp=sharing
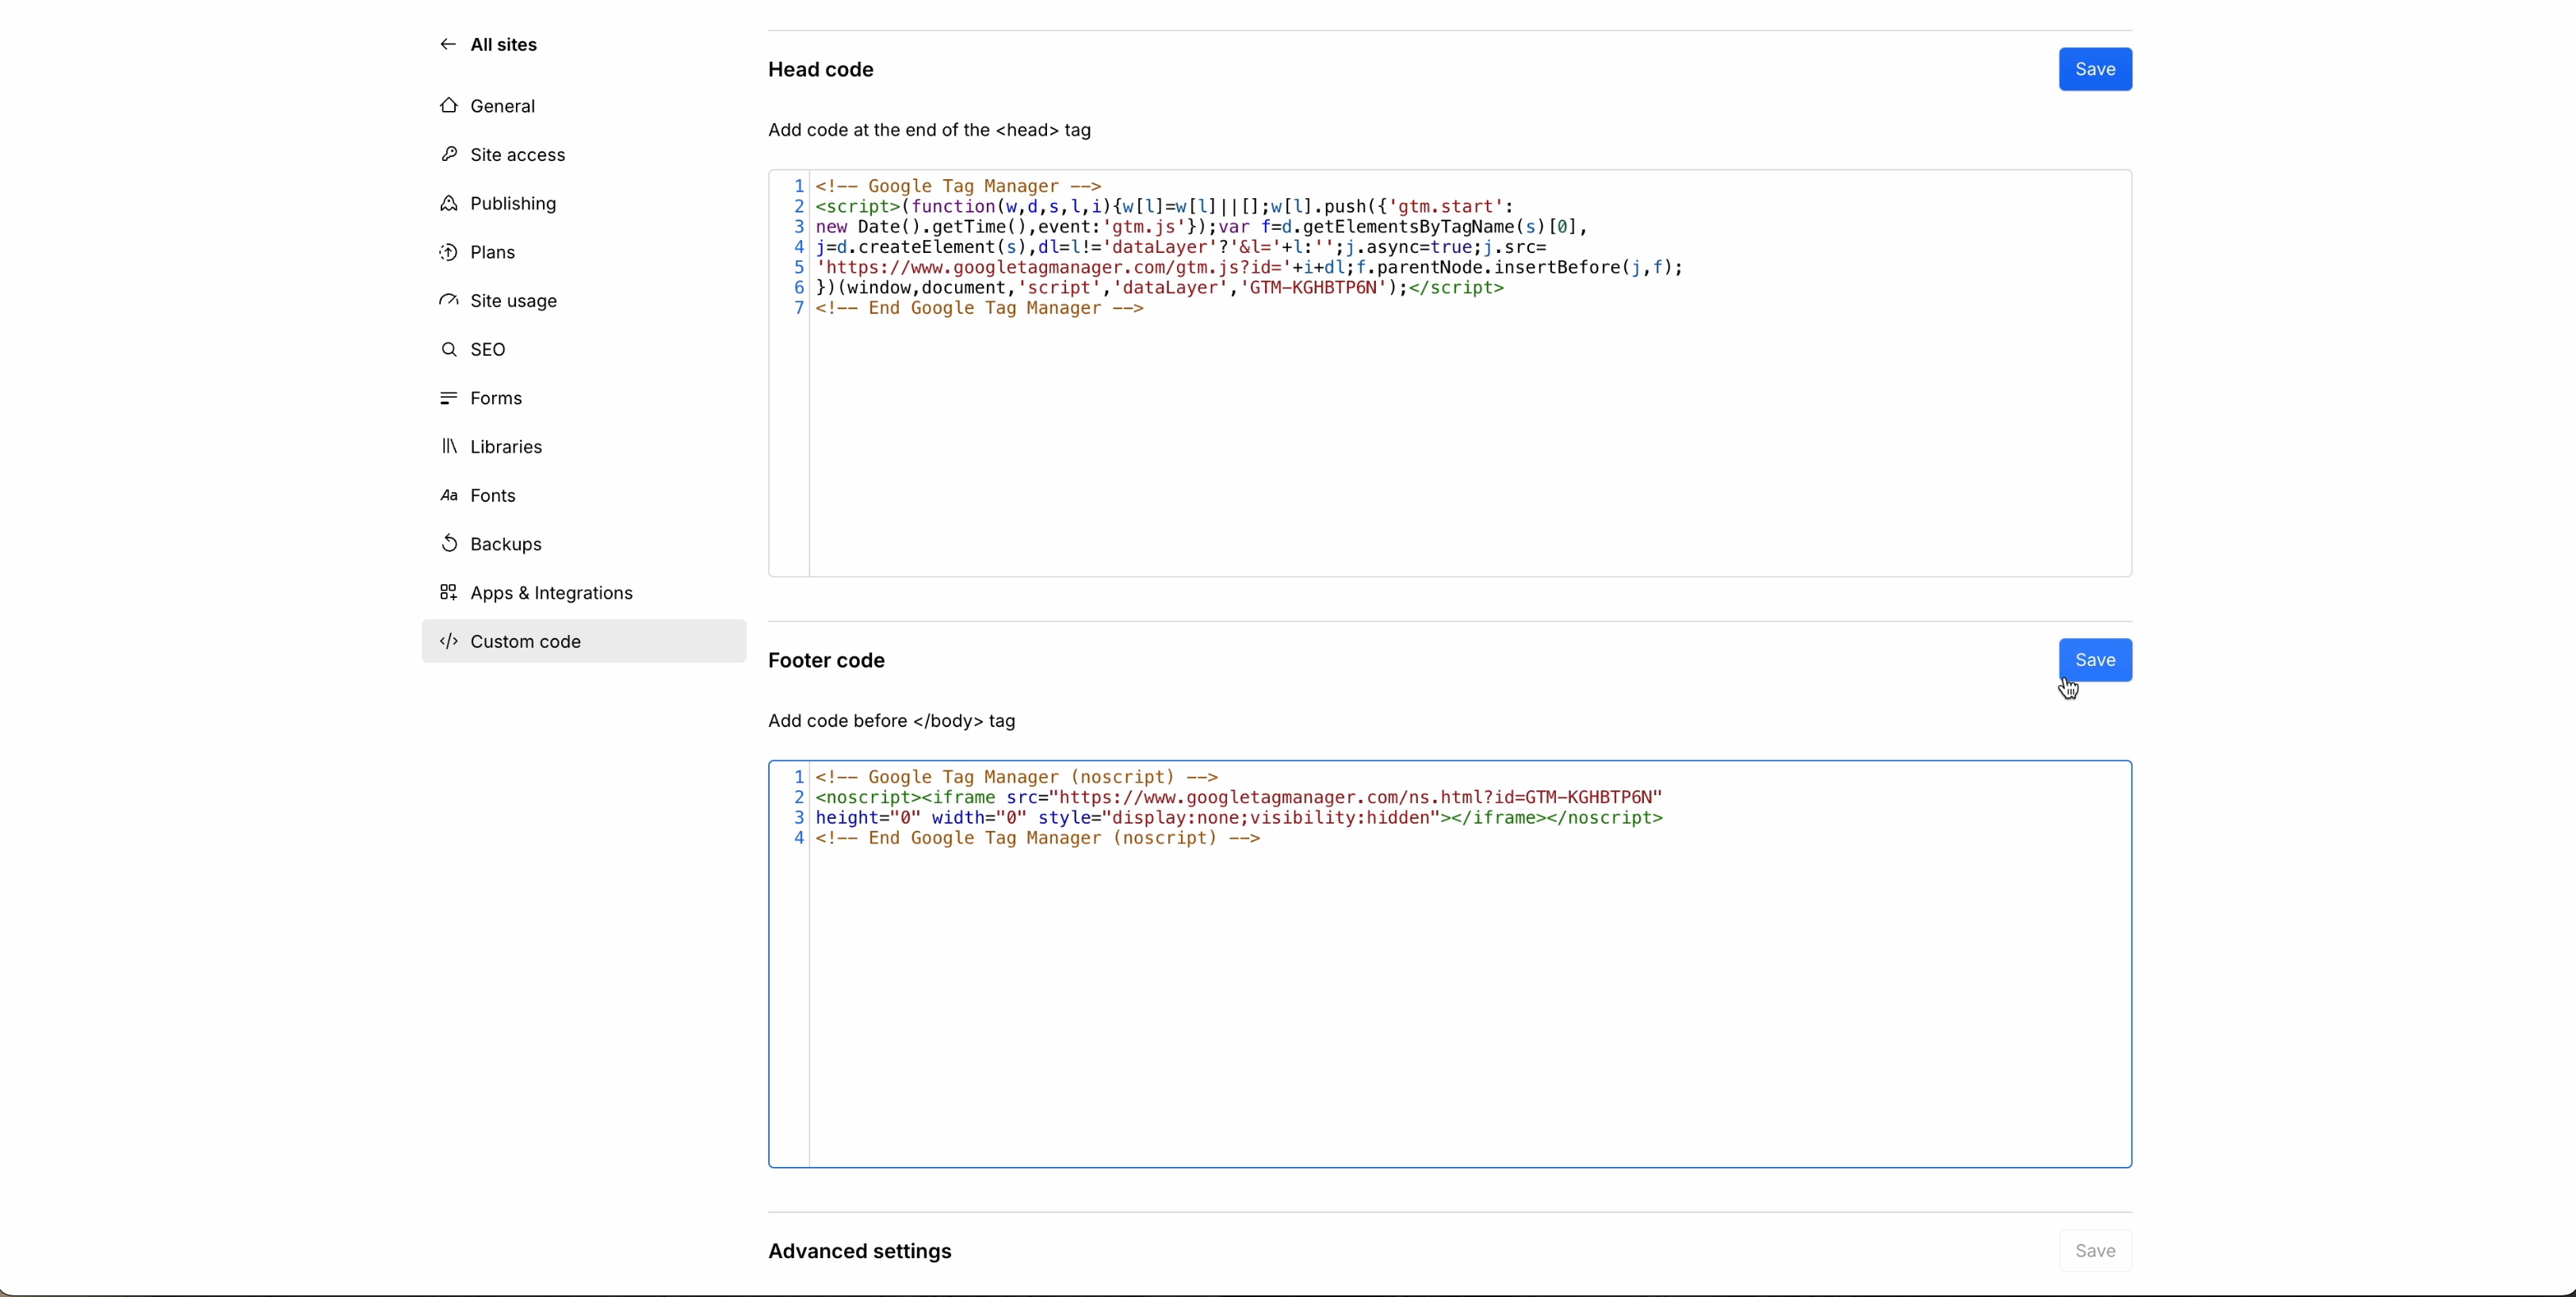
Navigate to admin, and copy and paste GTM codes from Google Tag Manager and paste into Webflow
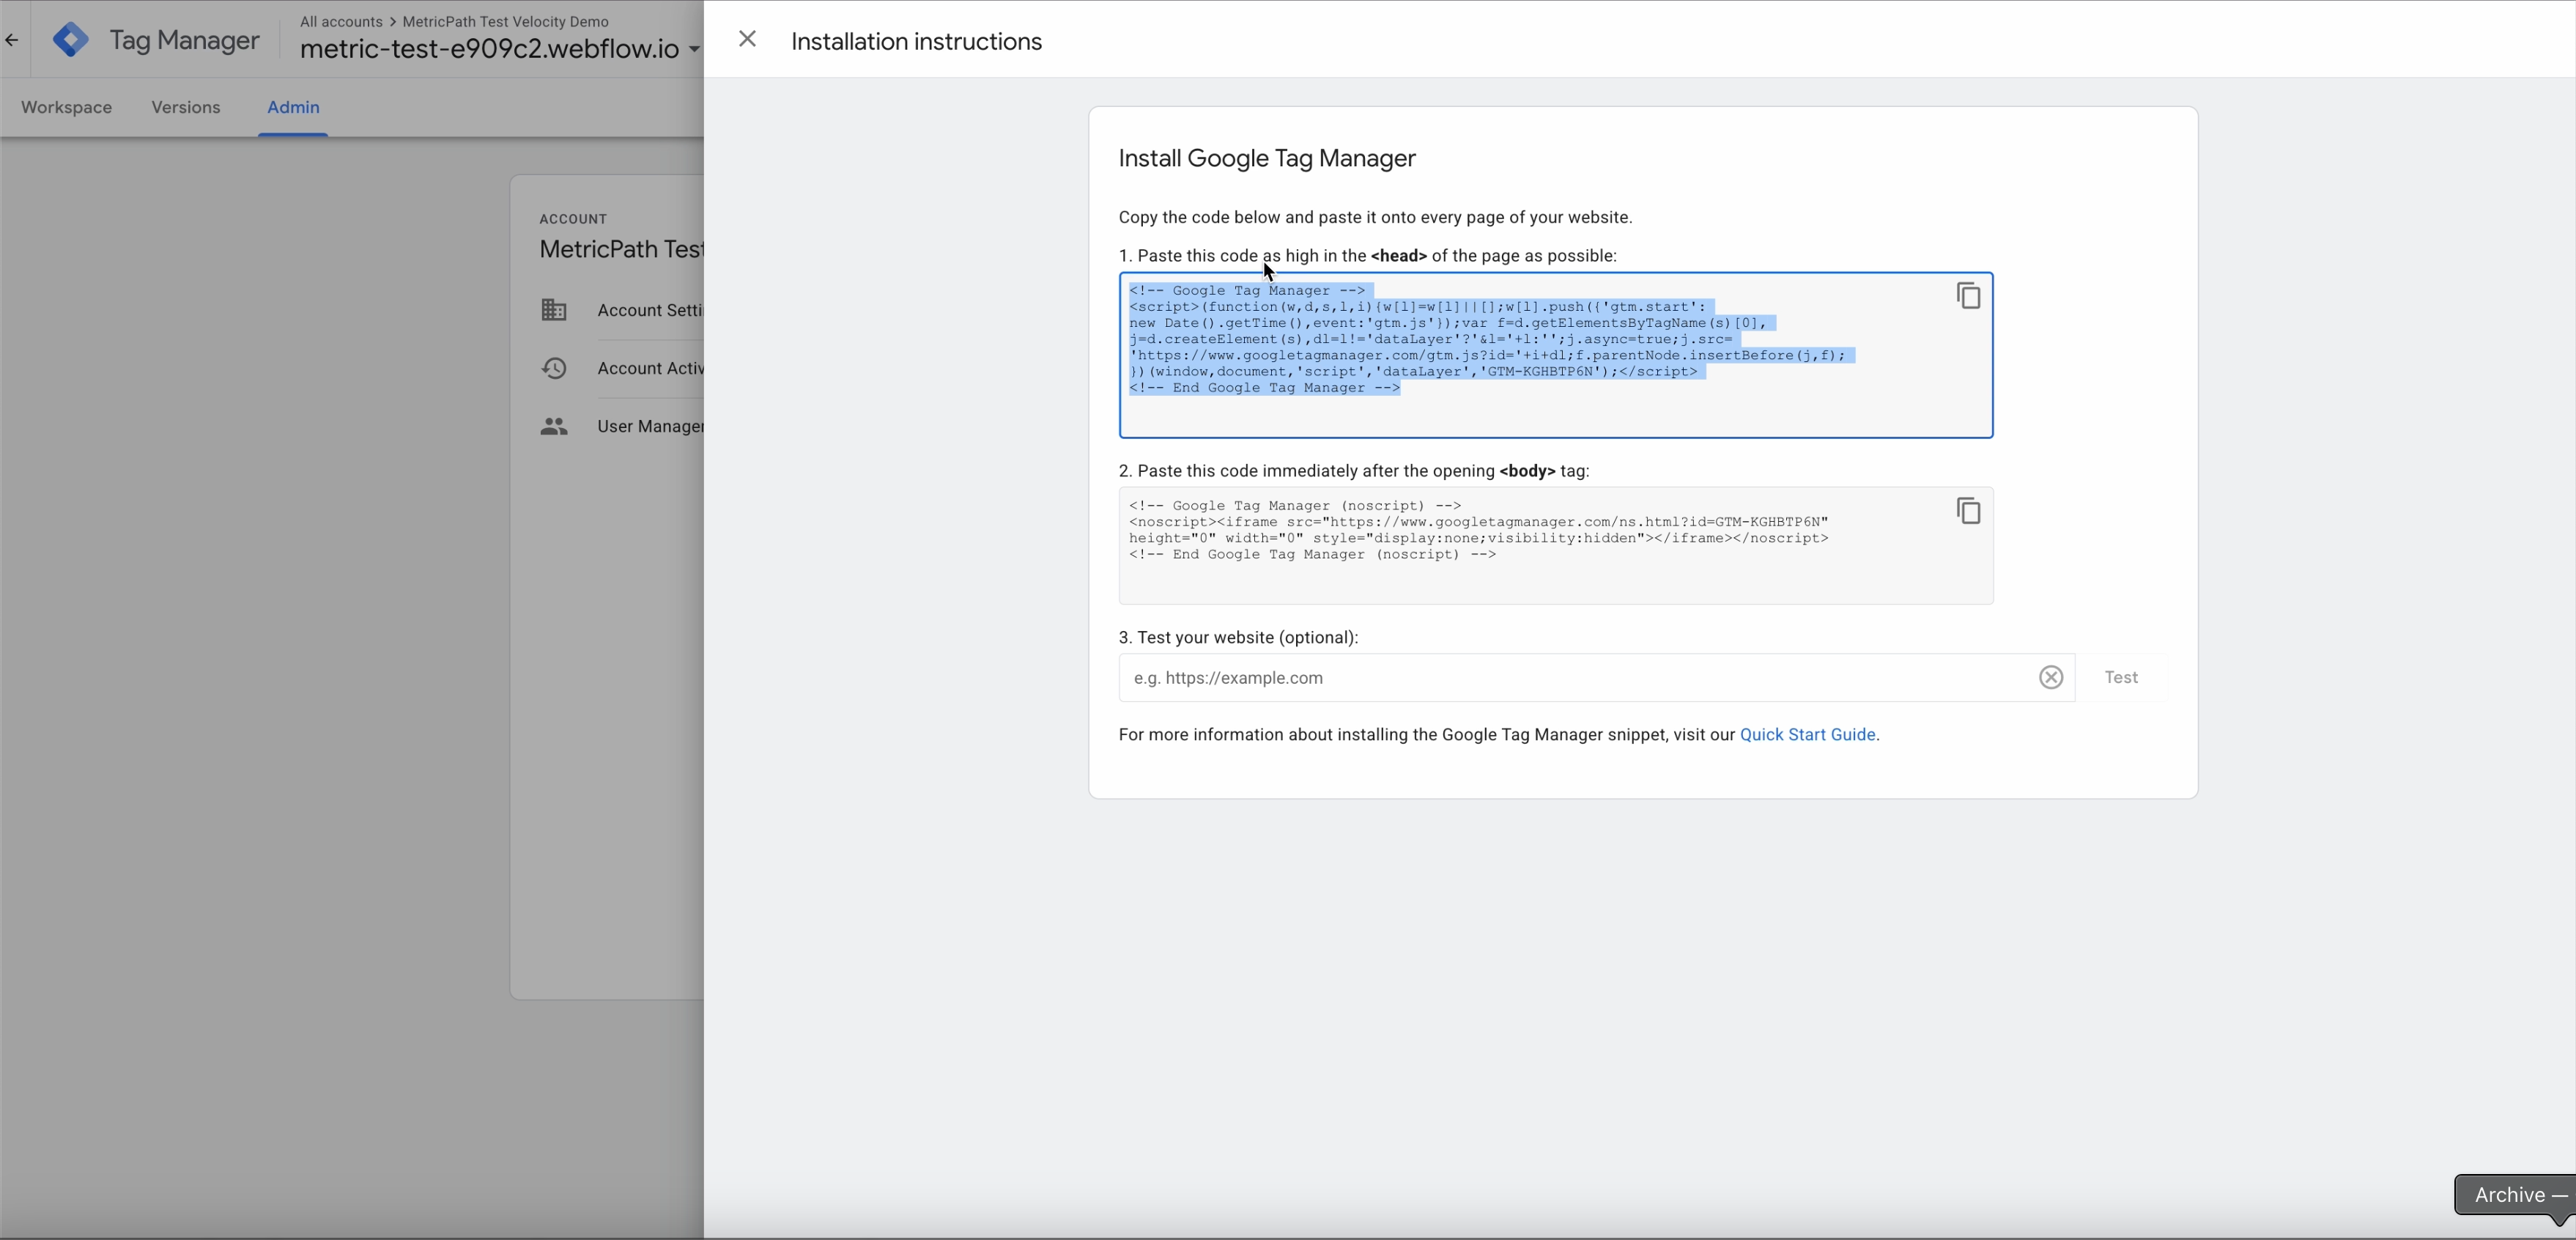
Save and publish your change into Webflow
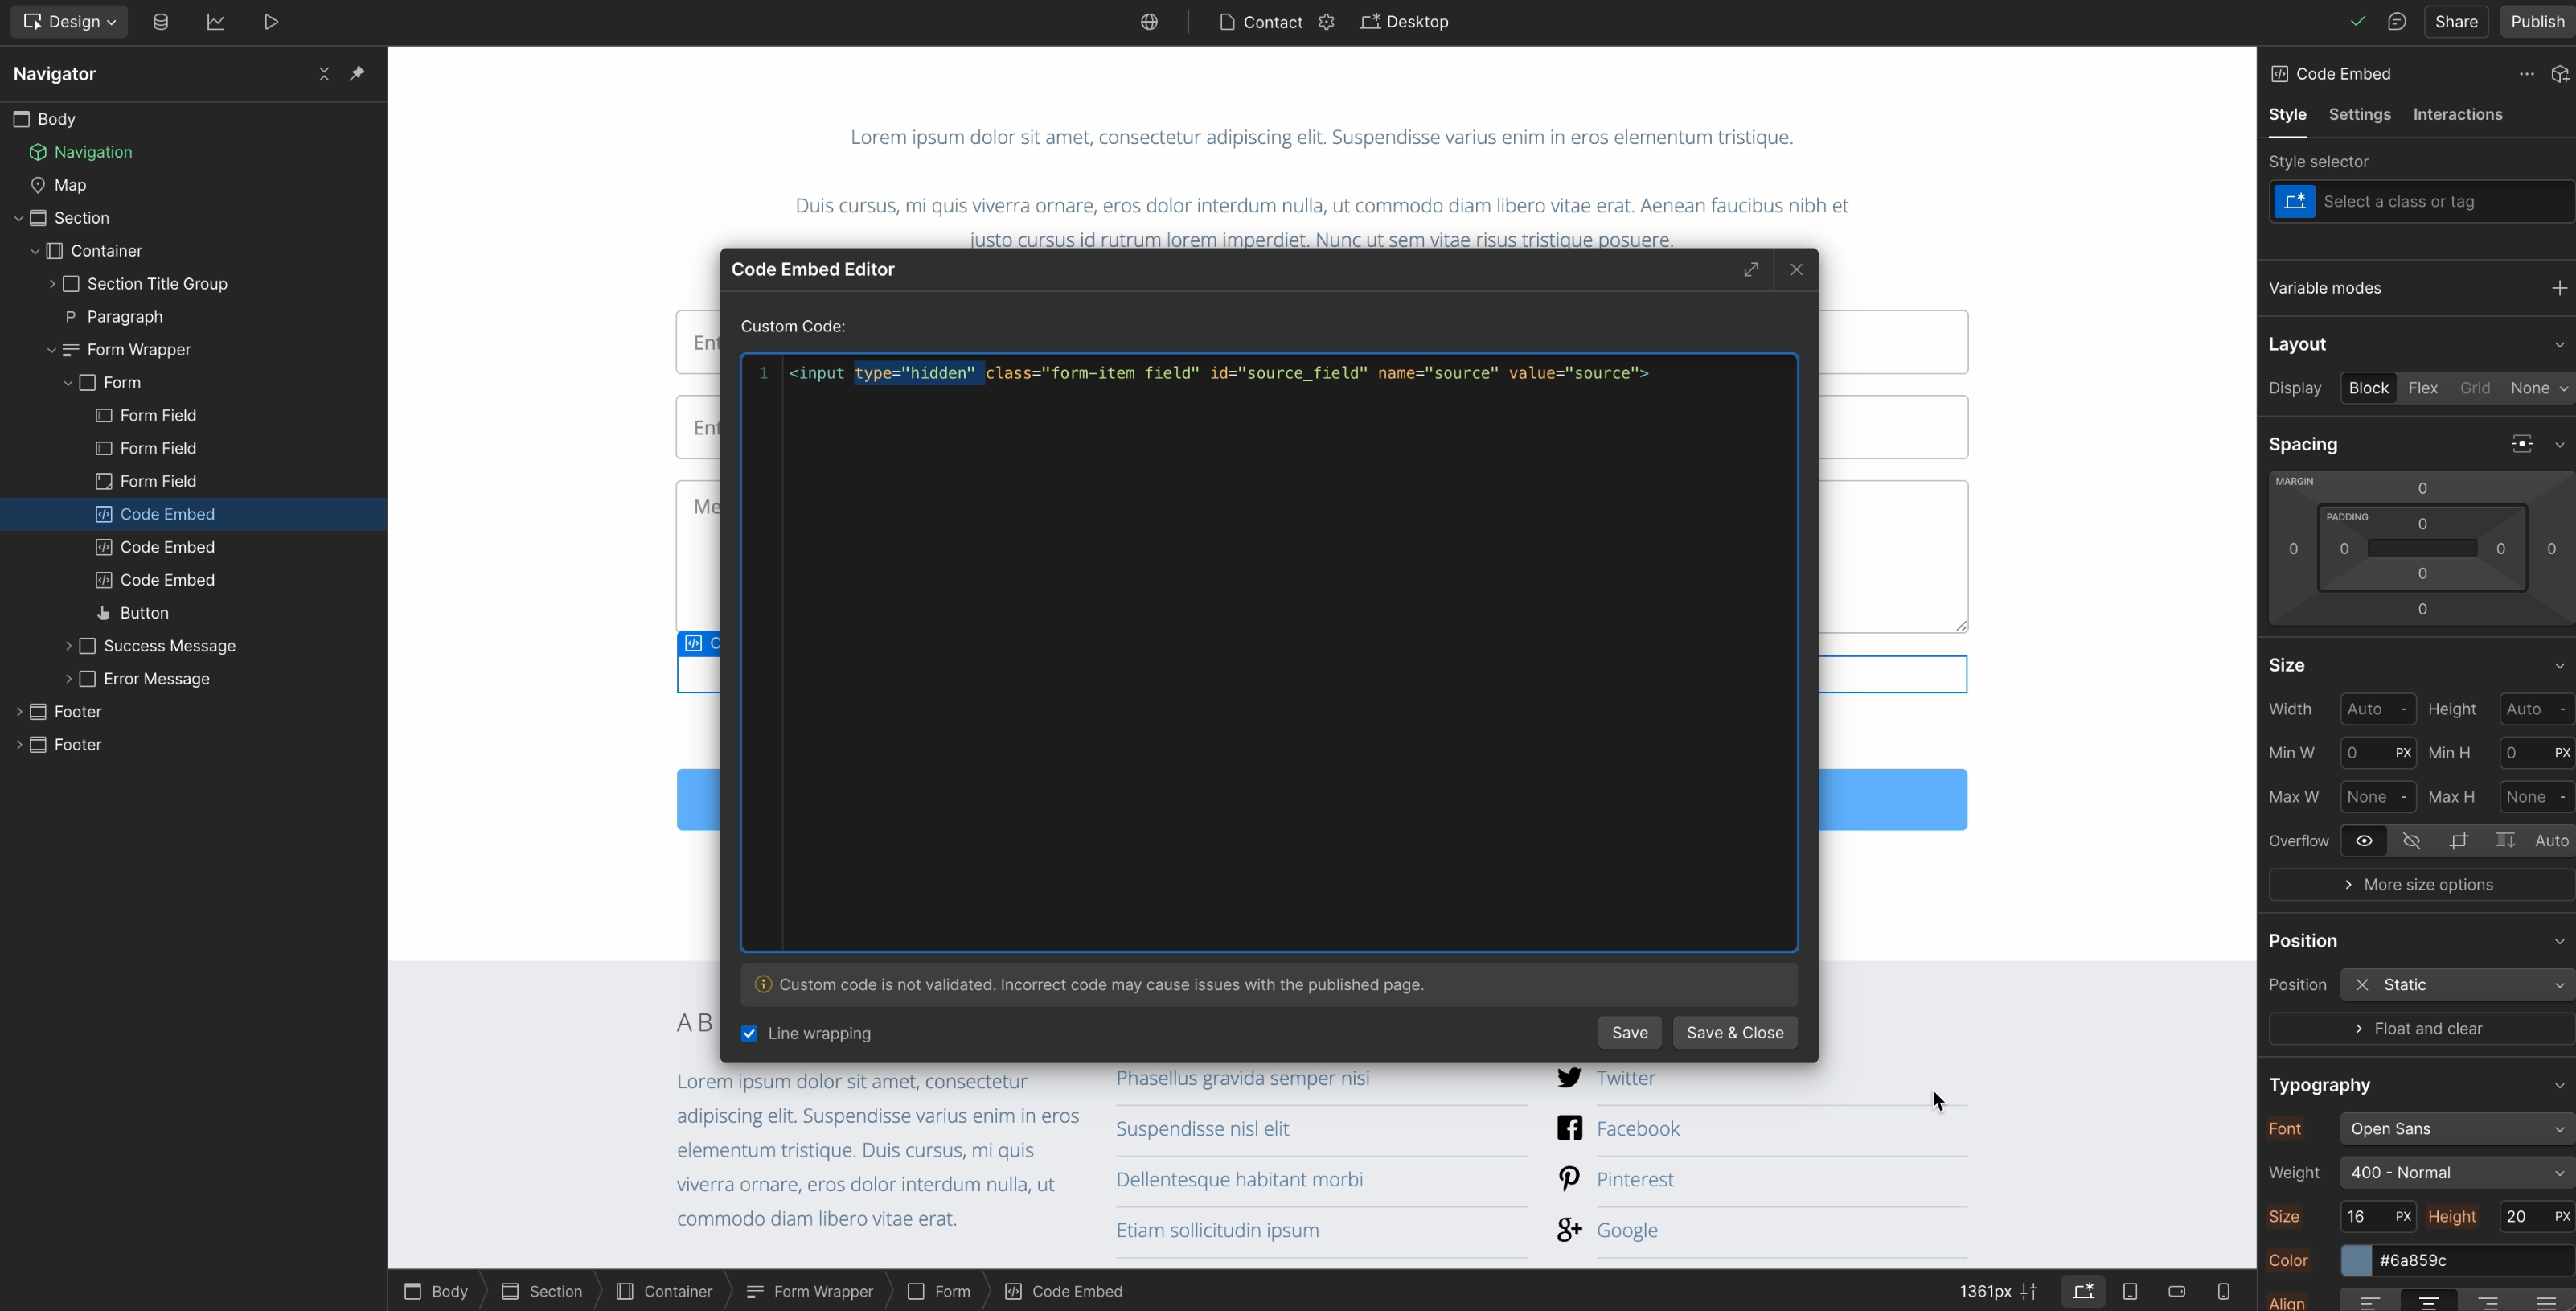
Navigate to the webflow page builder and add the code embed element into the form
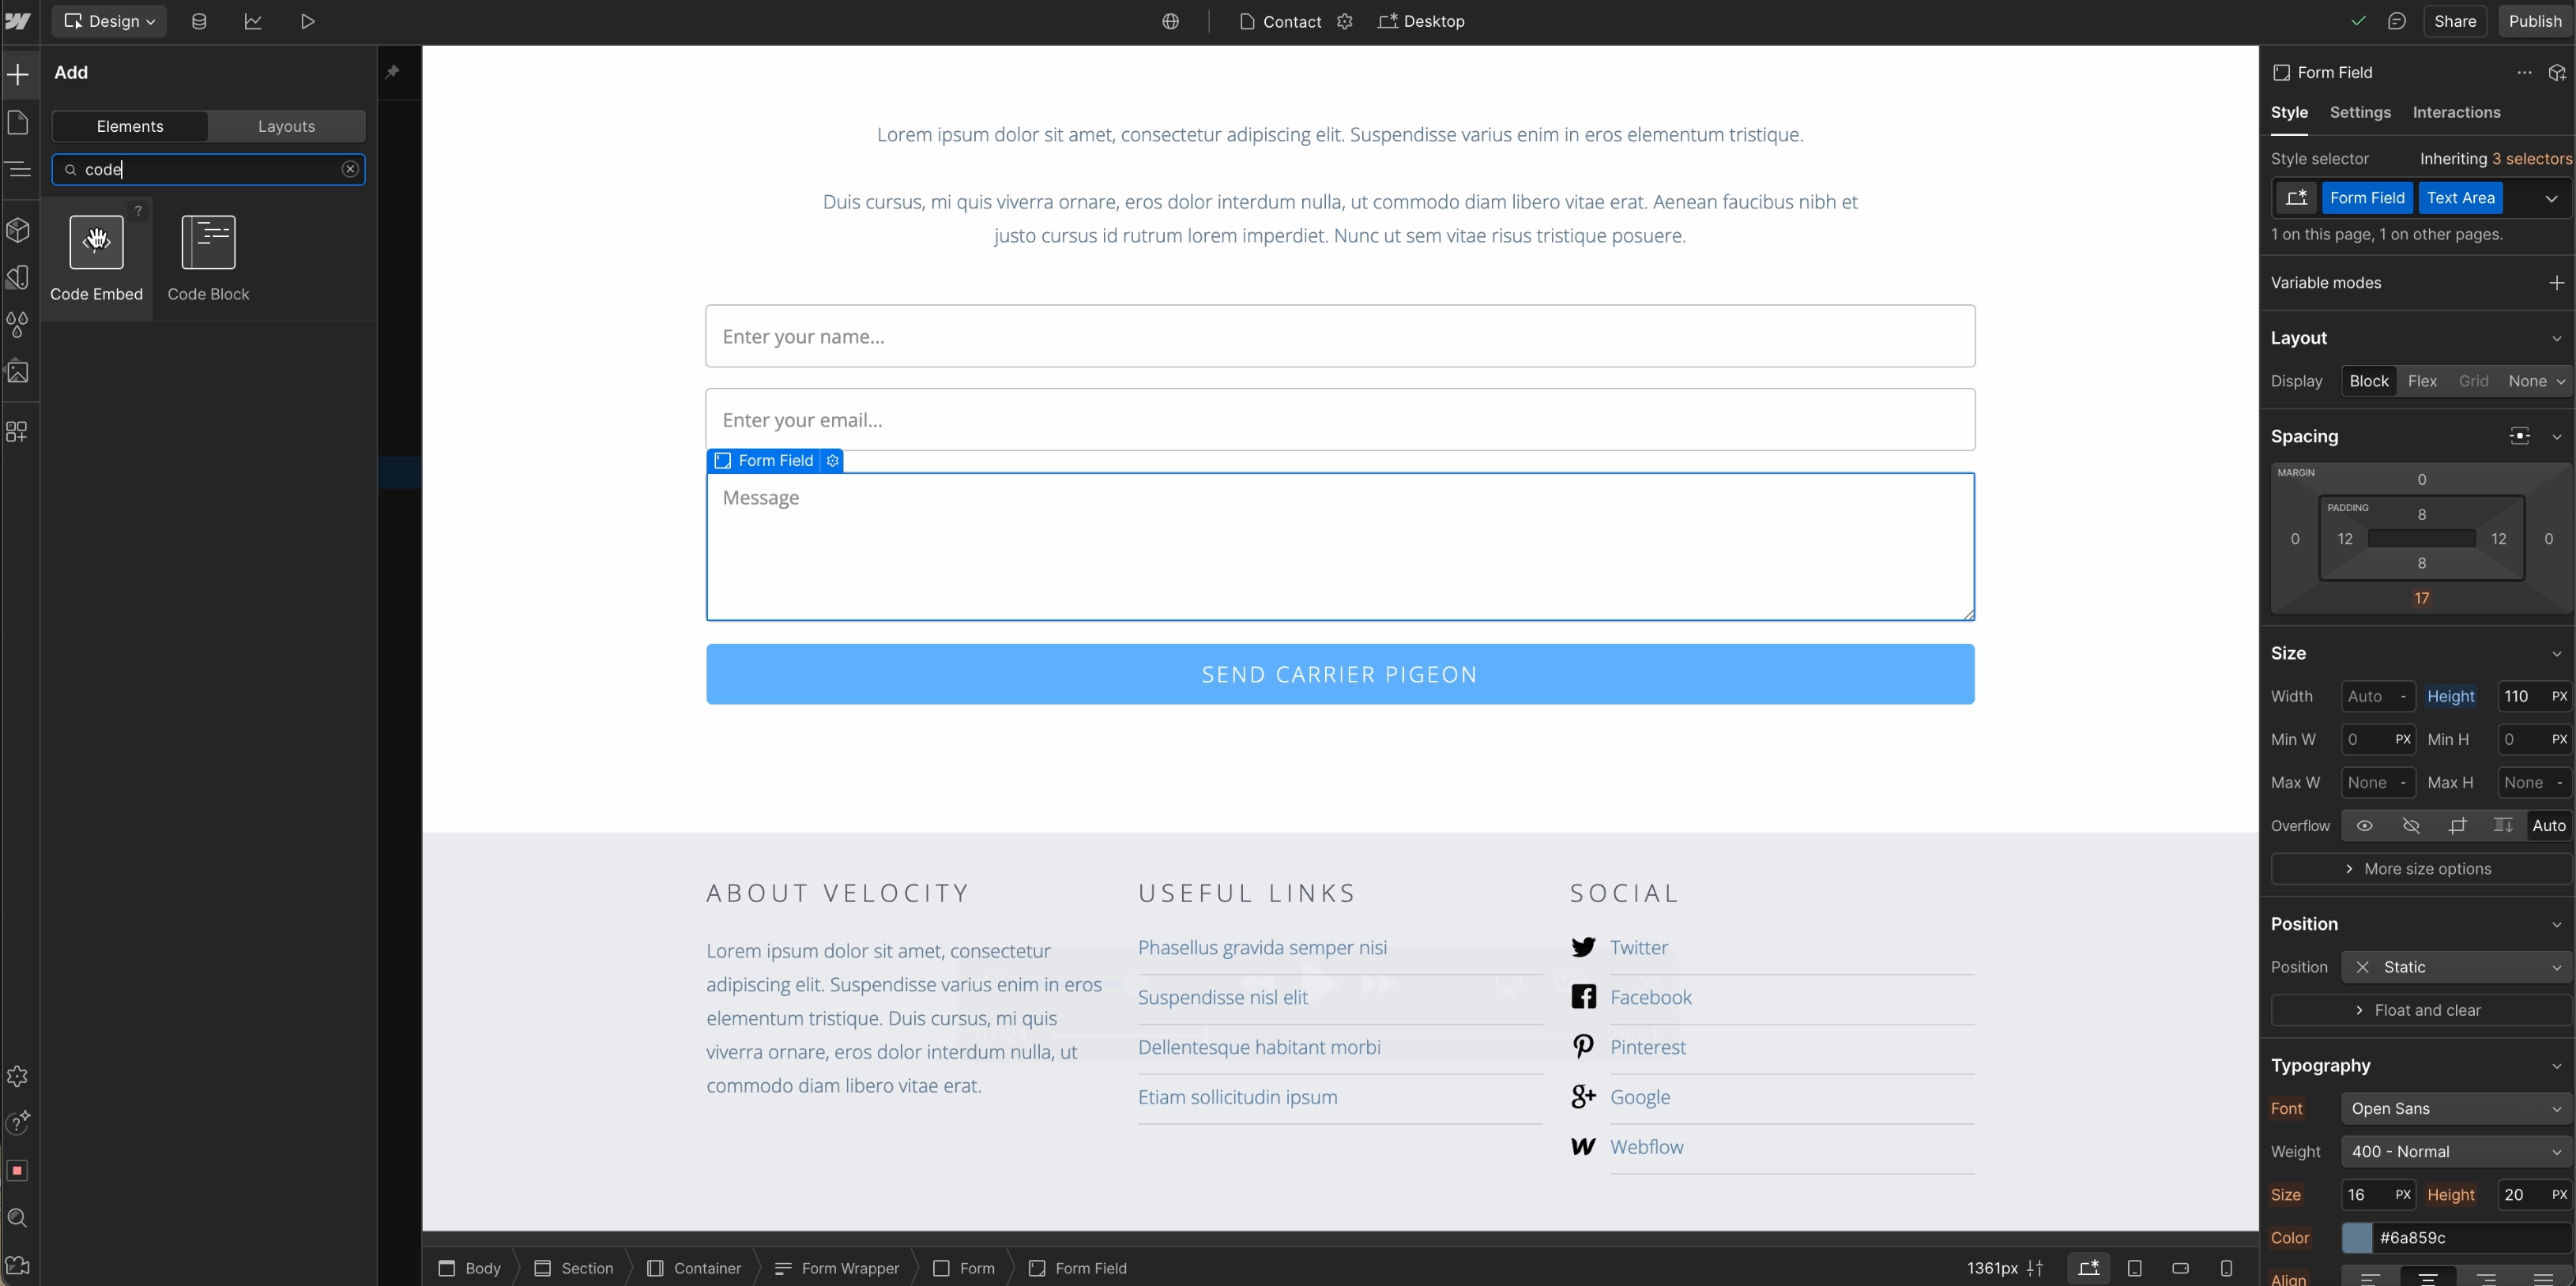
First add the source field using the following code
<input class=form-item field" id="source_field" name="source" value="source">
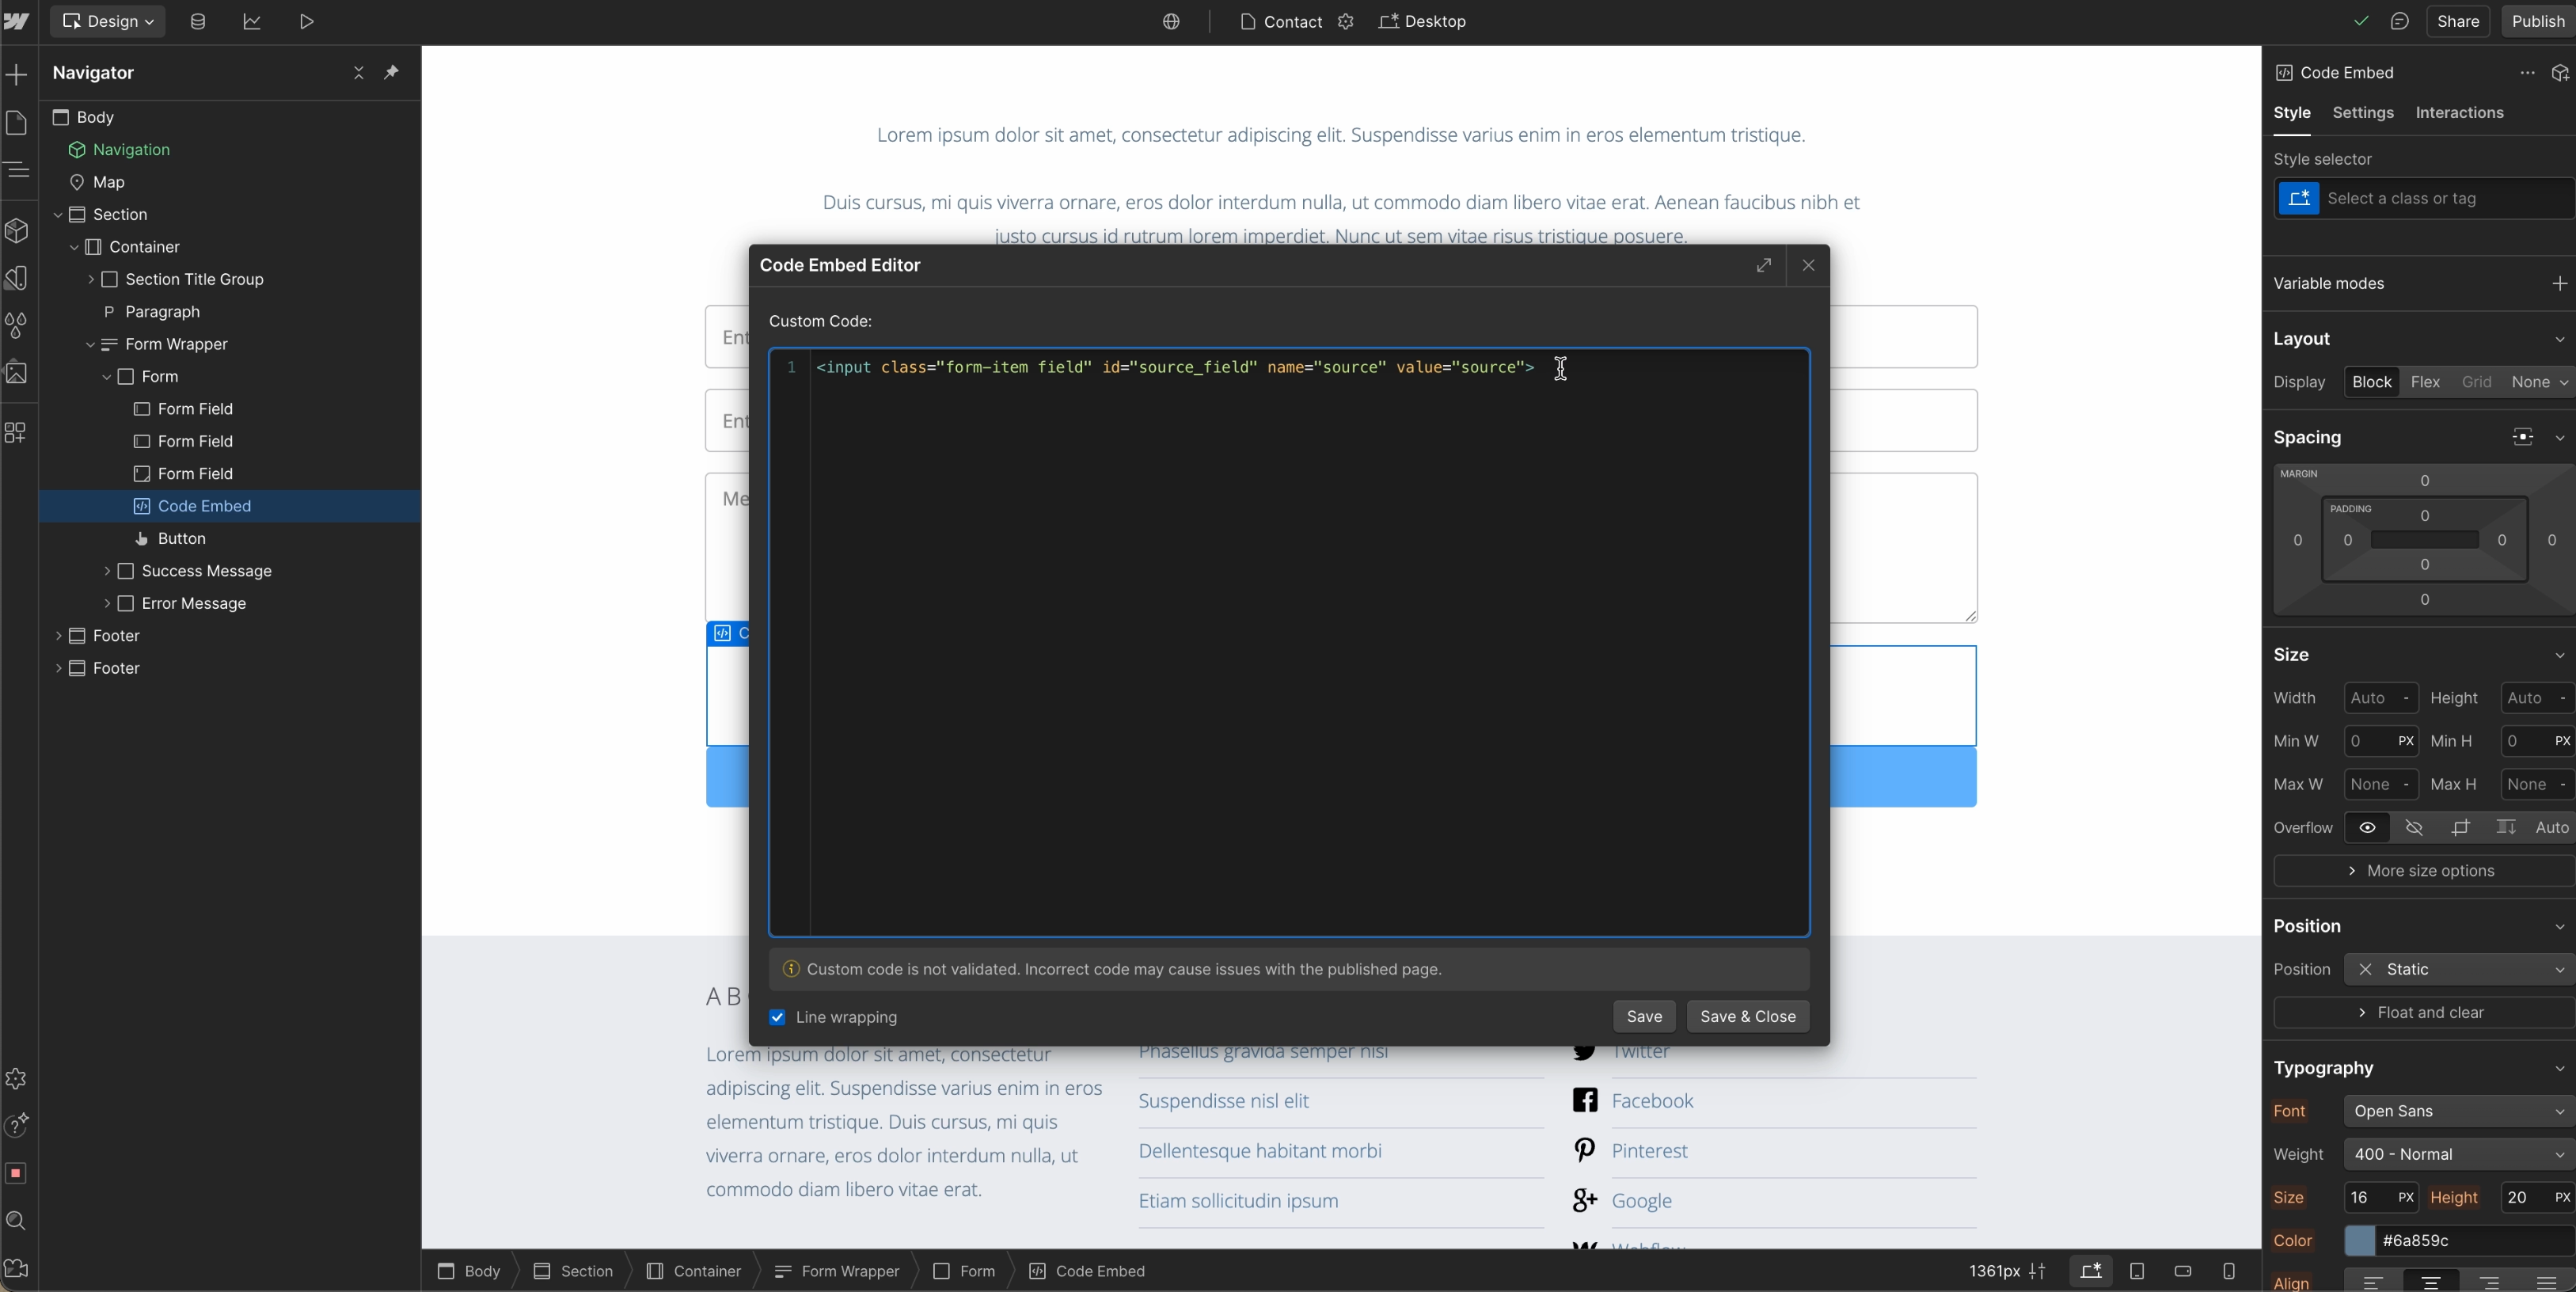
Repeat this process and add the following
<input class=form-item field" id="source_field" name="medium" value="medium">
<input class=form-item field" id="source_field" name="campaign-name" value="campaign">
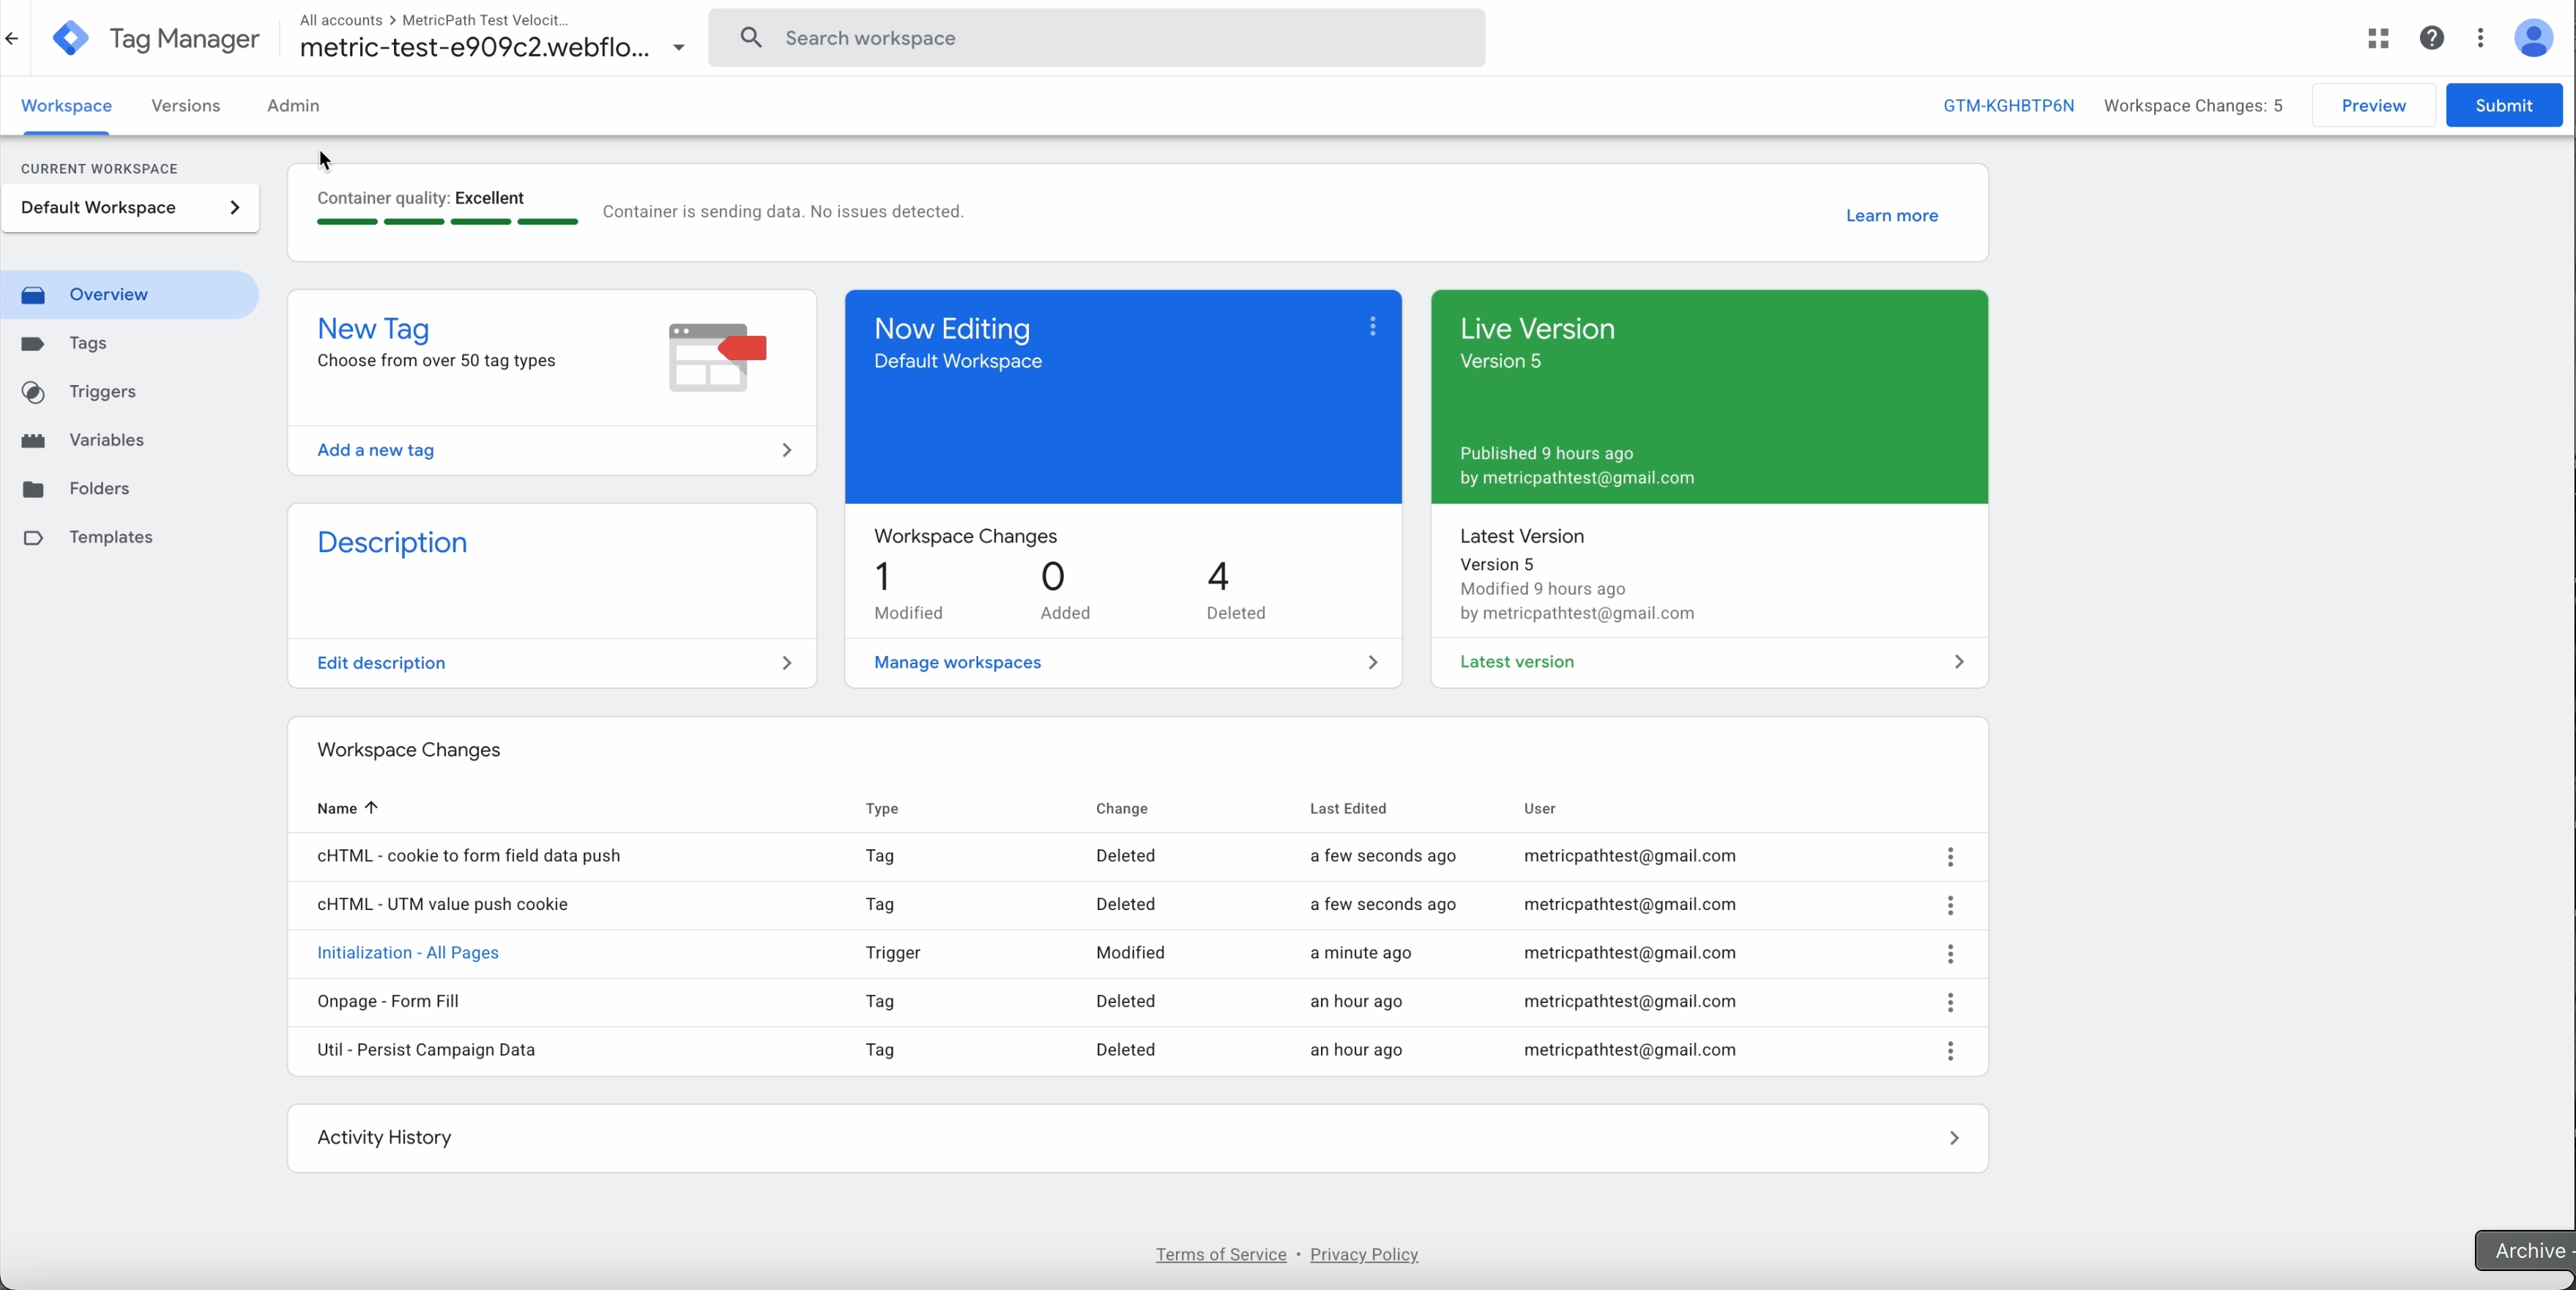
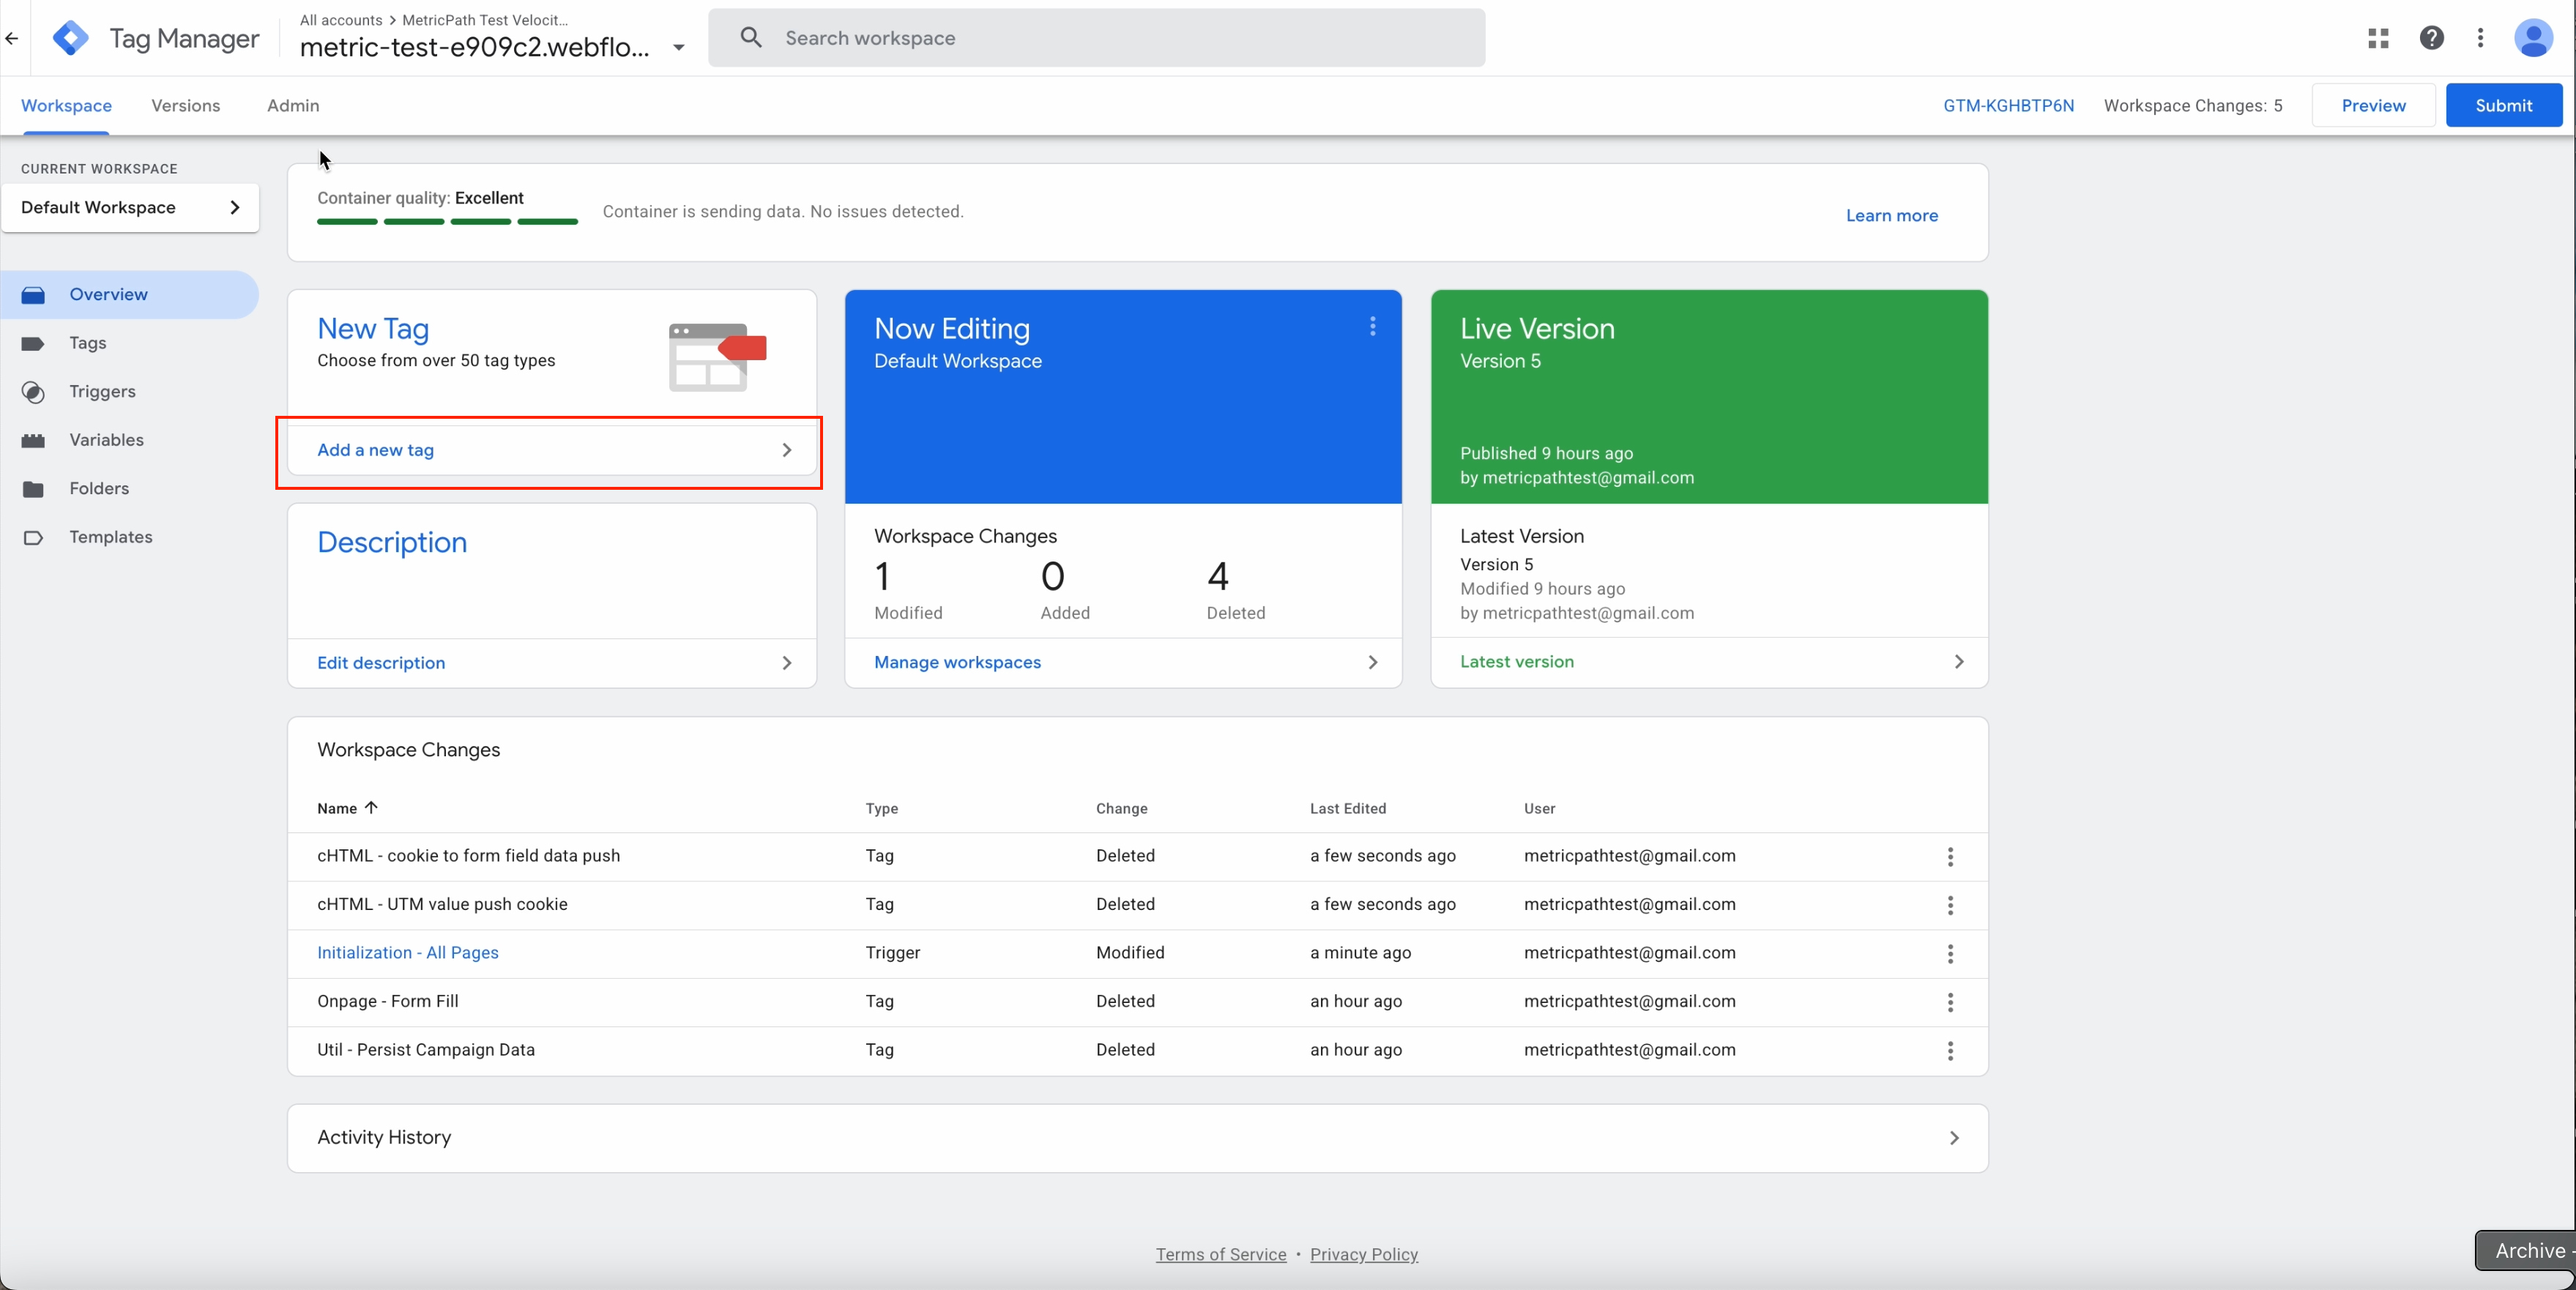
Navigate back into Google. Tag Manager and Create New Tag
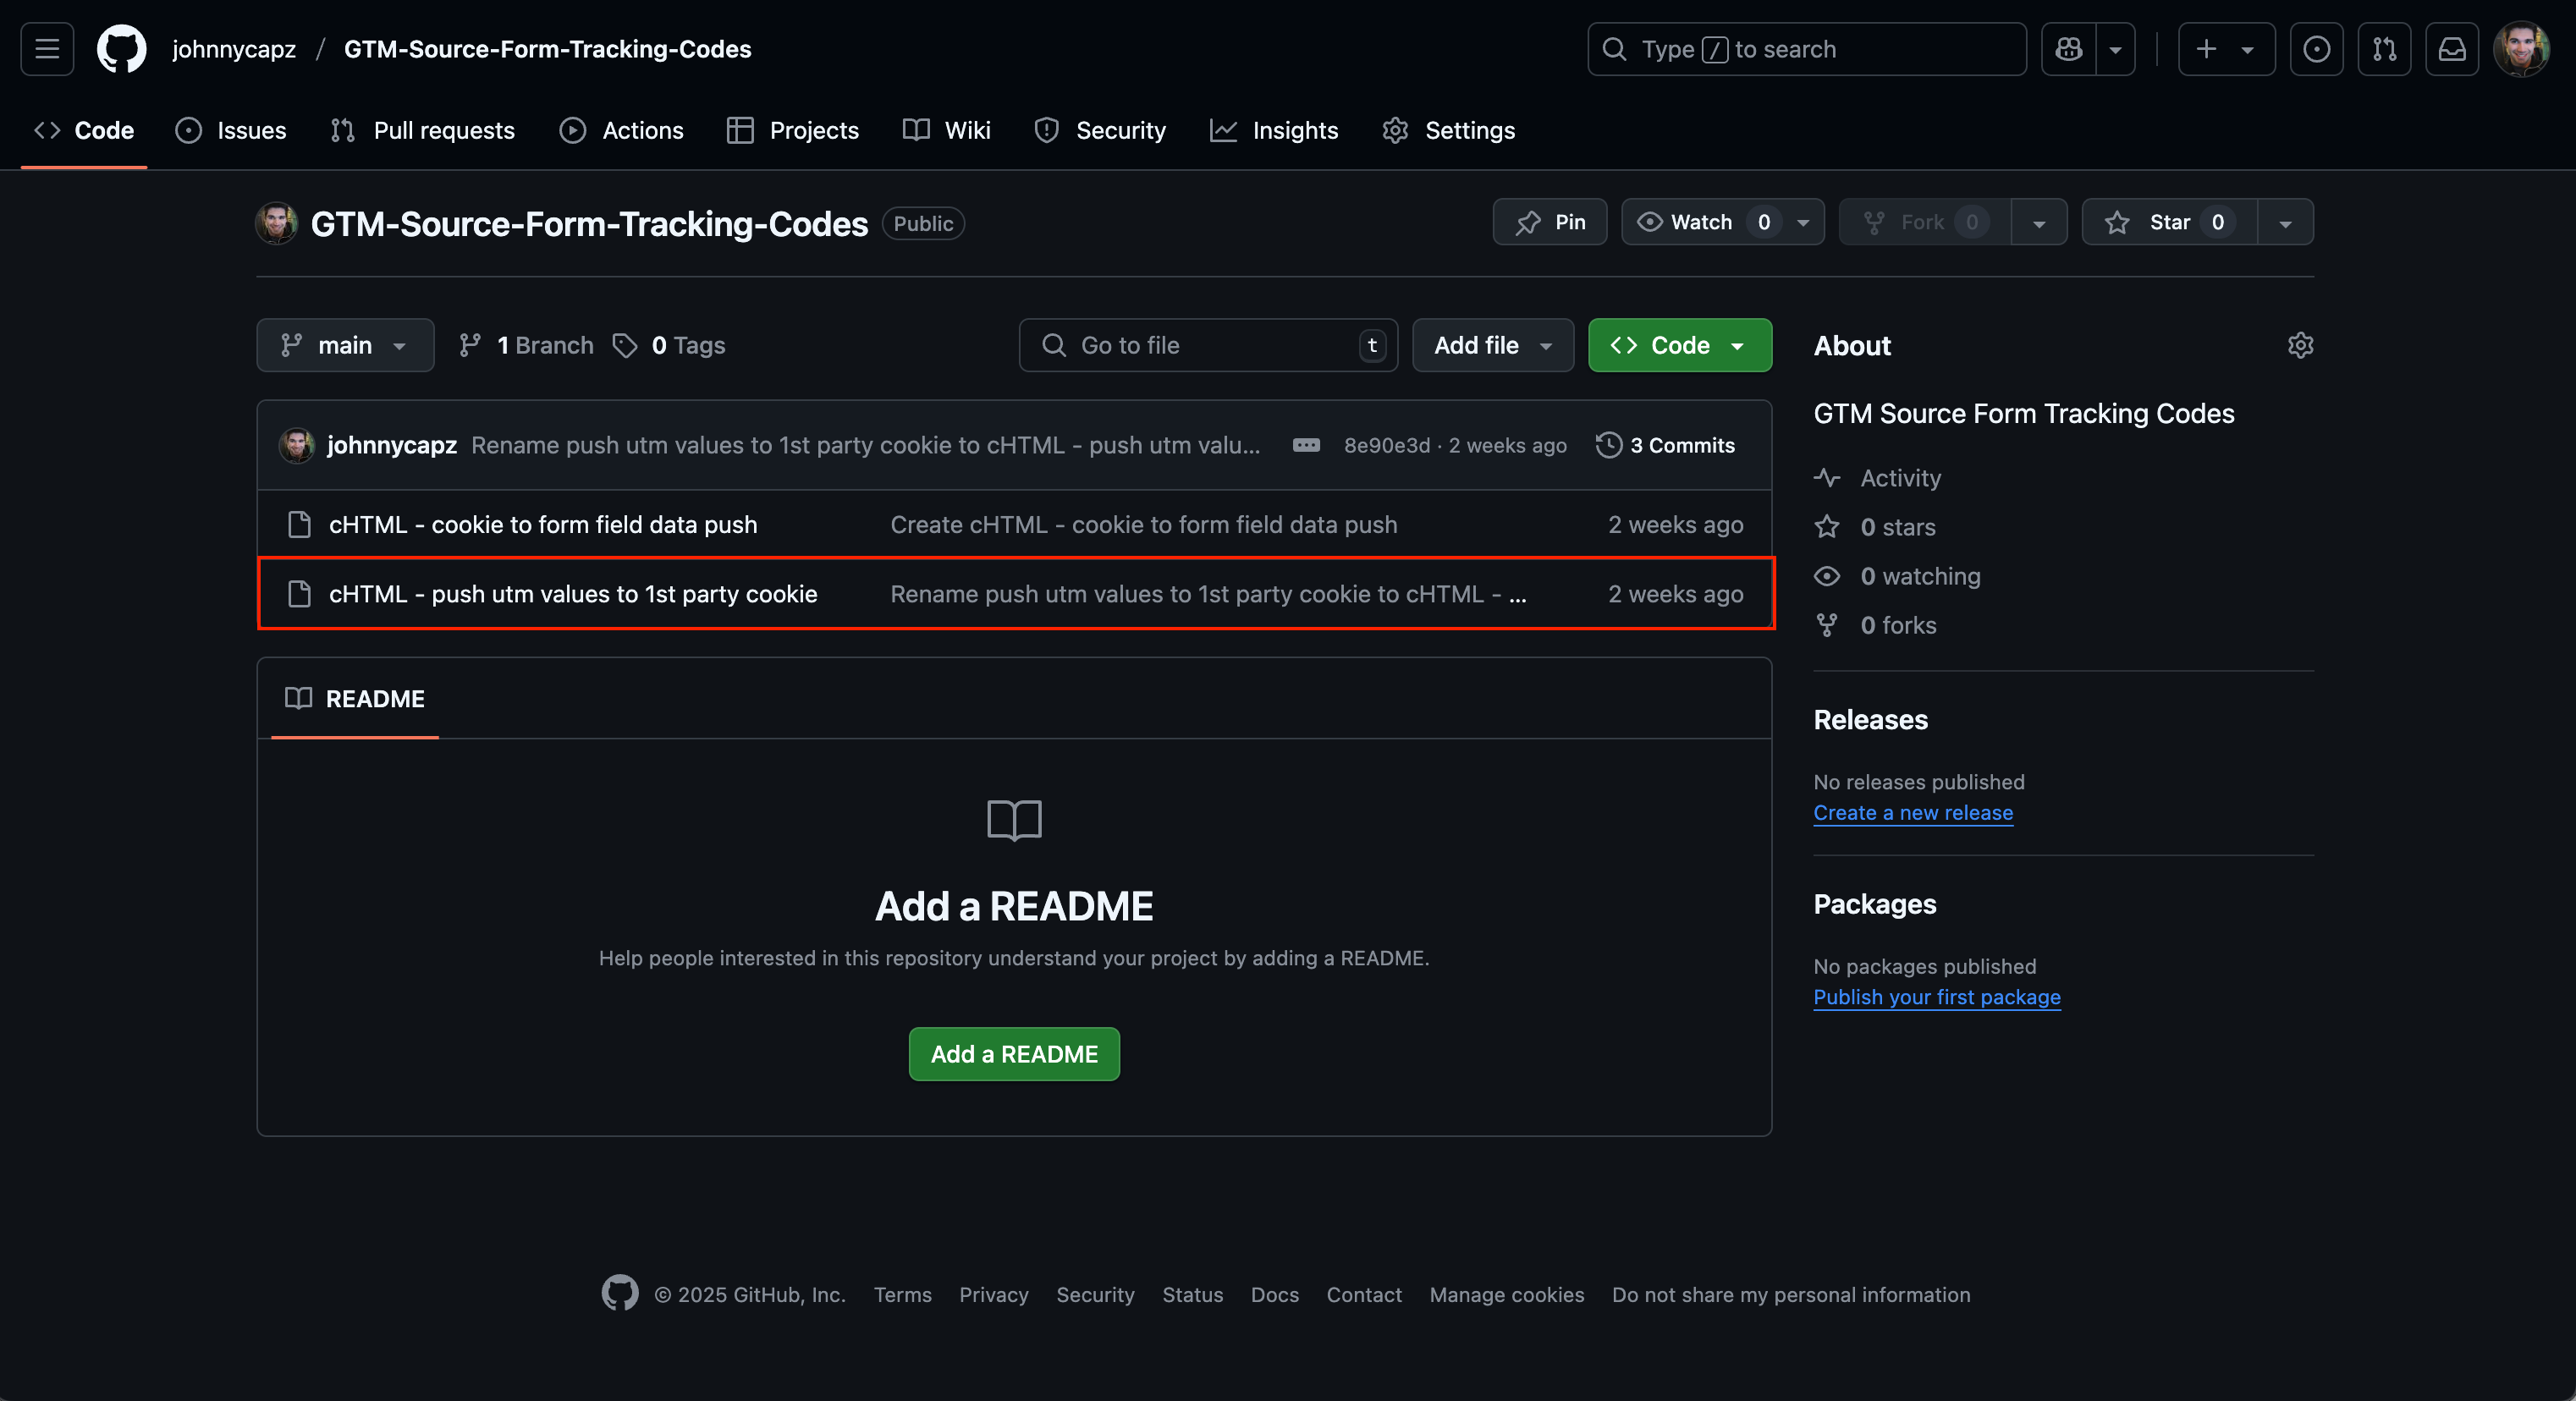
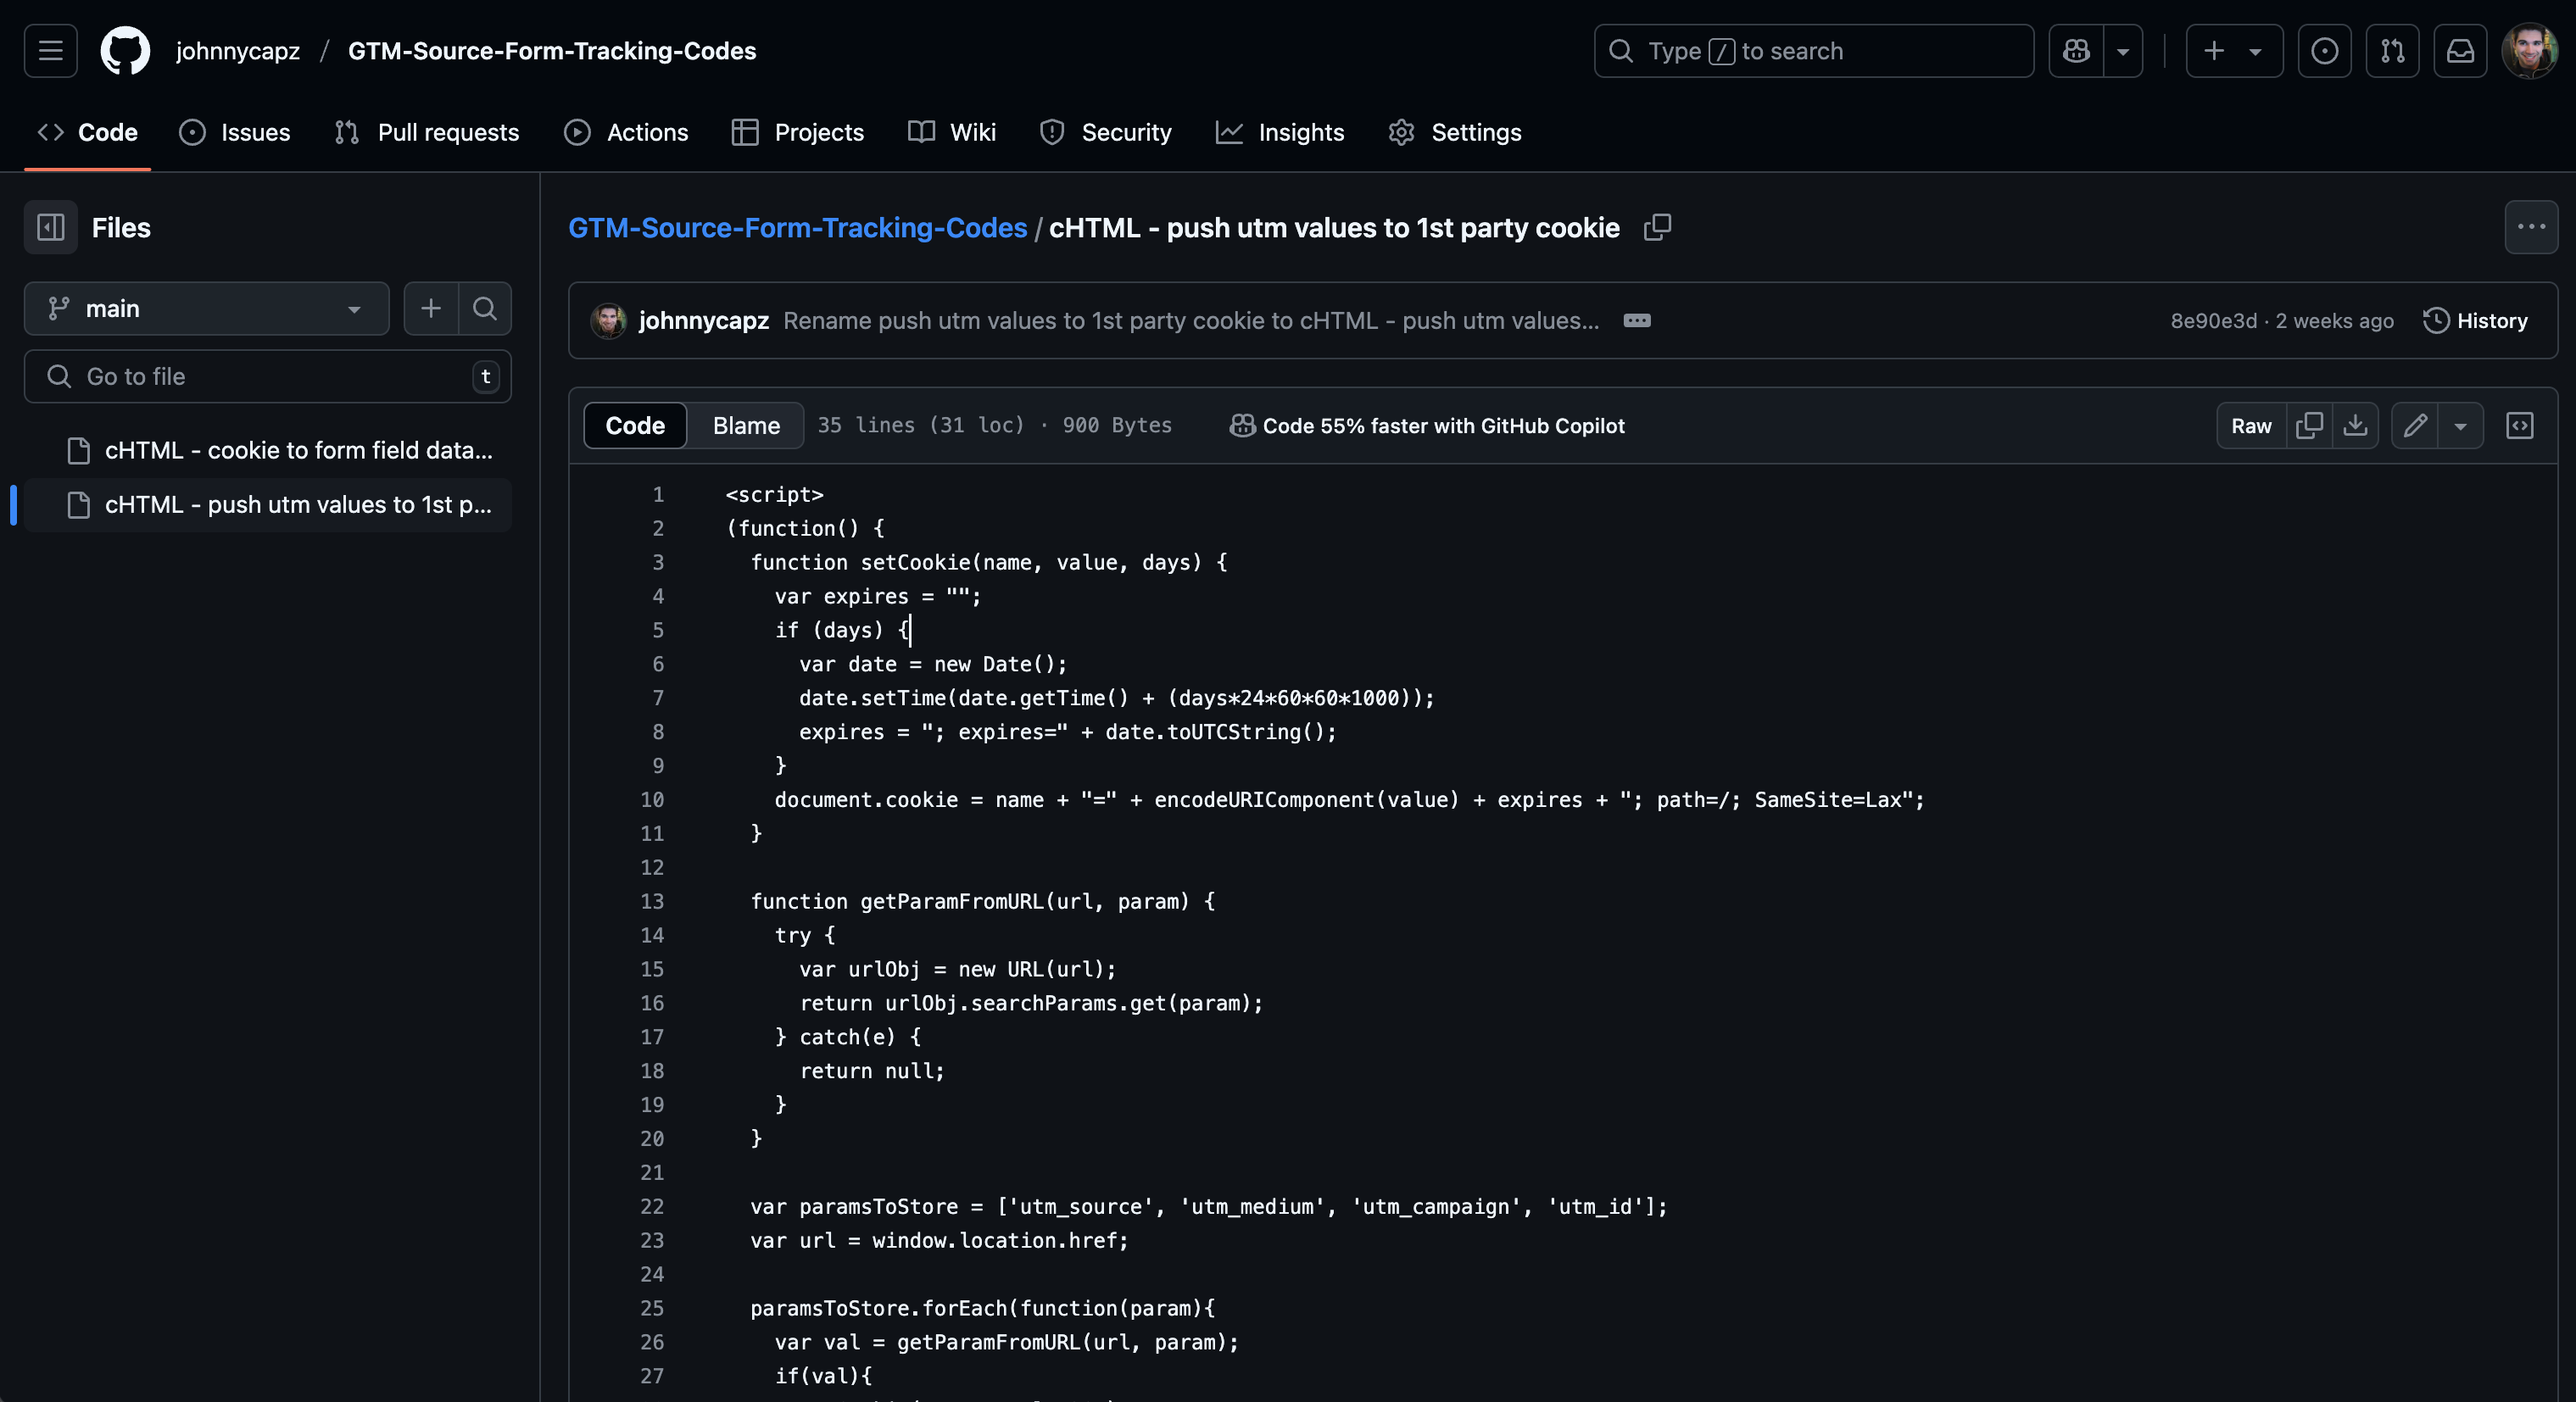
Navigate to github link https://github.com/johnnycapz/GTM-Source-Form-Tracking-Codes
Copy code from cHTML - push utm values to 1st party cookie
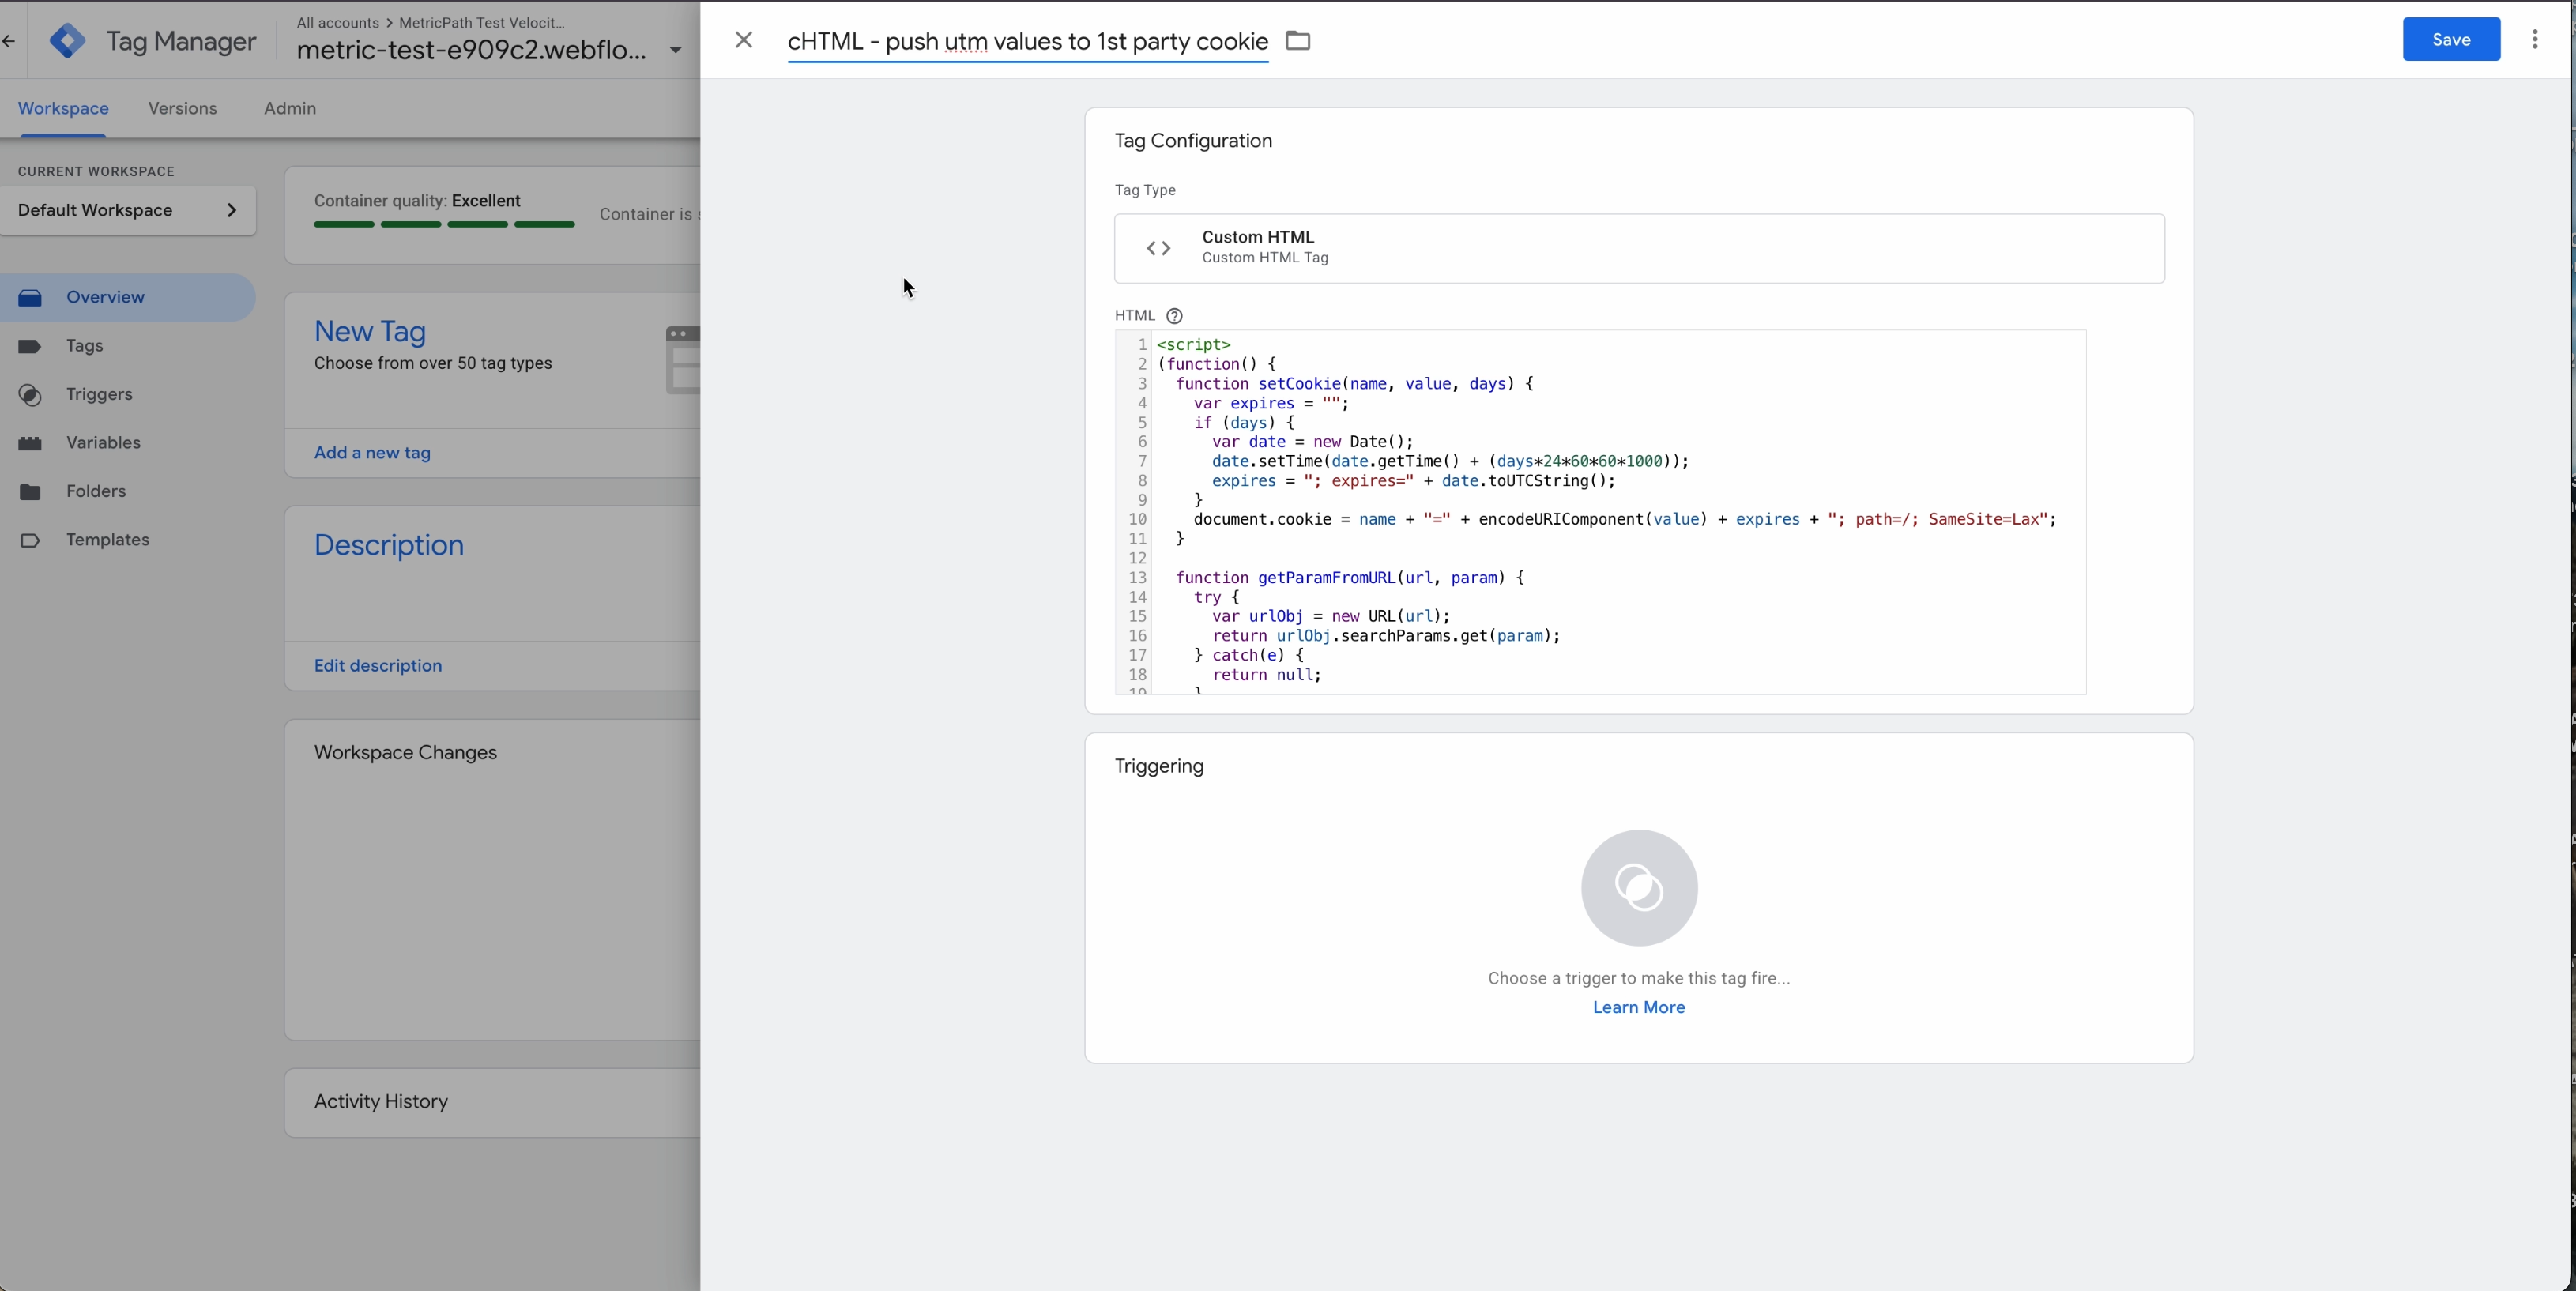
Navigate back into Google Tag Manager, select tag configuration, and then select custom html. Paste the code into the tag. Then name the tag cHTML - push utm values to 1st party cookie
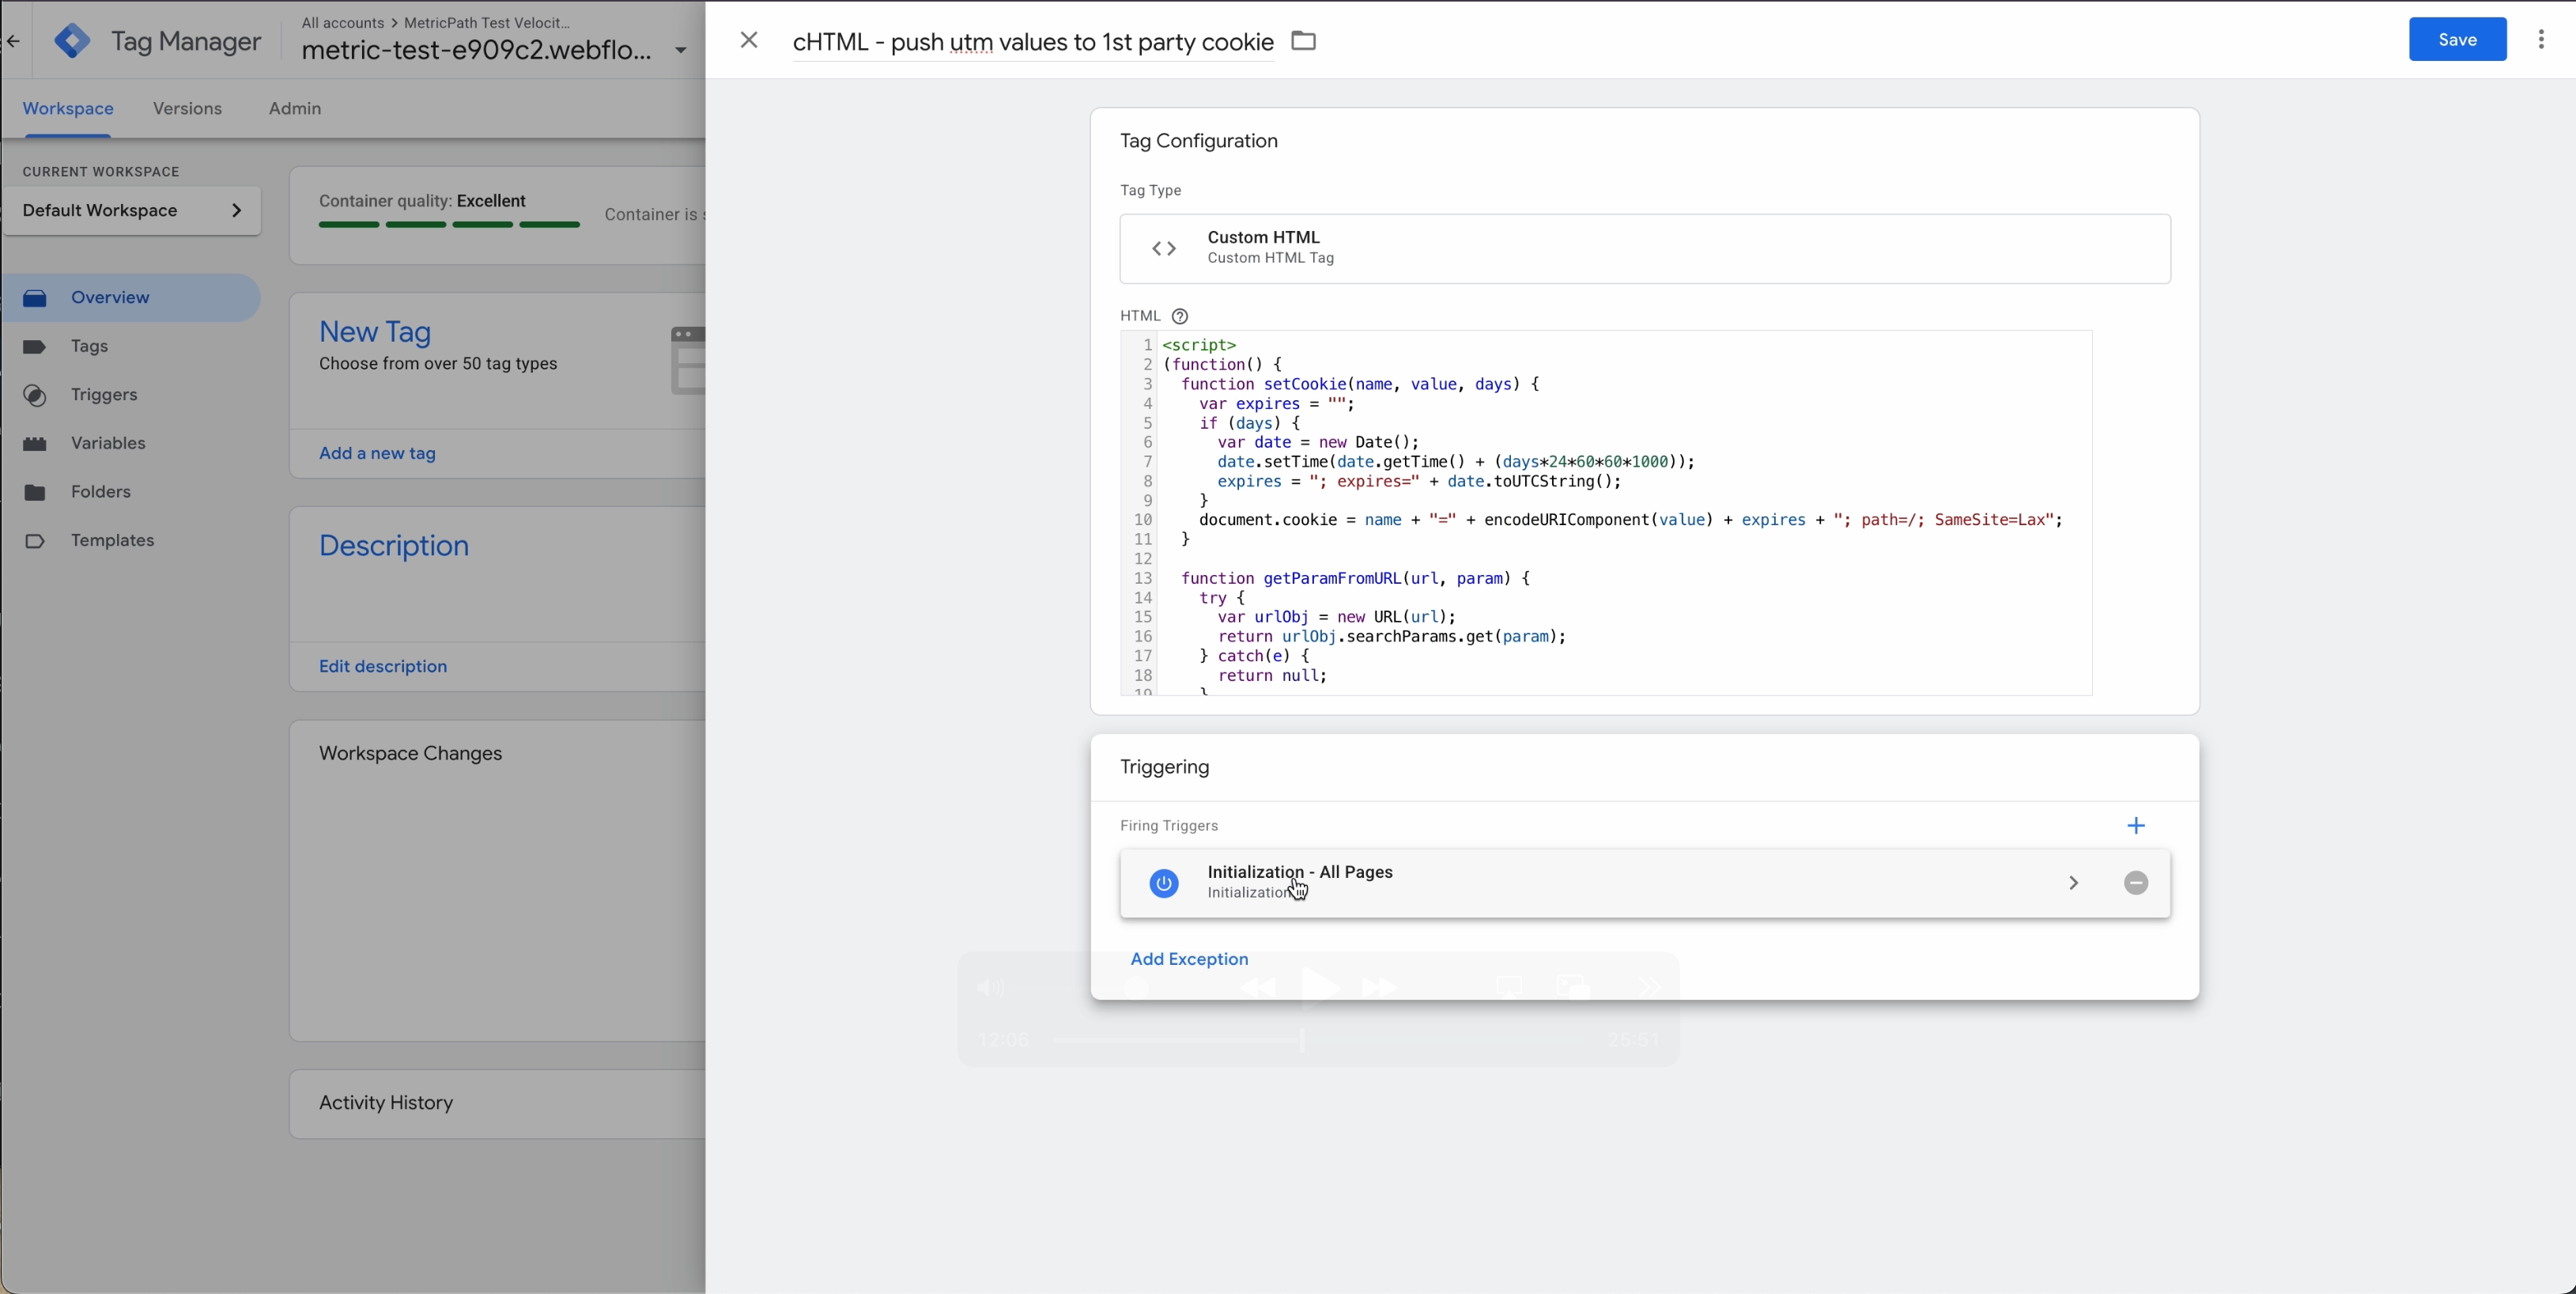
Set the trigger to Initialization - All Pages. Then save the tag
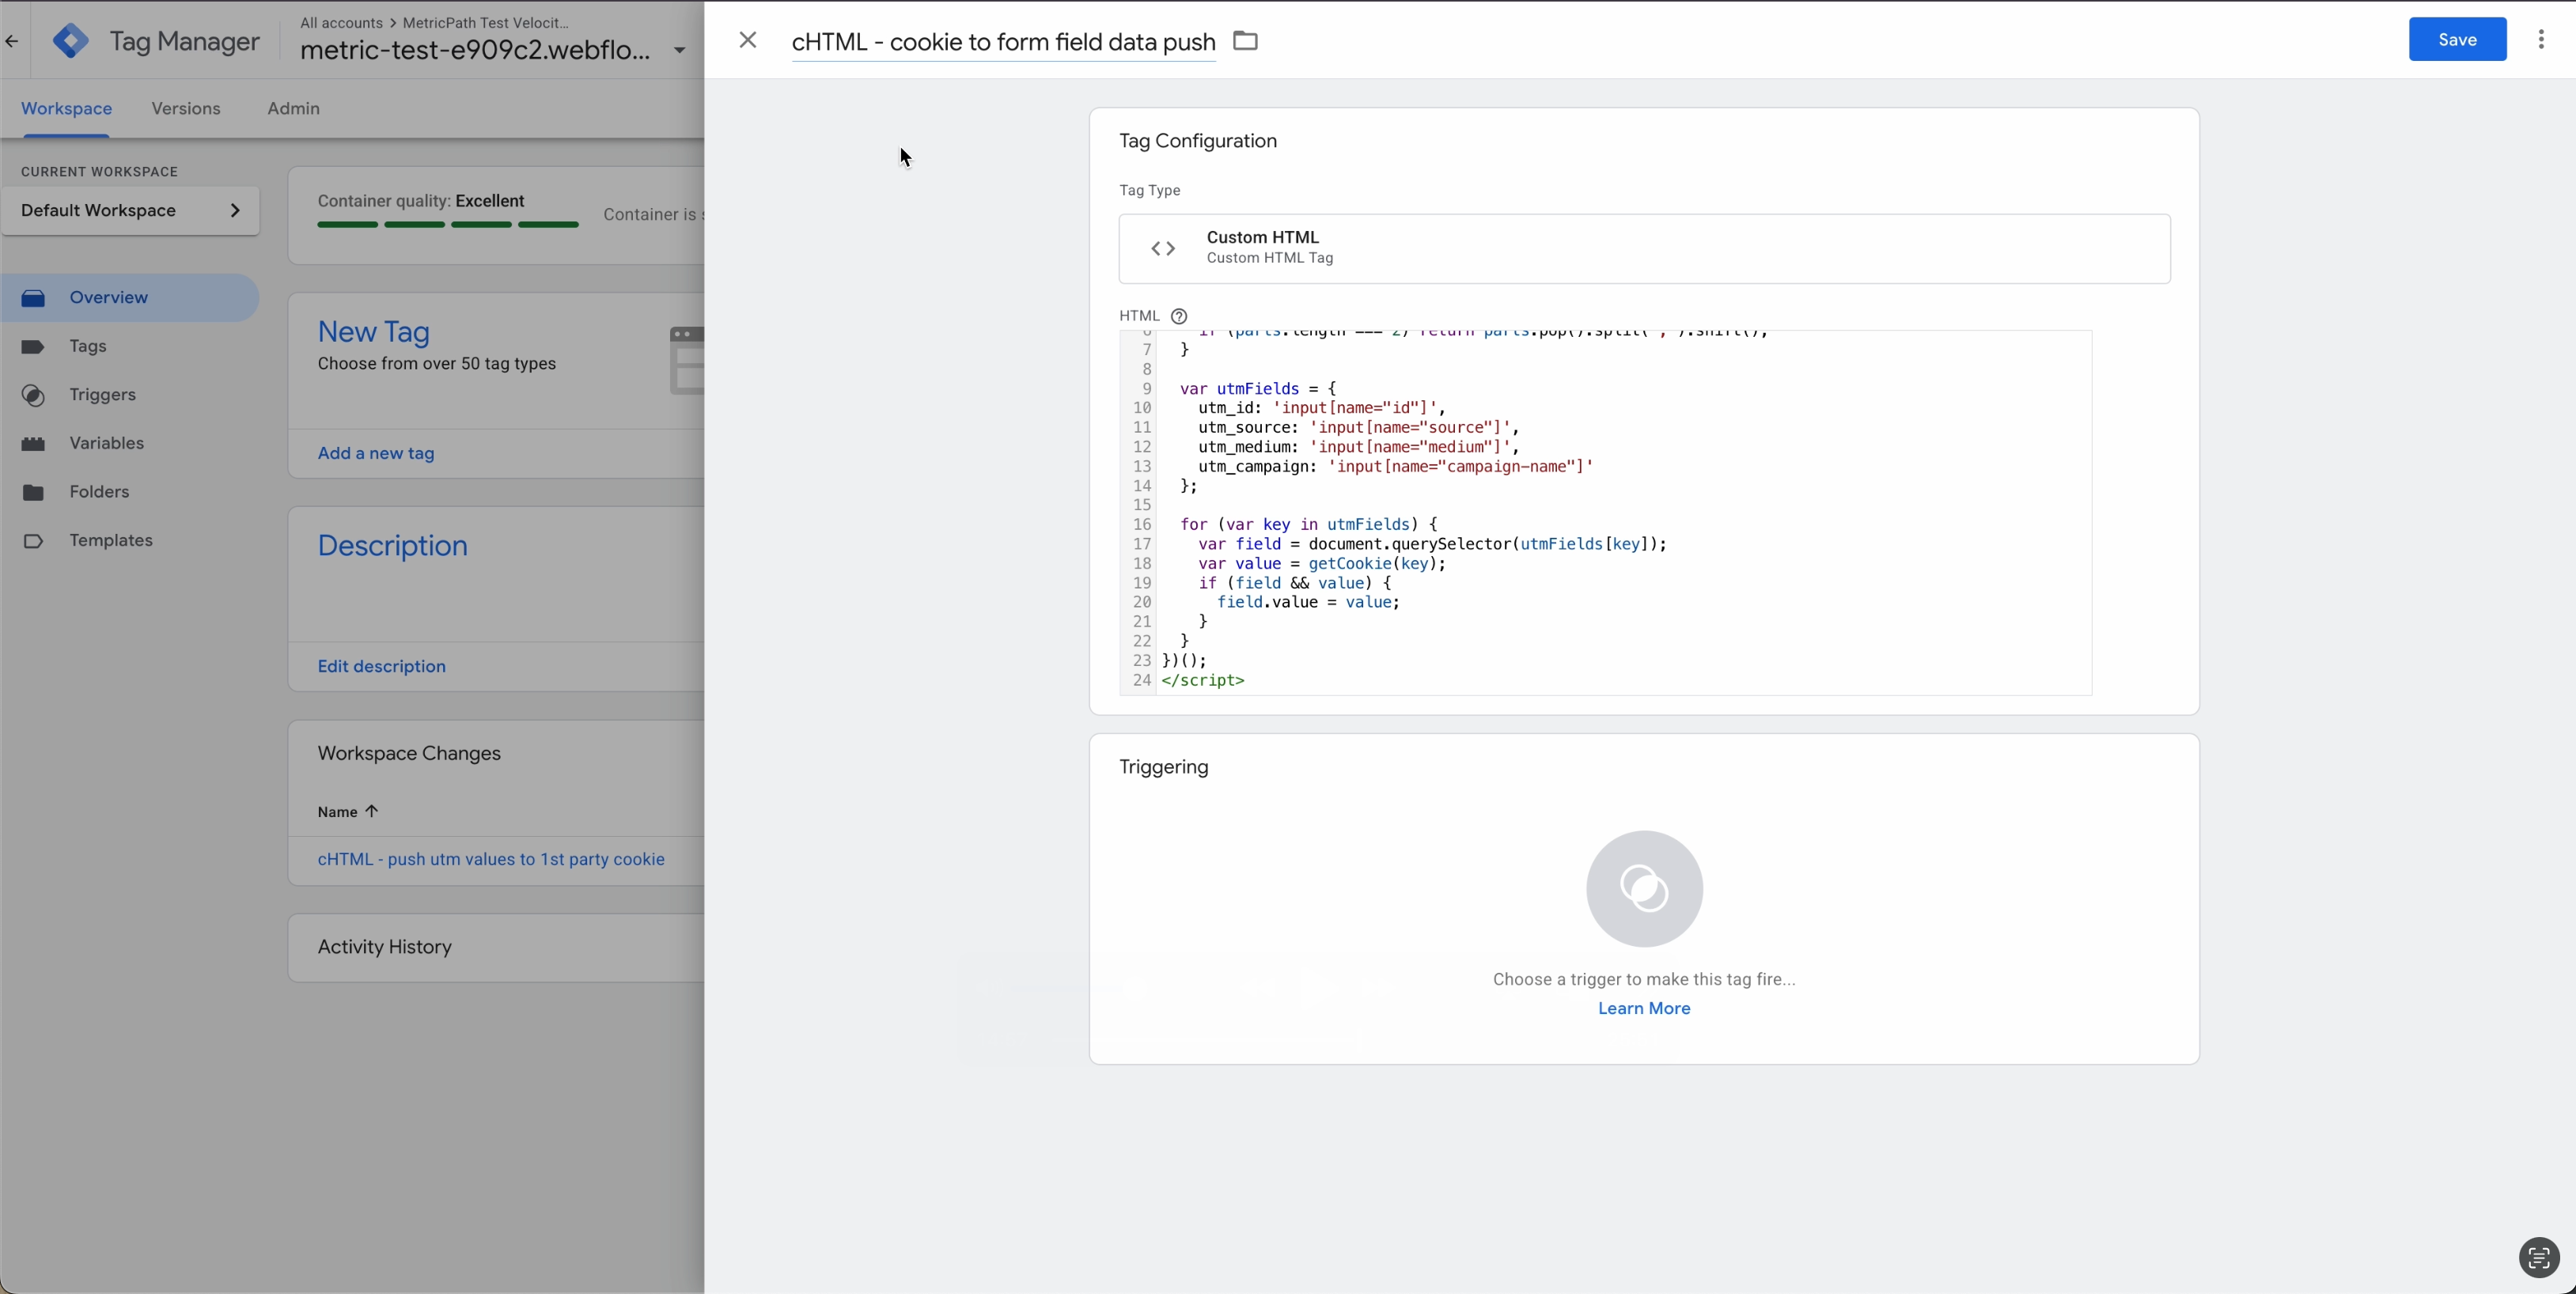
Create a new tag and copy and paste the 2nd code in from github link into the tag.

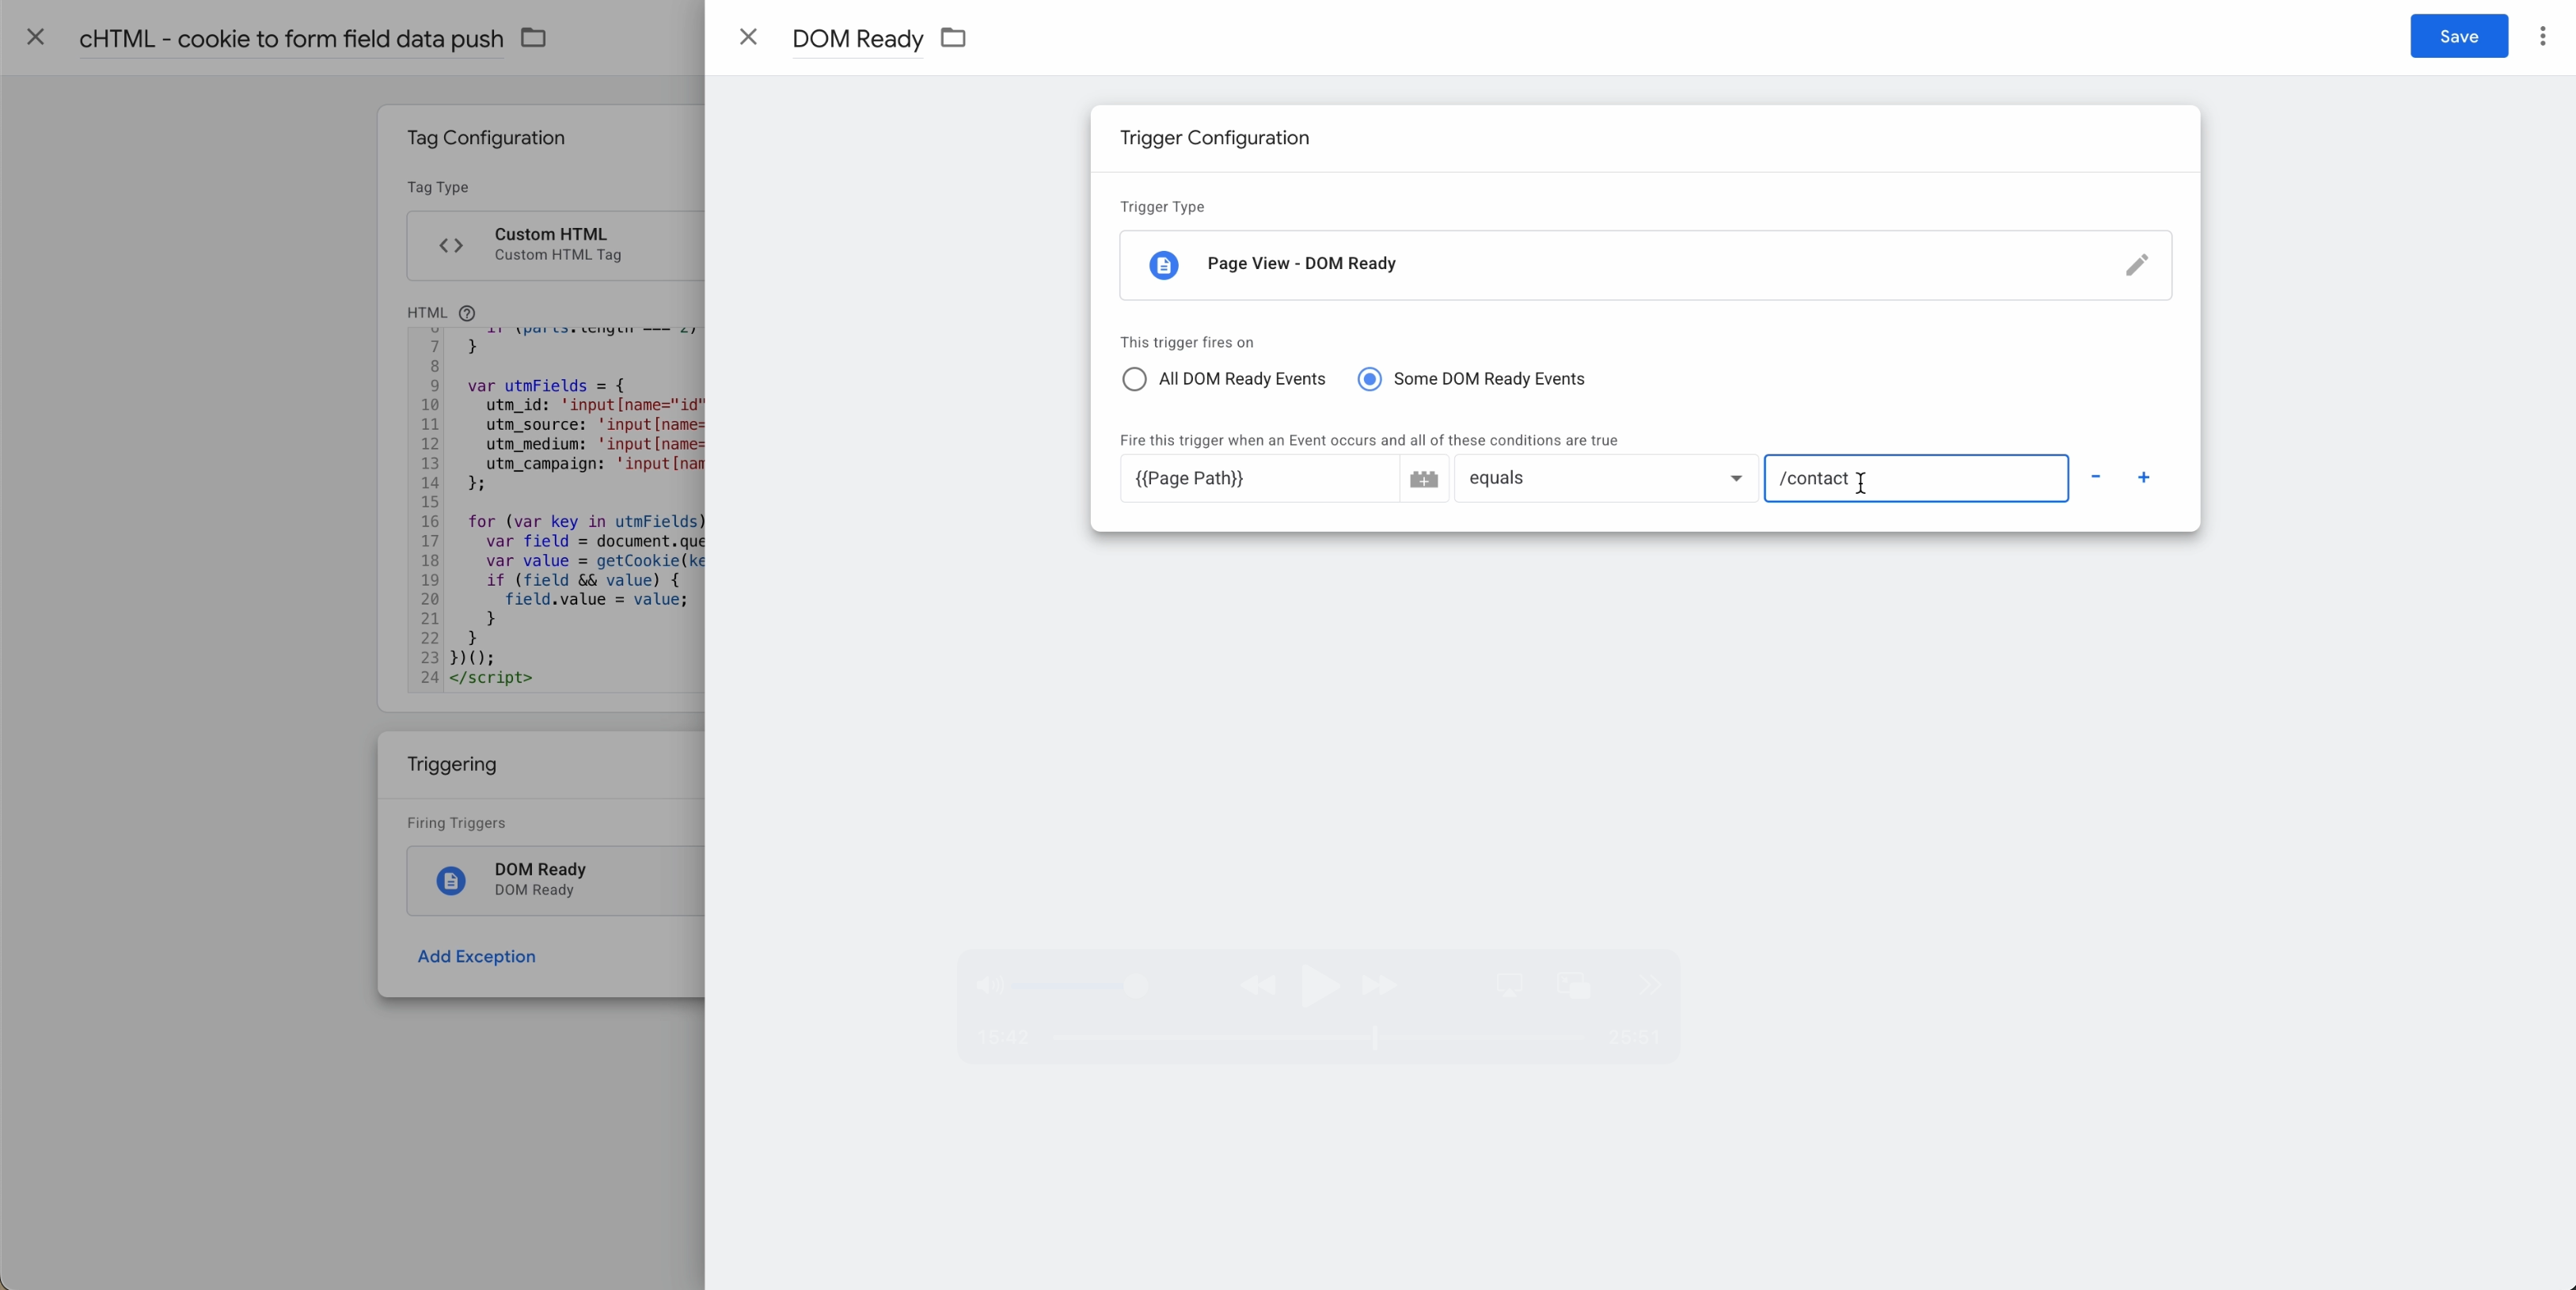
Name tag cHTML - cookie to form field data push
For the trigger select DOM Ready, andthen select some DOM Ready Events. Add the pages you wish this tag to fire on refercing the screenshot below.
Save the tag and navigate to the home screen of Google Tag Manager
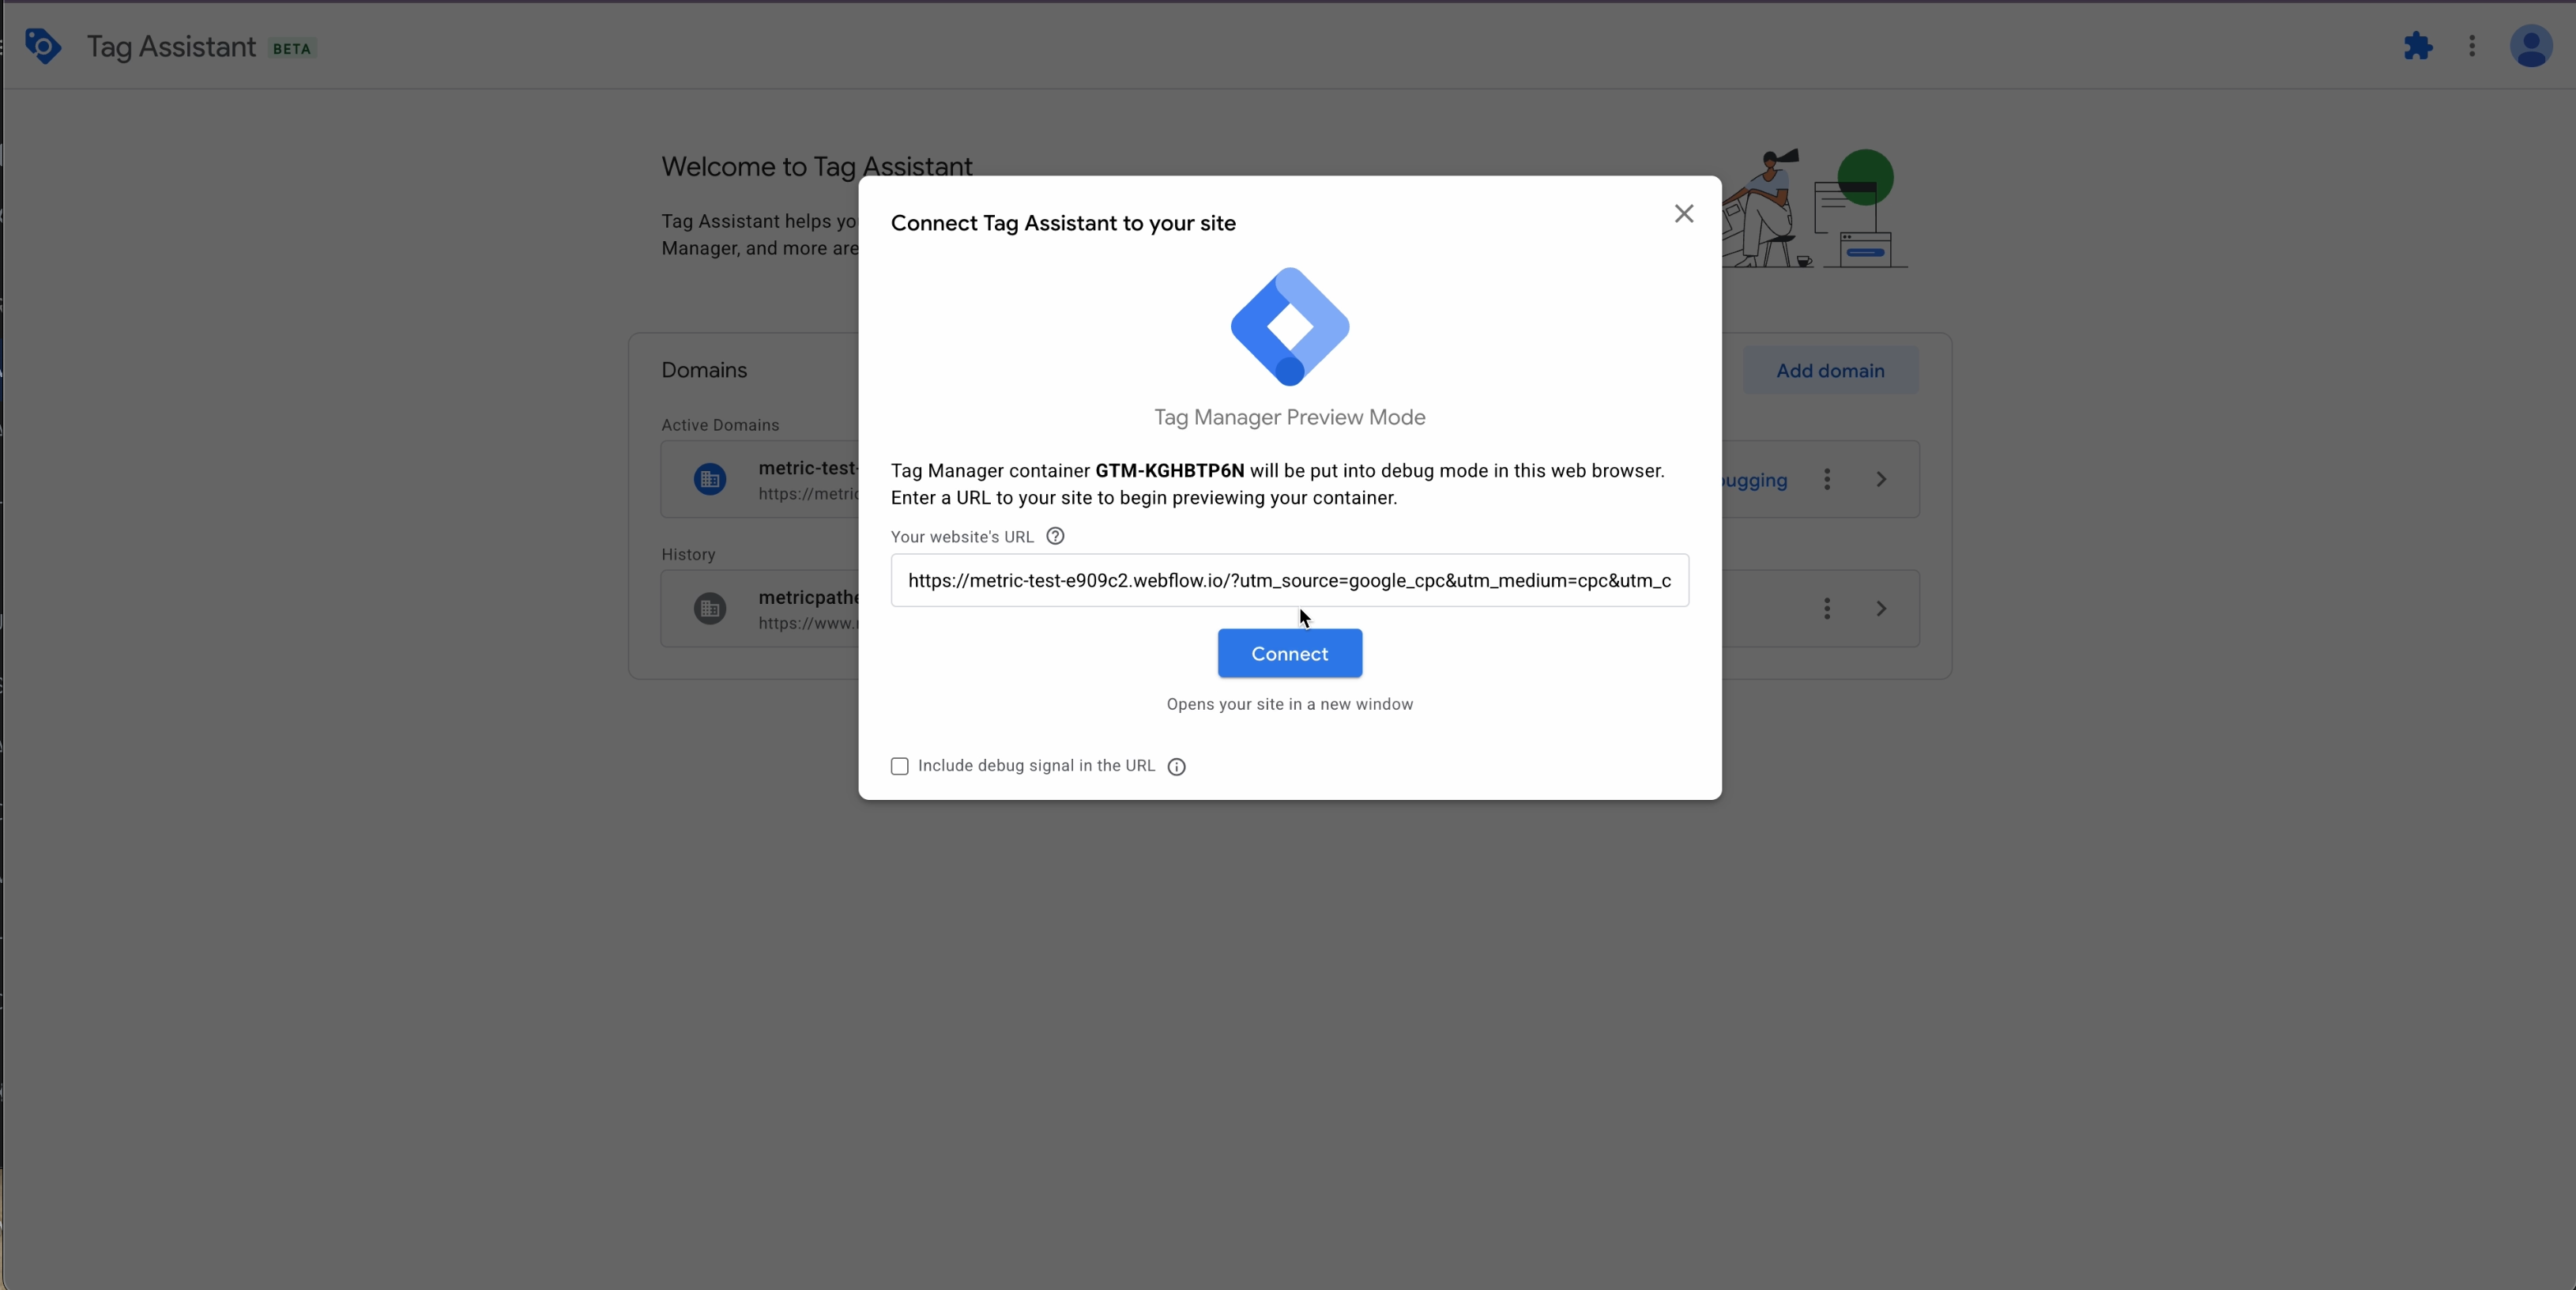
Select Preview

Enter a URL with UTM Parameters, make sure the debug signal check box is turned off.
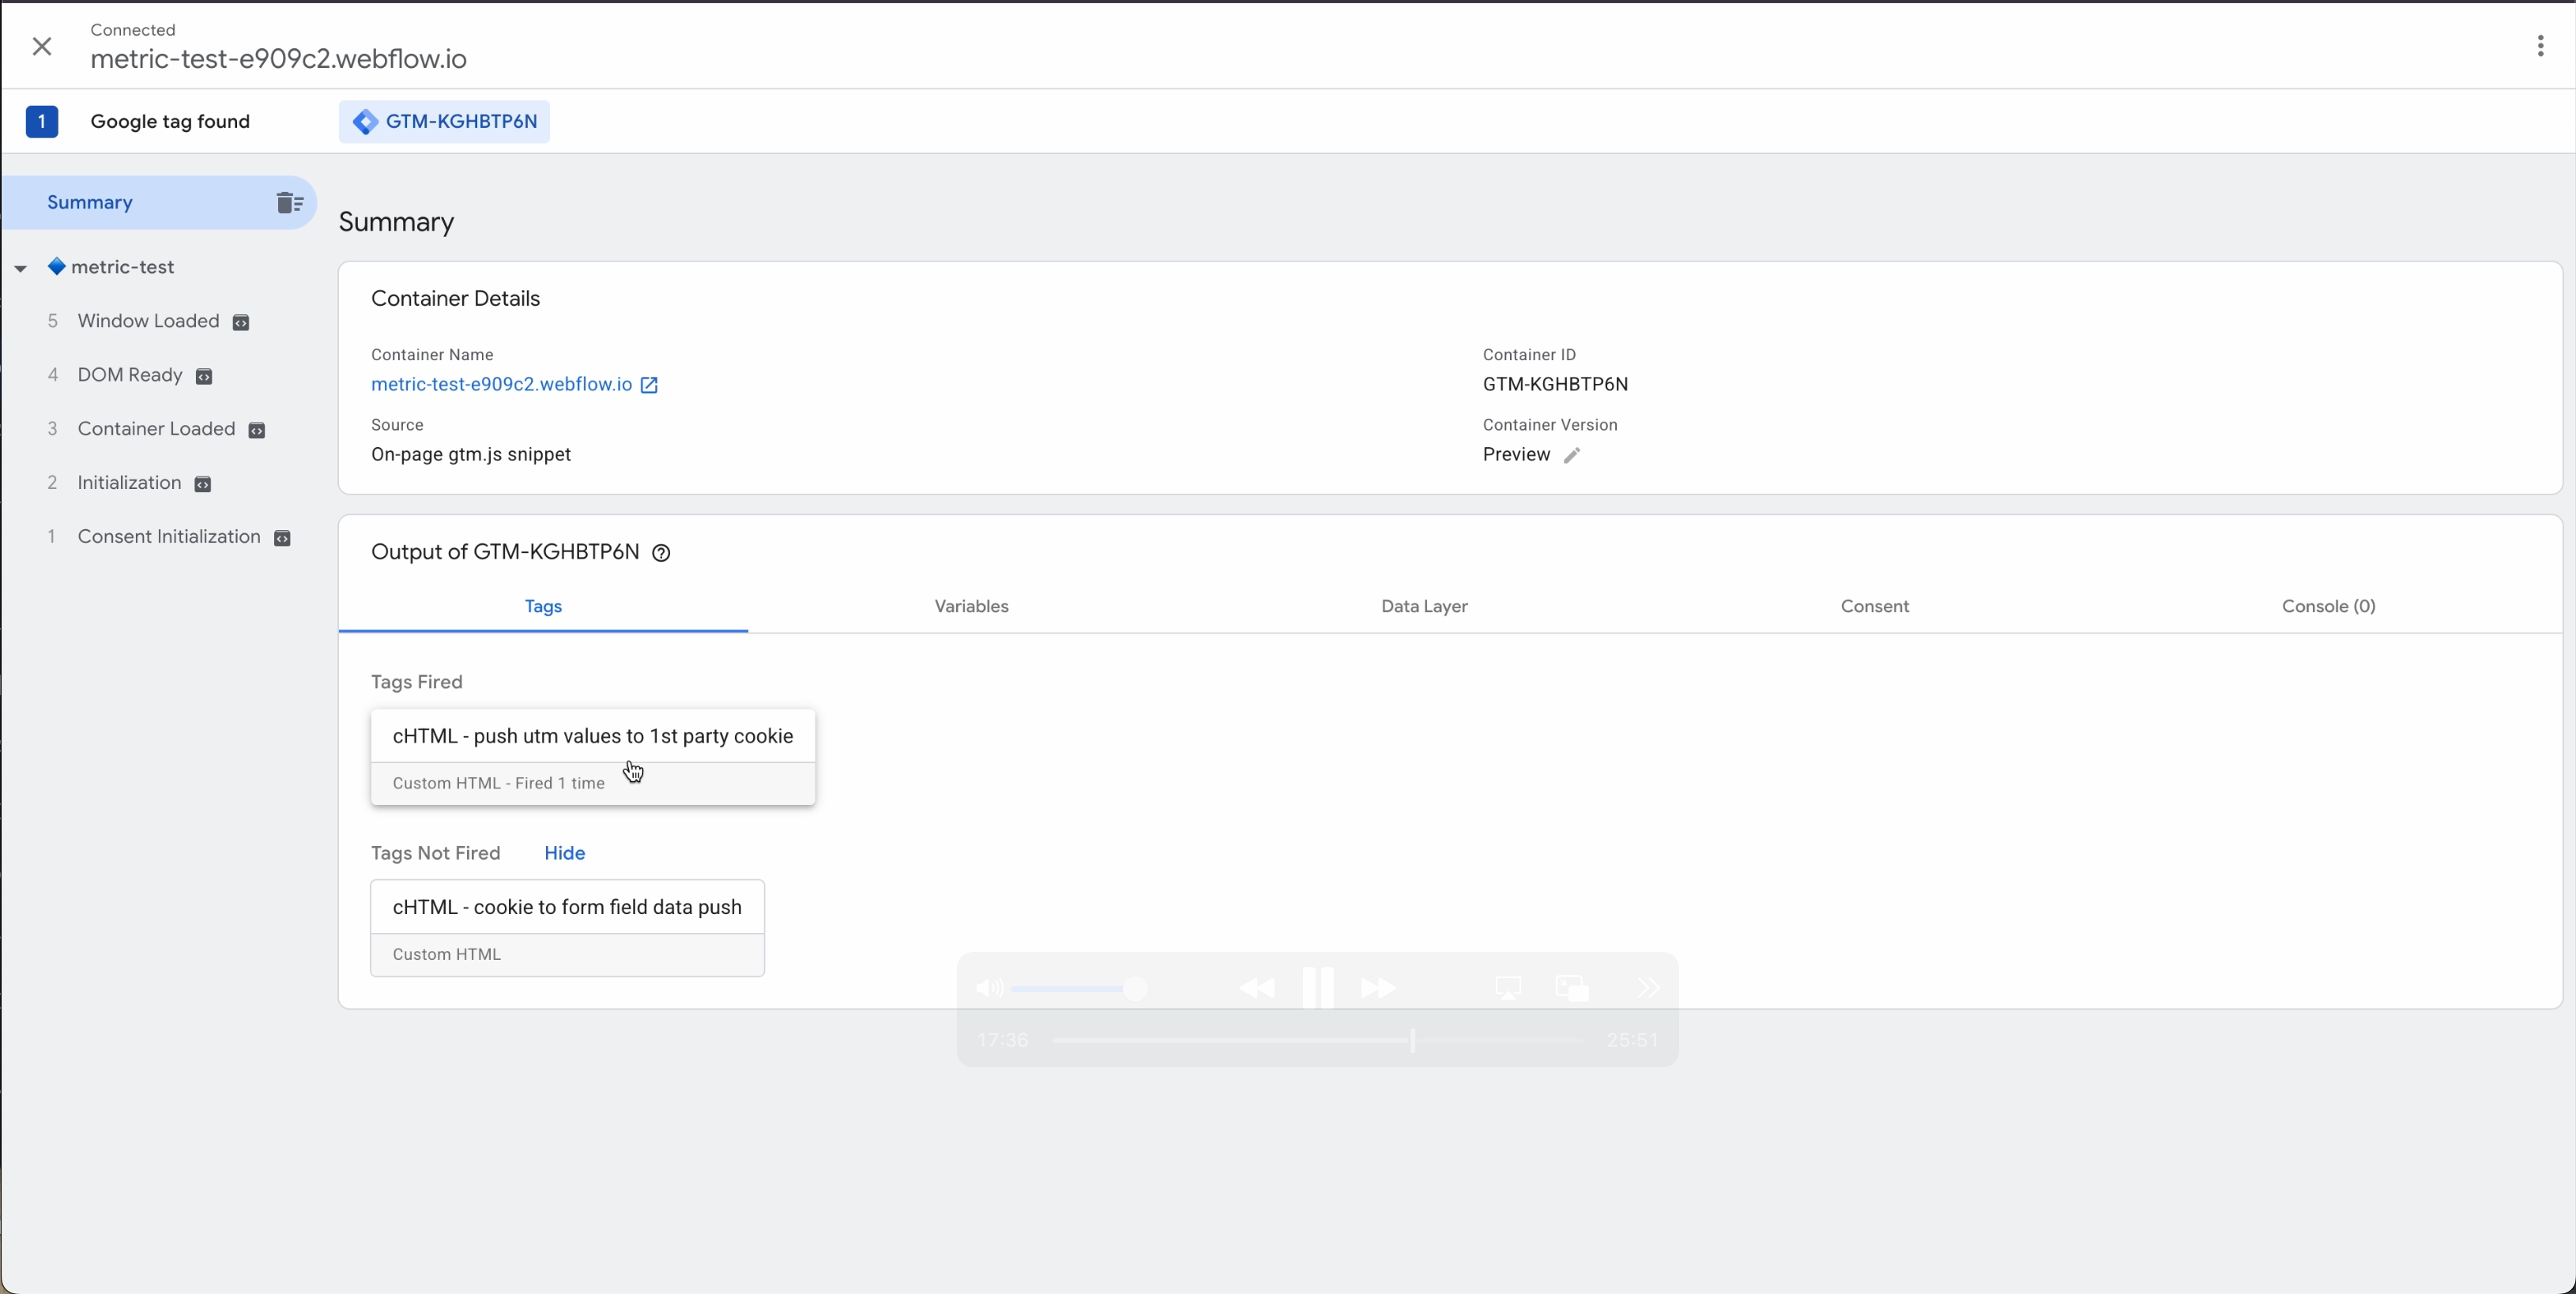
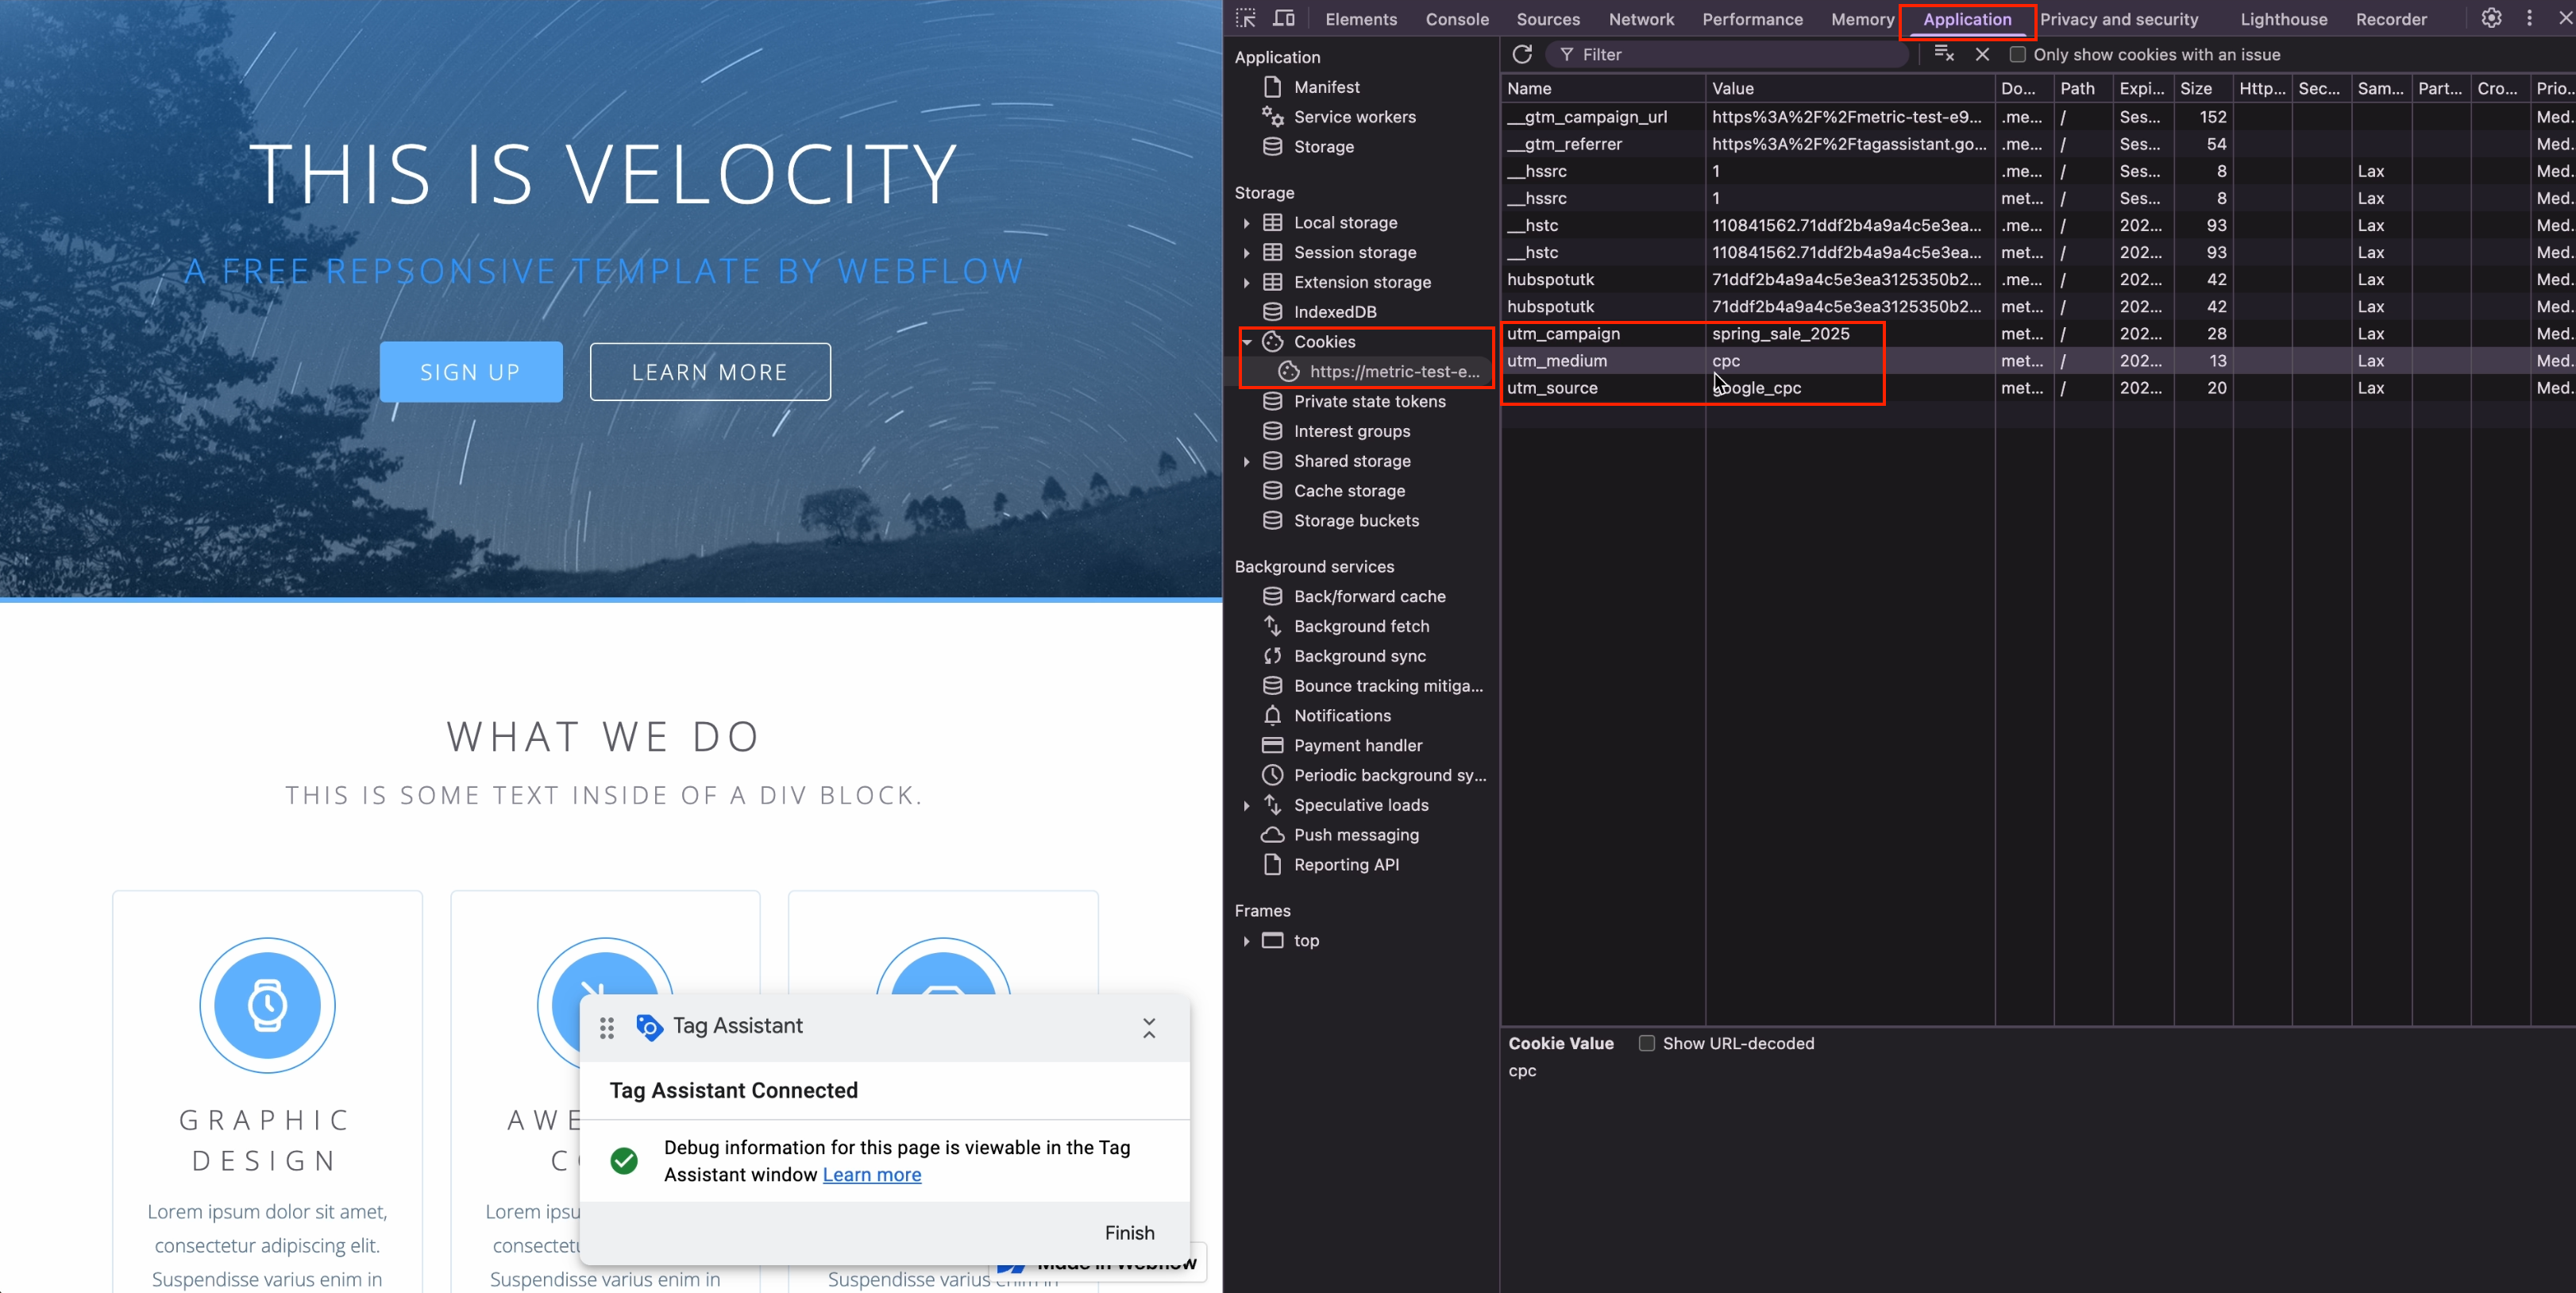
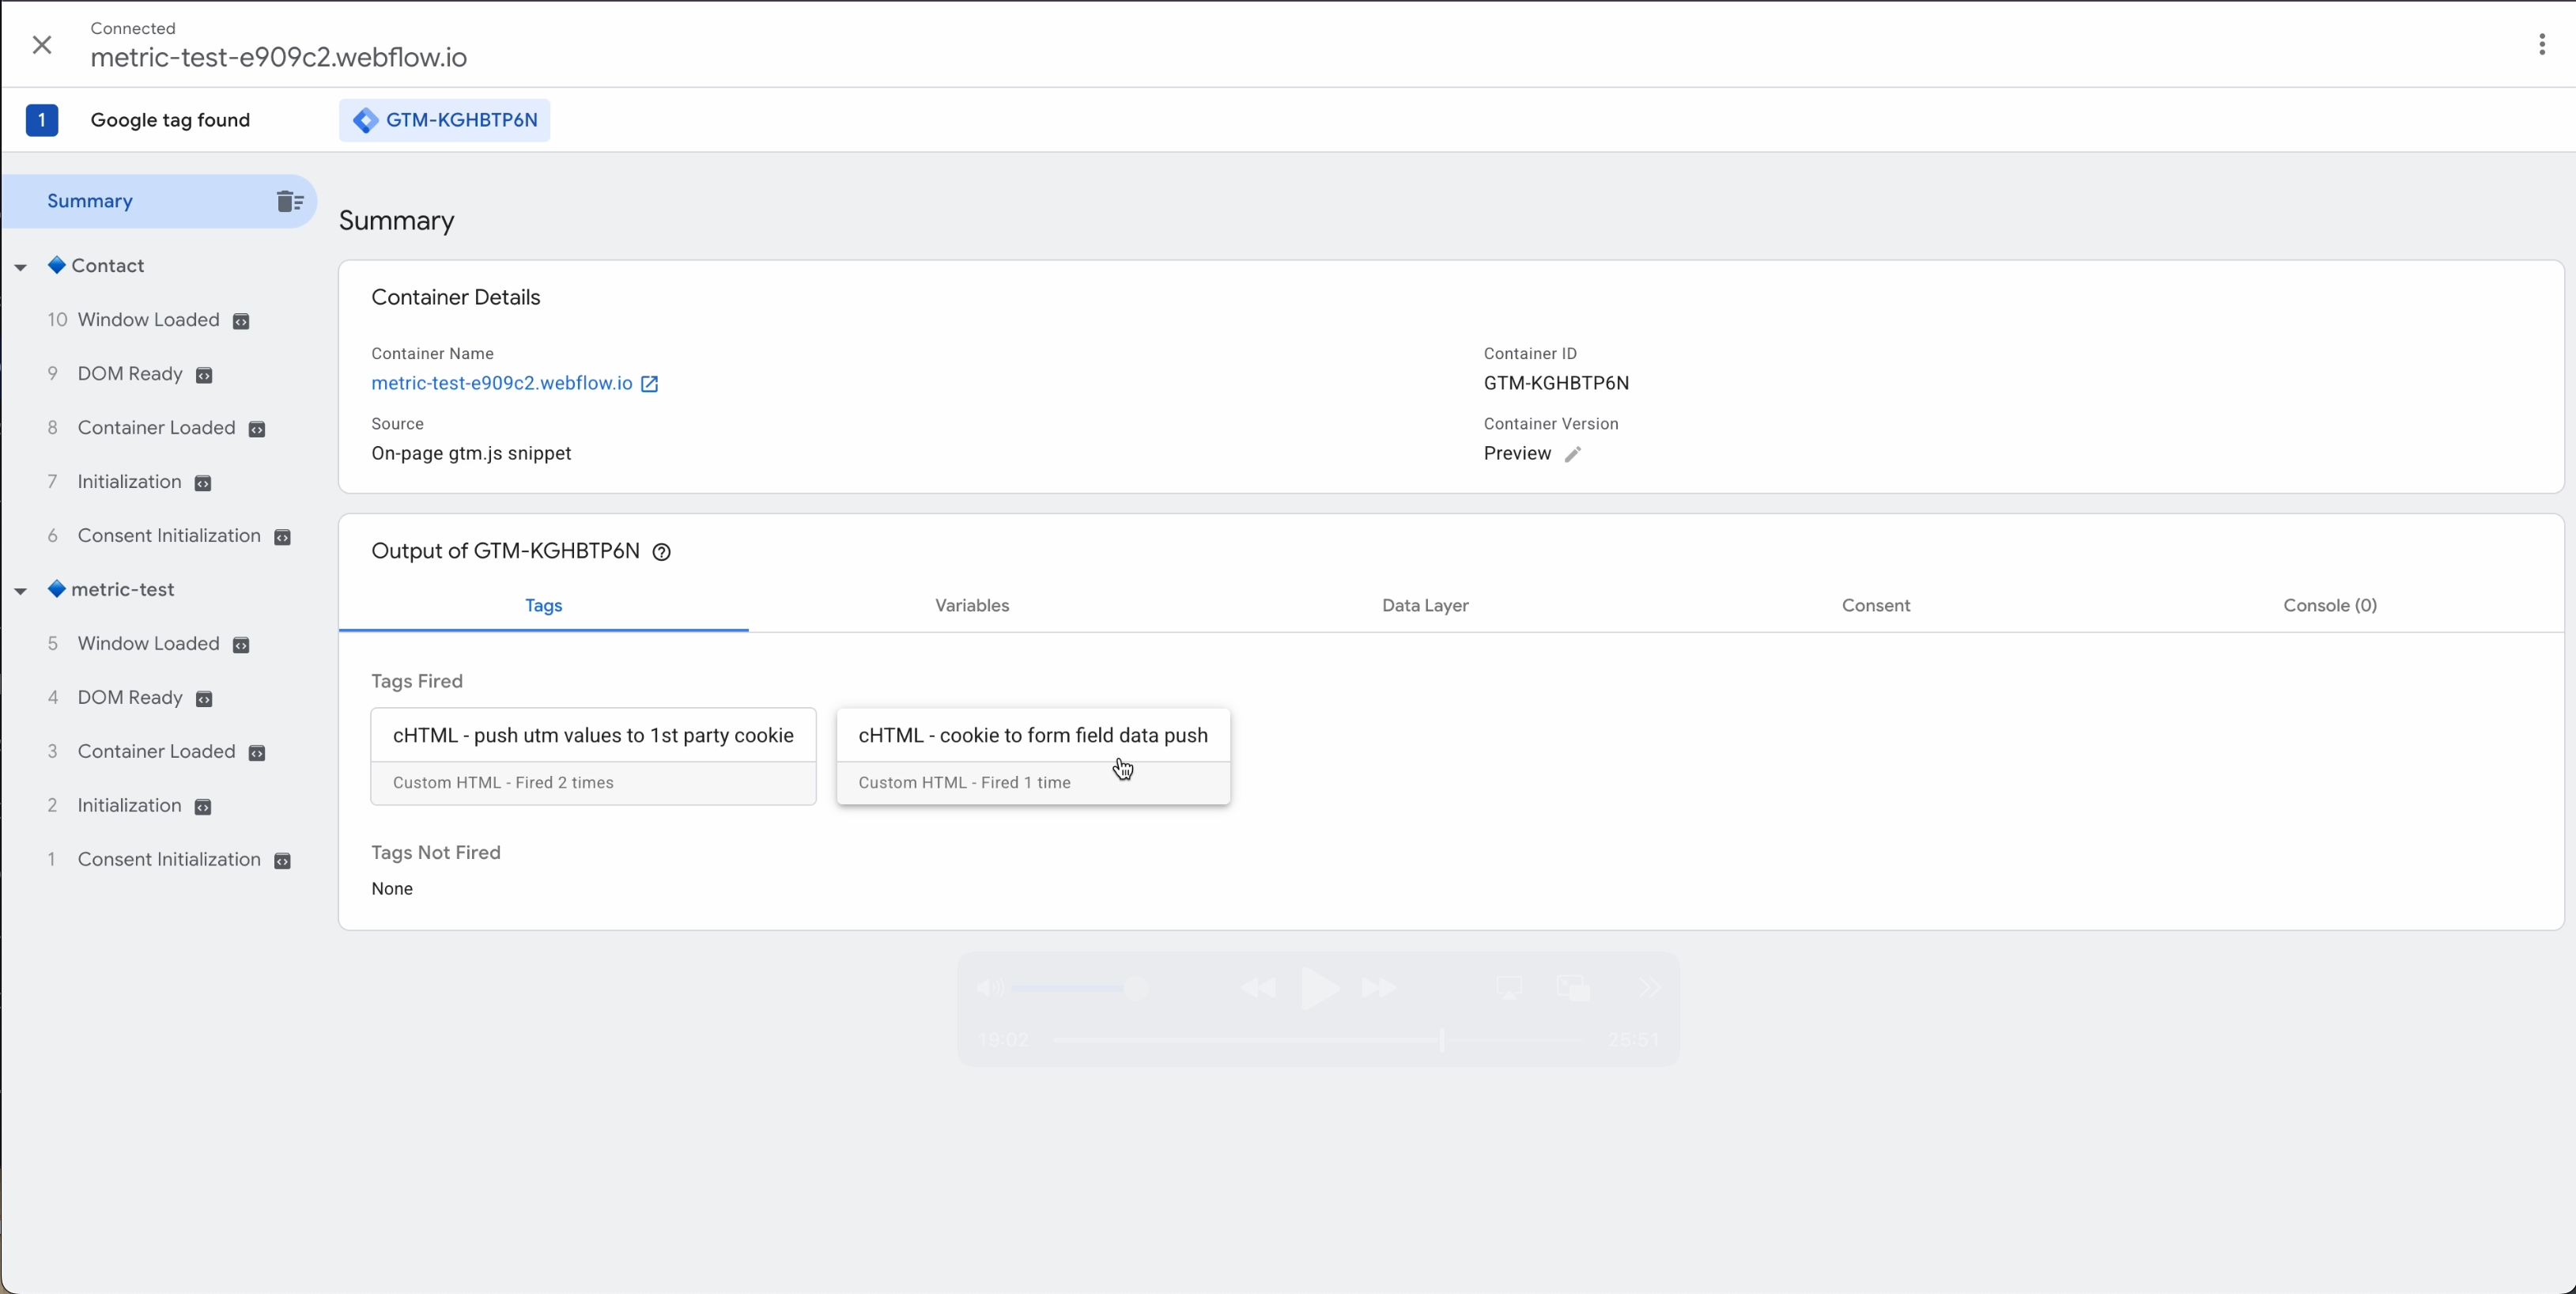
Ensure the tag that creates the cookie has fired in the preview dashboard and cookie is storing data in the browser. Use chrome dev tools and navigate to Application -> cookies and make sure you see the values being populated
Navigate to the contact page and ensure values are being filled in contact form.
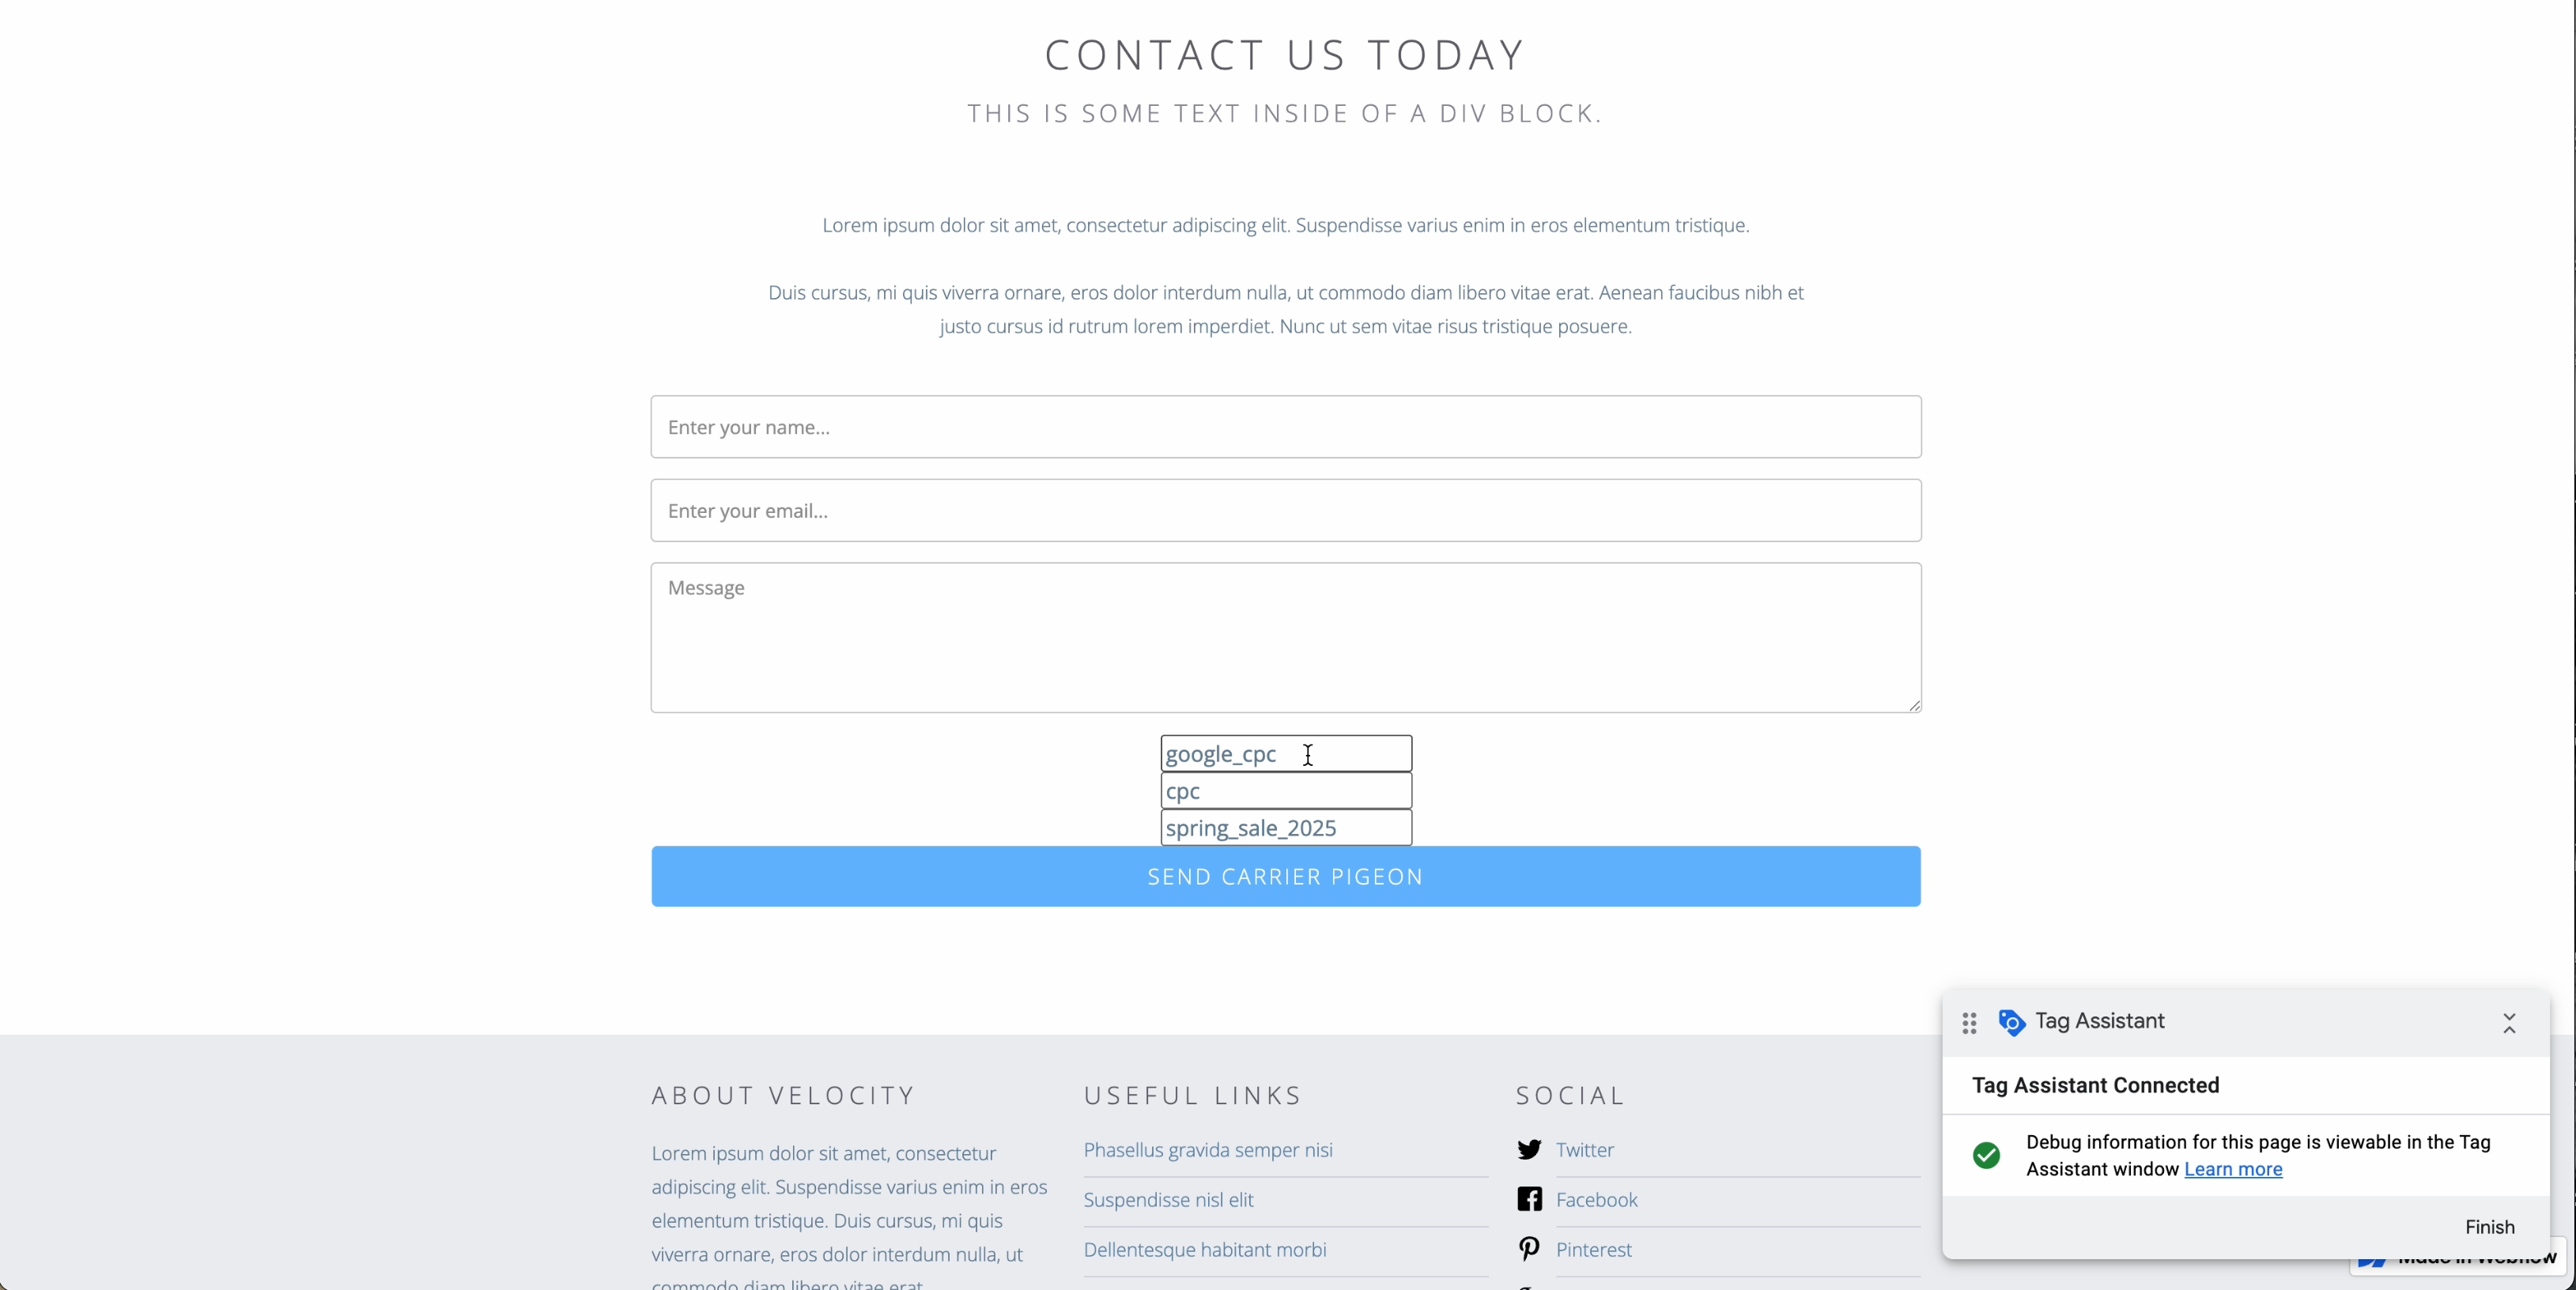
Ensure 2nd tag is fired.
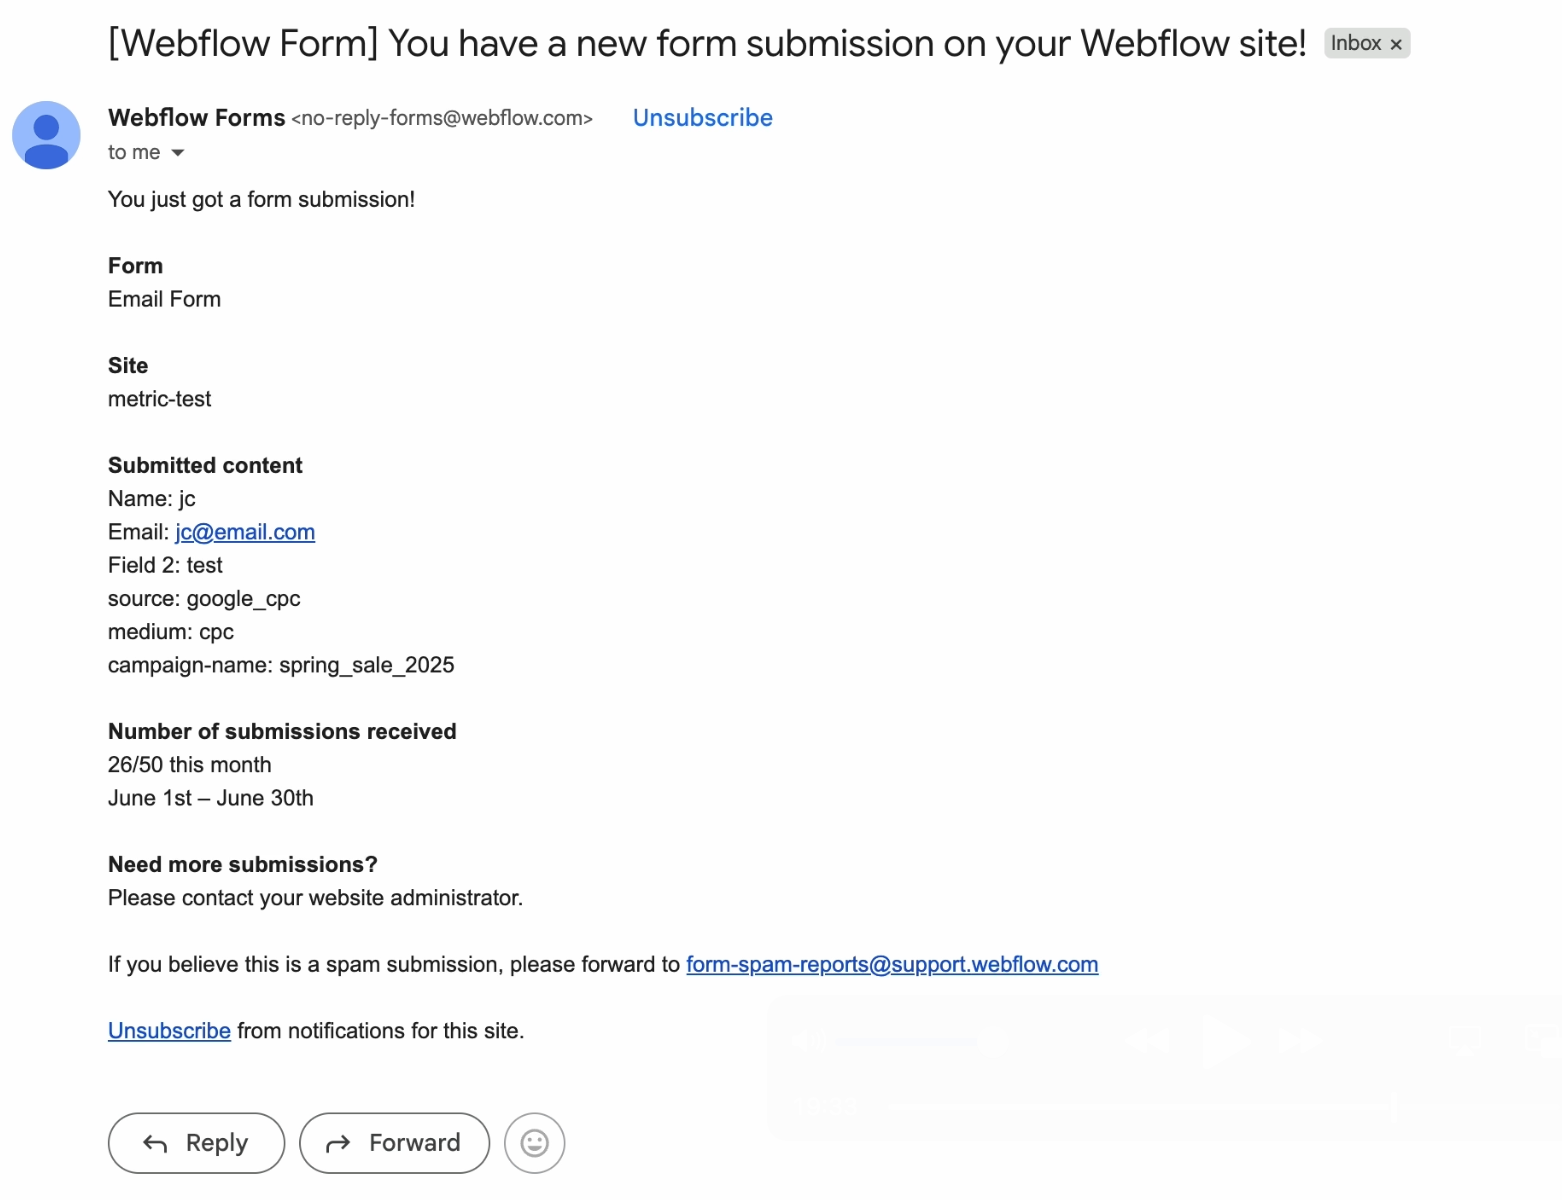
Submit the form and check to see if your email notification contains the values.
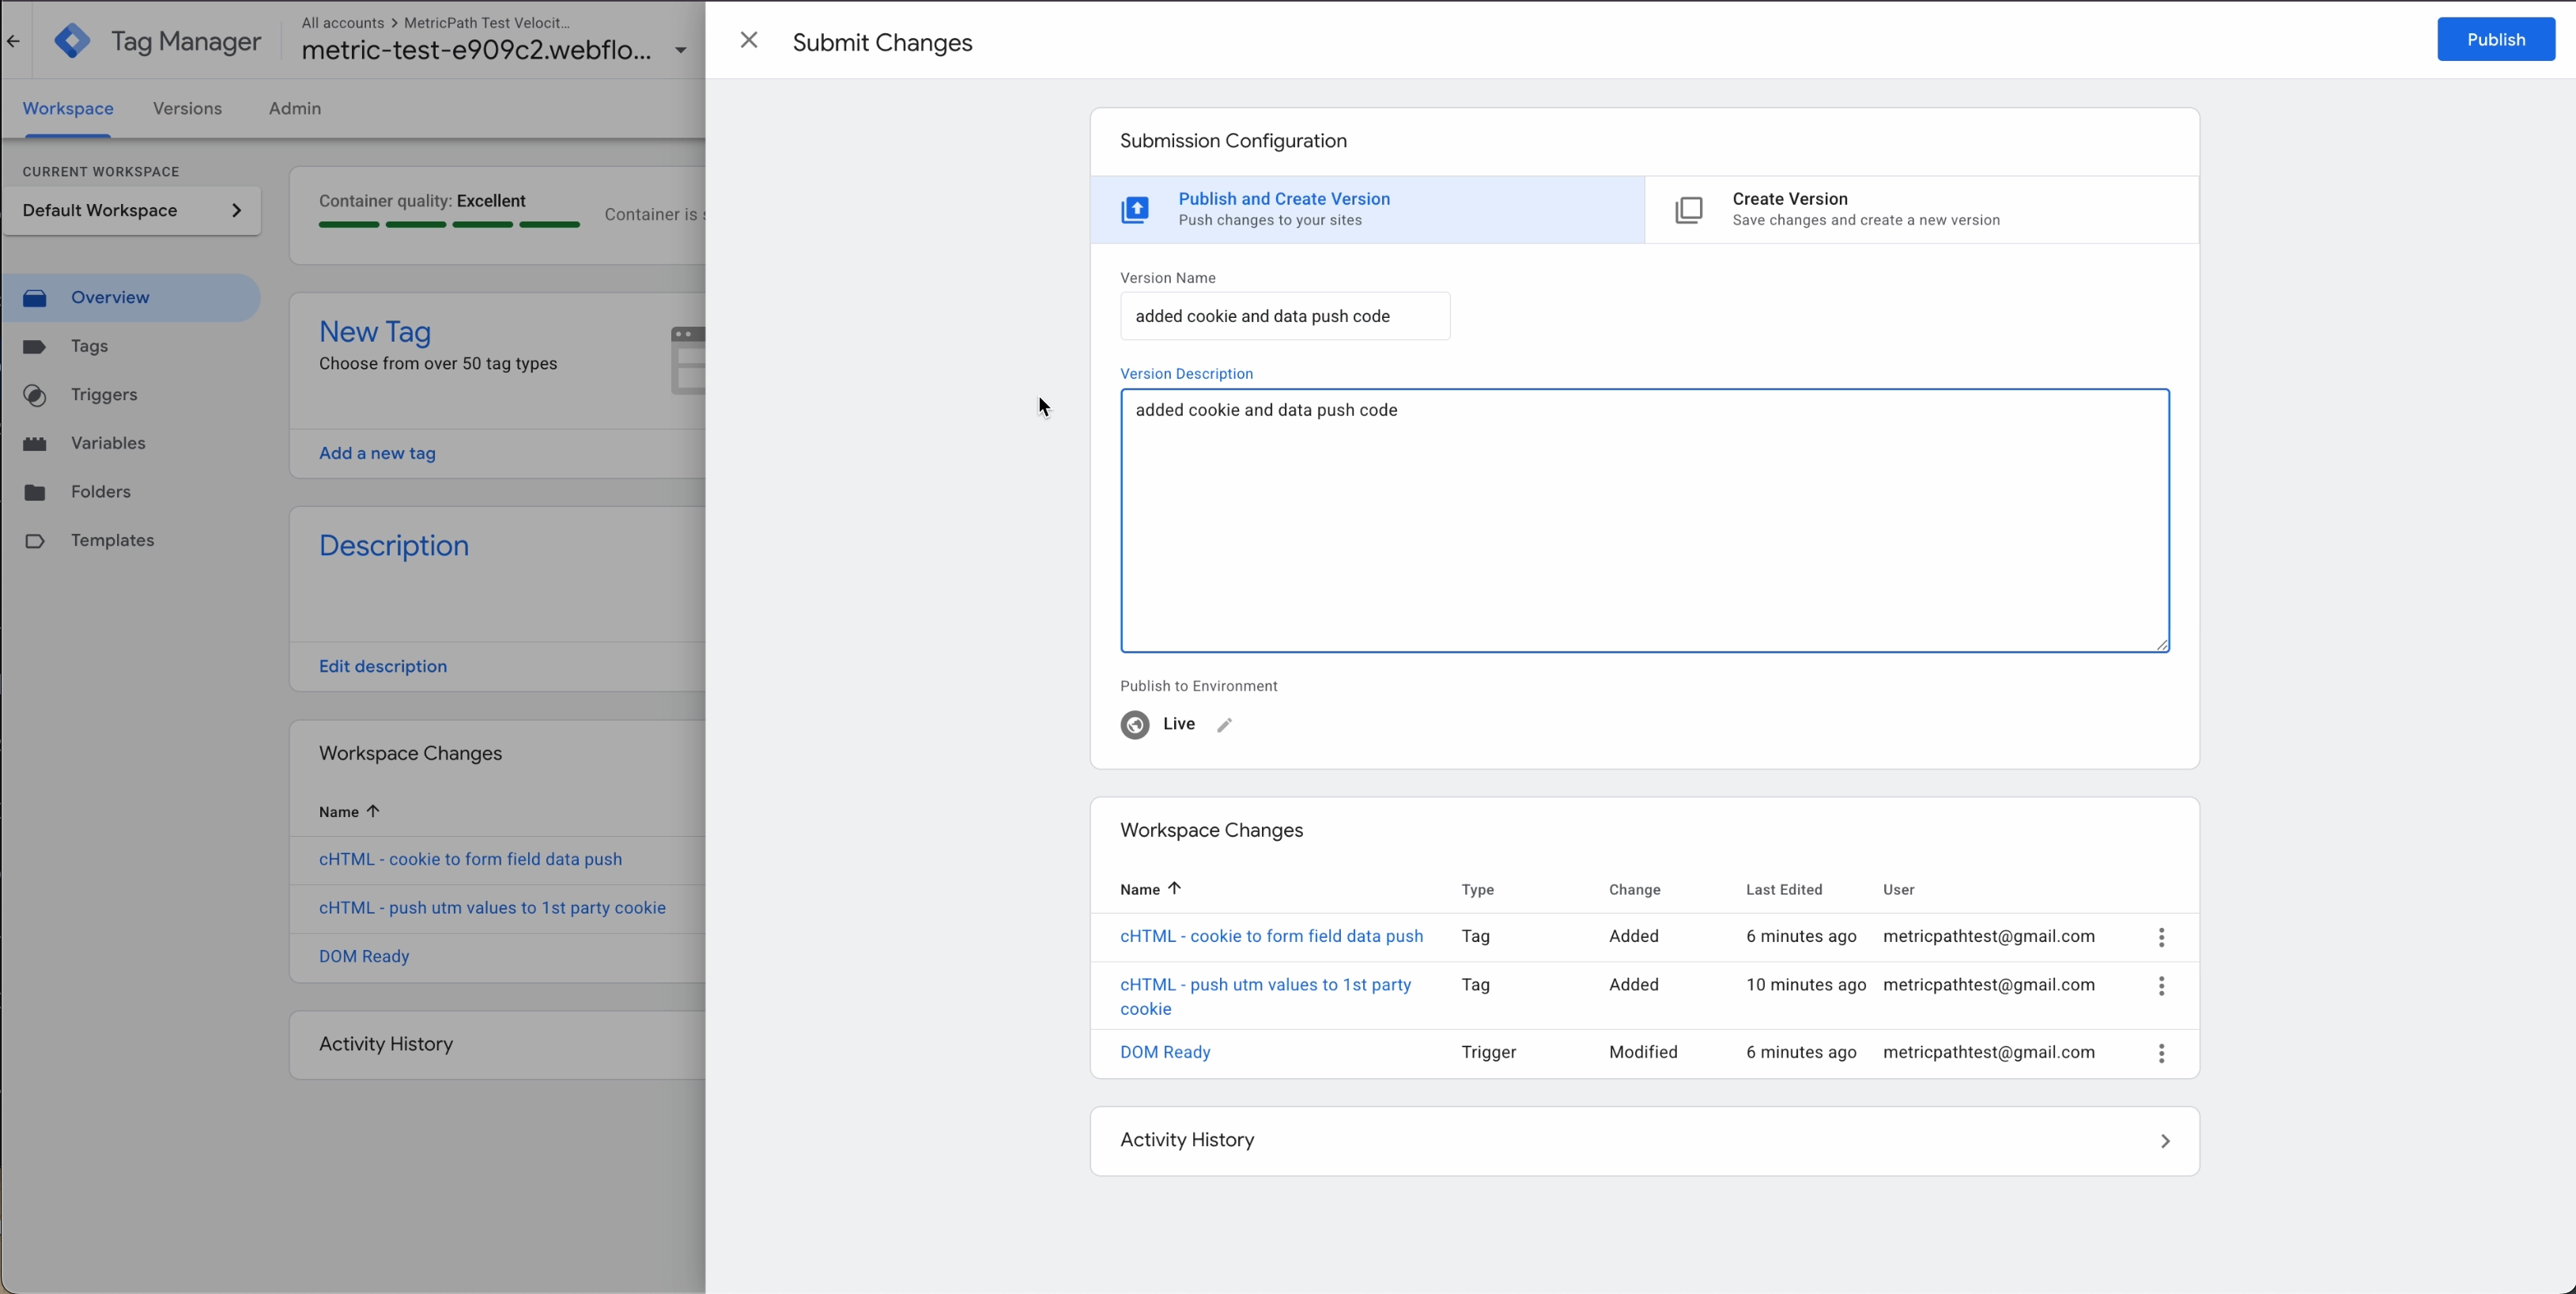
Exit preview mode and publish your changes in Google Tag Manager.
Navigate back into Webflow and hide the fields by adding in the input.
type="hidden"
Save and publish your changes and test one last time.
Ultimately, effective Marketing ROI measurement is critical for strategic growth. By meticulously aligning marketing efforts with clear objectives and implementing precise technical tracking, businesses can move beyond guesswork to data-driven decisions. This empowers marketers to prove their value, optimize investments, and ensure every dollar spent contributes meaningfully to the bottom line, driving true business success.